Language:
العربية
Português do Brasil
繁體中文
English
Français
Deutsch
Ελληνικά
Italiano
日本語
한글
Español (México)
Nederlands
Português
Русский
Español
Svenska
Türkçe
English US
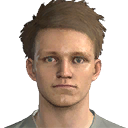
Player Name:
M. ØDEGAARD
Squad Number:
10
Team Name:
SC HEERENVEEN
League:
Eredivisie
Nationality:
NORWAY
Region:
Europe
Height:
176
Weight:
68
Age:
19
Foot:
Left foot
Condition:
C
Position:
AMF
LWF
SS
CF
RWF
LMF
DMF
CMF
AMF
RMF
LB
CB
RB
Attacking Prowess:
73
Ball Control:
86
Dribbling:
87
Low Pass:
76
Lofted Pass:
72
Finishing:
70
Place Kicking:
74
Swerve:
76
Header:
60
Defensive Prowess:
54
Ball Winning:
50
Kicking Power:
74
Speed:
72
Explosive Power:
77
Body Control:
91
Physical Contact:
61
Jump:
52
Stamina:
75
Goalkeeping:
40
Catching:
40
Clearing:
40
Reflexes:
40
Coverage:
40
Form:
5
Injury Resistance:
2
Weak Foot Usage:
1
Weak Foot Accuracy:
2
Overall Rating:
77
Rating as
GK
CB
LB
RB
DMF
CMF
LMF
RMF
AMF
LWF
RWF
SS
CF
:
Playing Style
Creative Playmaker
Player Skills
Scissors Feint
Flip Flap
Marseille Turn
Sombrero
Long Range Drive
Heel Trick
Weighted Pass
Pinpoint Crossing
Rabona
COM Playing Styles
Trickster
Incisive Run
Share this player
Permalink:
Forum code:
Facebook:
Twitter:
Tweet
Use the following Scout Combinations to sign this player
Show only free Scouts
(Hide Club and Nationality Scouts)
Show only 100% Combinations
Show all combinations
5*
SC HEERENVEEN
NORWAY
Marseille Turn
100%
4*
SC HEERENVEEN
NORWAY
Marseille Turn
100%
3*
SC HEERENVEEN
NORWAY
Marseille Turn
100%
5*
Dutch League
NORWAY
Marseille Turn
100%
4*
Dutch League
NORWAY
Marseille Turn
100%
3*
Dutch League
NORWAY
Marseille Turn
100%
5*
SC HEERENVEEN
Europe
Marseille Turn
100%
4*
SC HEERENVEEN
Europe
Marseille Turn
100%
3*
SC HEERENVEEN
Europe
Marseille Turn
100%
5*
NORWAY
AMF
Marseille Turn
100%
4*
NORWAY
AMF
Marseille Turn
100%
3*
NORWAY
AMF
Marseille Turn
100%
5*
SC HEERENVEEN
AMF
Marseille Turn
100%
4*
SC HEERENVEEN
AMF
Marseille Turn
100%
3*
SC HEERENVEEN
AMF
Marseille Turn
100%
5*
Dutch League
AMF
Marseille Turn
100%
4*
Dutch League
AMF
Marseille Turn
100%
3*
Dutch League
AMF
Marseille Turn
100%
5*
SC HEERENVEEN
U-24
Marseille Turn
100%
4*
SC HEERENVEEN
U-24
Marseille Turn
100%
3*
SC HEERENVEEN
U-24
Marseille Turn
100%
5*
NORWAY
Long-pass (Build Up)
Marseille Turn
100%
4*
NORWAY
Long-pass (Build Up)
Marseille Turn
100%
3*
NORWAY
Long-pass (Build Up)
Marseille Turn
100%
5*
NORWAY
Counter Attack (Attacking Styles)
Marseille Turn
100%
4*
NORWAY
Counter Attack (Attacking Styles)
Marseille Turn
100%
3*
NORWAY
Counter Attack (Attacking Styles)
Marseille Turn
100%
5*
NORWAY
Ball Control
Marseille Turn
100%
4*
NORWAY
Ball Control
Marseille Turn
100%
3*
NORWAY
Ball Control
Marseille Turn
100%
5*
SC HEERENVEEN
Ball Control
Marseille Turn
100%
4*
SC HEERENVEEN
Ball Control
Marseille Turn
100%
3*
SC HEERENVEEN
Ball Control
Marseille Turn
100%
5*
NORWAY
Left foot
Marseille Turn
100%
4*
NORWAY
Left foot
Marseille Turn
100%
3*
NORWAY
Left foot
Marseille Turn
100%
5*
SC HEERENVEEN
Left foot
Marseille Turn
100%
4*
SC HEERENVEEN
Left foot
Marseille Turn
100%
3*
SC HEERENVEEN
Left foot
Marseille Turn
100%
5*
SC HEERENVEEN
NORWAY
Creative Playmaker
100%
4*
SC HEERENVEEN
NORWAY
Creative Playmaker
100%
3*
SC HEERENVEEN
NORWAY
Creative Playmaker
100%
5*
Dutch League
NORWAY
Creative Playmaker
100%
4*
Dutch League
NORWAY
Creative Playmaker
100%
3*
Dutch League
NORWAY
Creative Playmaker
100%
5*
NORWAY
Creative Playmaker
-
100%
4*
NORWAY
Creative Playmaker
-
100%
3*
NORWAY
Creative Playmaker
-
100%
5*
SC HEERENVEEN
Creative Playmaker
-
100%
4*
SC HEERENVEEN
Creative Playmaker
-
100%
3*
SC HEERENVEEN
Creative Playmaker
-
100%
5*
NORWAY
Maintain Formation (Positioning)
Creative Playmaker
100%
4*
NORWAY
Maintain Formation (Positioning)
Creative Playmaker
100%
3*
NORWAY
Maintain Formation (Positioning)
Creative Playmaker
100%
5*
SC HEERENVEEN
Maintain Formation (Positioning)
Creative Playmaker
100%
4*
SC HEERENVEEN
Maintain Formation (Positioning)
Creative Playmaker
100%
3*
SC HEERENVEEN
Maintain Formation (Positioning)
Creative Playmaker
100%
3*
Dutch League
Maintain Formation (Positioning)
Creative Playmaker
100%
5*
SC HEERENVEEN
Europe
Creative Playmaker
100%
4*
SC HEERENVEEN
Europe
Creative Playmaker
100%
3*
SC HEERENVEEN
Europe
Creative Playmaker
100%
3*
Dutch League
Europe
Creative Playmaker
100%
3*
Dutch League
Creative Playmaker
-
100%
5*
NORWAY
Centre (Attacking Area)
Creative Playmaker
100%
4*
NORWAY
Centre (Attacking Area)
Creative Playmaker
100%
3*
NORWAY
Centre (Attacking Area)
Creative Playmaker
100%
5*
SC HEERENVEEN
Centre (Attacking Area)
Creative Playmaker
100%
4*
SC HEERENVEEN
Centre (Attacking Area)
Creative Playmaker
100%
3*
SC HEERENVEEN
Centre (Attacking Area)
Creative Playmaker
100%
3*
Dutch League
Centre (Attacking Area)
Creative Playmaker
100%
5*
NORWAY
AMF
Creative Playmaker
100%
4*
NORWAY
AMF
Creative Playmaker
100%
3*
NORWAY
AMF
Creative Playmaker
100%
5*
SC HEERENVEEN
AMF
Creative Playmaker
100%
4*
SC HEERENVEEN
AMF
Creative Playmaker
100%
3*
SC HEERENVEEN
AMF
Creative Playmaker
100%
3*
Dutch League
AMF
Creative Playmaker
100%
5*
NORWAY
U-24
Creative Playmaker
100%
4*
NORWAY
U-24
Creative Playmaker
100%
3*
NORWAY
U-24
Creative Playmaker
100%
5*
SC HEERENVEEN
U-24
Creative Playmaker
100%
4*
SC HEERENVEEN
U-24
Creative Playmaker
100%
3*
SC HEERENVEEN
U-24
Creative Playmaker
100%
3*
Dutch League
U-24
Creative Playmaker
100%
5*
NORWAY
Aggressive (Pressuring)
Creative Playmaker
100%
4*
NORWAY
Aggressive (Pressuring)
Creative Playmaker
100%
3*
NORWAY
Aggressive (Pressuring)
Creative Playmaker
100%
5*
SC HEERENVEEN
Aggressive (Pressuring)
Creative Playmaker
100%
4*
SC HEERENVEEN
Aggressive (Pressuring)
Creative Playmaker
100%
3*
SC HEERENVEEN
Aggressive (Pressuring)
Creative Playmaker
100%
3*
Dutch League
Aggressive (Pressuring)
Creative Playmaker
100%
5*
NORWAY
Long-pass (Build Up)
Creative Playmaker
100%
4*
NORWAY
Long-pass (Build Up)
Creative Playmaker
100%
3*
NORWAY
Long-pass (Build Up)
Creative Playmaker
100%
5*
SC HEERENVEEN
Long-pass (Build Up)
Creative Playmaker
100%
4*
SC HEERENVEEN
Long-pass (Build Up)
Creative Playmaker
100%
3*
SC HEERENVEEN
Long-pass (Build Up)
Creative Playmaker
100%
5*
Dutch League
Long-pass (Build Up)
Creative Playmaker
100%
4*
Dutch League
Long-pass (Build Up)
Creative Playmaker
100%
3*
Dutch League
Long-pass (Build Up)
Creative Playmaker
100%
5*
NORWAY
Utility Players
Creative Playmaker
100%
4*
NORWAY
Utility Players
Creative Playmaker
100%
3*
NORWAY
Utility Players
Creative Playmaker
100%
5*
SC HEERENVEEN
Utility Players
Creative Playmaker
100%
4*
SC HEERENVEEN
Utility Players
Creative Playmaker
100%
3*
SC HEERENVEEN
Utility Players
Creative Playmaker
100%
3*
Dutch League
Utility Players
Creative Playmaker
100%
5*
NORWAY
Wide (Containment Area)
Creative Playmaker
100%
4*
NORWAY
Wide (Containment Area)
Creative Playmaker
100%
3*
NORWAY
Wide (Containment Area)
Creative Playmaker
100%
5*
SC HEERENVEEN
Wide (Containment Area)
Creative Playmaker
100%
4*
SC HEERENVEEN
Wide (Containment Area)
Creative Playmaker
100%
3*
SC HEERENVEEN
Wide (Containment Area)
Creative Playmaker
100%
3*
Dutch League
Wide (Containment Area)
Creative Playmaker
100%
5*
NORWAY
Counter Attack (Attacking Styles)
Creative Playmaker
100%
4*
NORWAY
Counter Attack (Attacking Styles)
Creative Playmaker
100%
3*
NORWAY
Counter Attack (Attacking Styles)
Creative Playmaker
100%
5*
SC HEERENVEEN
Counter Attack (Attacking Styles)
Creative Playmaker
100%
4*
SC HEERENVEEN
Counter Attack (Attacking Styles)
Creative Playmaker
100%
3*
SC HEERENVEEN
Counter Attack (Attacking Styles)
Creative Playmaker
100%
3*
Dutch League
Counter Attack (Attacking Styles)
Creative Playmaker
100%
5*
NORWAY
Ball Control
Creative Playmaker
100%
4*
NORWAY
Ball Control
Creative Playmaker
100%
3*
NORWAY
Ball Control
Creative Playmaker
100%
5*
SC HEERENVEEN
Ball Control
Creative Playmaker
100%
4*
SC HEERENVEEN
Ball Control
Creative Playmaker
100%
3*
SC HEERENVEEN
Ball Control
Creative Playmaker
100%
3*
Dutch League
Ball Control
Creative Playmaker
100%
5*
NORWAY
Left foot
Creative Playmaker
100%
4*
NORWAY
Left foot
Creative Playmaker
100%
3*
NORWAY
Left foot
Creative Playmaker
100%
5*
SC HEERENVEEN
Left foot
Creative Playmaker
100%
4*
SC HEERENVEEN
Left foot
Creative Playmaker
100%
3*
SC HEERENVEEN
Left foot
Creative Playmaker
100%
3*
Dutch League
Left foot
Creative Playmaker
100%
5*
NORWAY
Dribbling
Creative Playmaker
100%
4*
NORWAY
Dribbling
Creative Playmaker
100%
3*
NORWAY
Dribbling
Creative Playmaker
100%
5*
SC HEERENVEEN
Dribbling
Creative Playmaker
100%
4*
SC HEERENVEEN
Dribbling
Creative Playmaker
100%
3*
SC HEERENVEEN
Dribbling
Creative Playmaker
100%
3*
Dutch League
Dribbling
Creative Playmaker
100%
5*
NORWAY
Frontline Pressure (Defensive Styles)
Creative Playmaker
100%
4*
NORWAY
Frontline Pressure (Defensive Styles)
Creative Playmaker
100%
3*
NORWAY
Frontline Pressure (Defensive Styles)
Creative Playmaker
100%
5*
SC HEERENVEEN
Frontline Pressure (Defensive Styles)
Creative Playmaker
100%
4*
SC HEERENVEEN
Frontline Pressure (Defensive Styles)
Creative Playmaker
100%
3*
SC HEERENVEEN
Frontline Pressure (Defensive Styles)
Creative Playmaker
100%
3*
Dutch League
Frontline Pressure (Defensive Styles)
Creative Playmaker
100%
5*
NORWAY
Strength On the Ball
Creative Playmaker
100%
4*
NORWAY
Strength On the Ball
Creative Playmaker
100%
3*
NORWAY
Strength On the Ball
Creative Playmaker
100%
5*
SC HEERENVEEN
Strength On the Ball
Creative Playmaker
100%
4*
SC HEERENVEEN
Strength On the Ball
Creative Playmaker
100%
3*
SC HEERENVEEN
Strength On the Ball
Creative Playmaker
100%
5*
Dutch League
Strength On the Ball
Creative Playmaker
100%
4*
Dutch League
Strength On the Ball
Creative Playmaker
100%
3*
Dutch League
Strength On the Ball
Creative Playmaker
100%
5*
SC HEERENVEEN
NORWAY
Flip Flap
100%
4*
SC HEERENVEEN
NORWAY
Flip Flap
100%
3*
SC HEERENVEEN
NORWAY
Flip Flap
100%
5*
SC HEERENVEEN
Flip Flap
-
100%
4*
SC HEERENVEEN
Flip Flap
-
100%
3*
SC HEERENVEEN
Flip Flap
-
100%
5*
SC HEERENVEEN
Maintain Formation (Positioning)
Flip Flap
100%
4*
SC HEERENVEEN
Maintain Formation (Positioning)
Flip Flap
100%
3*
SC HEERENVEEN
Maintain Formation (Positioning)
Flip Flap
100%
5*
SC HEERENVEEN
Europe
Flip Flap
100%
4*
SC HEERENVEEN
Europe
Flip Flap
100%
3*
SC HEERENVEEN
Europe
Flip Flap
100%
5*
SC HEERENVEEN
Centre (Attacking Area)
Flip Flap
100%
4*
SC HEERENVEEN
Centre (Attacking Area)
Flip Flap
100%
3*
SC HEERENVEEN
Centre (Attacking Area)
Flip Flap
100%
5*
NORWAY
AMF
Flip Flap
100%
4*
NORWAY
AMF
Flip Flap
100%
3*
NORWAY
AMF
Flip Flap
100%
5*
SC HEERENVEEN
AMF
Flip Flap
100%
4*
SC HEERENVEEN
AMF
Flip Flap
100%
3*
SC HEERENVEEN
AMF
Flip Flap
100%
3*
Dutch League
AMF
Flip Flap
100%
5*
SC HEERENVEEN
U-24
Flip Flap
100%
4*
SC HEERENVEEN
U-24
Flip Flap
100%
3*
SC HEERENVEEN
U-24
Flip Flap
100%
5*
SC HEERENVEEN
Aggressive (Pressuring)
Flip Flap
100%
4*
SC HEERENVEEN
Aggressive (Pressuring)
Flip Flap
100%
3*
SC HEERENVEEN
Aggressive (Pressuring)
Flip Flap
100%
5*
NORWAY
Long-pass (Build Up)
Flip Flap
100%
4*
NORWAY
Long-pass (Build Up)
Flip Flap
100%
3*
NORWAY
Long-pass (Build Up)
Flip Flap
100%
5*
SC HEERENVEEN
Long-pass (Build Up)
Flip Flap
100%
4*
SC HEERENVEEN
Long-pass (Build Up)
Flip Flap
100%
3*
SC HEERENVEEN
Long-pass (Build Up)
Flip Flap
100%
5*
Dutch League
Long-pass (Build Up)
Flip Flap
100%
4*
Dutch League
Long-pass (Build Up)
Flip Flap
100%
3*
Dutch League
Long-pass (Build Up)
Flip Flap
100%
5*
SC HEERENVEEN
Utility Players
Flip Flap
100%
4*
SC HEERENVEEN
Utility Players
Flip Flap
100%
3*
SC HEERENVEEN
Utility Players
Flip Flap
100%
5*
SC HEERENVEEN
Wide (Containment Area)
Flip Flap
100%
4*
SC HEERENVEEN
Wide (Containment Area)
Flip Flap
100%
3*
SC HEERENVEEN
Wide (Containment Area)
Flip Flap
100%
5*
NORWAY
Counter Attack (Attacking Styles)
Flip Flap
100%
4*
NORWAY
Counter Attack (Attacking Styles)
Flip Flap
100%
3*
NORWAY
Counter Attack (Attacking Styles)
Flip Flap
100%
5*
SC HEERENVEEN
Counter Attack (Attacking Styles)
Flip Flap
100%
4*
SC HEERENVEEN
Counter Attack (Attacking Styles)
Flip Flap
100%
3*
SC HEERENVEEN
Counter Attack (Attacking Styles)
Flip Flap
100%
5*
NORWAY
Ball Control
Flip Flap
100%
4*
NORWAY
Ball Control
Flip Flap
100%
3*
NORWAY
Ball Control
Flip Flap
100%
5*
SC HEERENVEEN
Ball Control
Flip Flap
100%
4*
SC HEERENVEEN
Ball Control
Flip Flap
100%
3*
SC HEERENVEEN
Ball Control
Flip Flap
100%
5*
NORWAY
Left foot
Flip Flap
100%
4*
NORWAY
Left foot
Flip Flap
100%
3*
NORWAY
Left foot
Flip Flap
100%
5*
SC HEERENVEEN
Left foot
Flip Flap
100%
4*
SC HEERENVEEN
Left foot
Flip Flap
100%
3*
SC HEERENVEEN
Left foot
Flip Flap
100%
5*
SC HEERENVEEN
Dribbling
Flip Flap
100%
4*
SC HEERENVEEN
Dribbling
Flip Flap
100%
3*
SC HEERENVEEN
Dribbling
Flip Flap
100%
5*
SC HEERENVEEN
Frontline Pressure (Defensive Styles)
Flip Flap
100%
4*
SC HEERENVEEN
Frontline Pressure (Defensive Styles)
Flip Flap
100%
3*
SC HEERENVEEN
Frontline Pressure (Defensive Styles)
Flip Flap
100%
5*
SC HEERENVEEN
Strength On the Ball
Flip Flap
100%
4*
SC HEERENVEEN
Strength On the Ball
Flip Flap
100%
3*
SC HEERENVEEN
Strength On the Ball
Flip Flap
100%
5*
SC HEERENVEEN
NORWAY
Heel Trick
100%
4*
SC HEERENVEEN
NORWAY
Heel Trick
100%
3*
SC HEERENVEEN
NORWAY
Heel Trick
100%
5*
SC HEERENVEEN
Europe
Heel Trick
100%
4*
SC HEERENVEEN
Europe
Heel Trick
100%
3*
SC HEERENVEEN
Europe
Heel Trick
100%
5*
NORWAY
AMF
Heel Trick
100%
4*
NORWAY
AMF
Heel Trick
100%
3*
NORWAY
AMF
Heel Trick
100%
5*
SC HEERENVEEN
U-24
Heel Trick
100%
4*
SC HEERENVEEN
U-24
Heel Trick
100%
3*
SC HEERENVEEN
U-24
Heel Trick
100%
5*
NORWAY
Long-pass (Build Up)
Heel Trick
100%
4*
NORWAY
Long-pass (Build Up)
Heel Trick
100%
3*
NORWAY
Long-pass (Build Up)
Heel Trick
100%
3*
Strength On the Ball
Long-pass (Build Up)
Heel Trick
100%
5*
NORWAY
Counter Attack (Attacking Styles)
Heel Trick
100%
4*
NORWAY
Counter Attack (Attacking Styles)
Heel Trick
100%
3*
NORWAY
Counter Attack (Attacking Styles)
Heel Trick
100%
5*
NORWAY
Ball Control
Heel Trick
100%
4*
NORWAY
Ball Control
Heel Trick
100%
3*
NORWAY
Ball Control
Heel Trick
100%
5*
SC HEERENVEEN
Ball Control
Heel Trick
100%
4*
SC HEERENVEEN
Ball Control
Heel Trick
100%
3*
SC HEERENVEEN
Ball Control
Heel Trick
100%
5*
NORWAY
Left foot
Heel Trick
100%
4*
NORWAY
Left foot
Heel Trick
100%
3*
NORWAY
Left foot
Heel Trick
100%
5*
NORWAY
Dribbling
Heel Trick
100%
4*
NORWAY
Dribbling
Heel Trick
100%
3*
NORWAY
Dribbling
Heel Trick
100%
5*
SC HEERENVEEN
Dribbling
Heel Trick
100%
4*
SC HEERENVEEN
Dribbling
Heel Trick
100%
3*
SC HEERENVEEN
Dribbling
Heel Trick
100%
5*
SC HEERENVEEN
Strength On the Ball
Heel Trick
100%
4*
SC HEERENVEEN
Strength On the Ball
Heel Trick
100%
3*
SC HEERENVEEN
Strength On the Ball
Heel Trick
100%
5*
SC HEERENVEEN
NORWAY
Scissors Feint
100%
4*
SC HEERENVEEN
NORWAY
Scissors Feint
100%
3*
SC HEERENVEEN
NORWAY
Scissors Feint
100%
5*
Dutch League
NORWAY
Scissors Feint
100%
4*
Dutch League
NORWAY
Scissors Feint
100%
3*
Dutch League
NORWAY
Scissors Feint
100%
5*
SC HEERENVEEN
Scissors Feint
-
100%
4*
SC HEERENVEEN
Scissors Feint
-
100%
3*
SC HEERENVEEN
Scissors Feint
-
100%
5*
SC HEERENVEEN
Maintain Formation (Positioning)
Scissors Feint
100%
4*
SC HEERENVEEN
Maintain Formation (Positioning)
Scissors Feint
100%
3*
SC HEERENVEEN
Maintain Formation (Positioning)
Scissors Feint
100%
5*
SC HEERENVEEN
Europe
Scissors Feint
100%
4*
SC HEERENVEEN
Europe
Scissors Feint
100%
3*
SC HEERENVEEN
Europe
Scissors Feint
100%
5*
SC HEERENVEEN
Centre (Attacking Area)
Scissors Feint
100%
4*
SC HEERENVEEN
Centre (Attacking Area)
Scissors Feint
100%
3*
SC HEERENVEEN
Centre (Attacking Area)
Scissors Feint
100%
5*
NORWAY
AMF
Scissors Feint
100%
4*
NORWAY
AMF
Scissors Feint
100%
3*
NORWAY
AMF
Scissors Feint
100%
5*
SC HEERENVEEN
AMF
Scissors Feint
100%
4*
SC HEERENVEEN
AMF
Scissors Feint
100%
3*
SC HEERENVEEN
AMF
Scissors Feint
100%
5*
Dutch League
AMF
Scissors Feint
100%
4*
Dutch League
AMF
Scissors Feint
100%
3*
Dutch League
AMF
Scissors Feint
100%
5*
SC HEERENVEEN
U-24
Scissors Feint
100%
4*
SC HEERENVEEN
U-24
Scissors Feint
100%
3*
SC HEERENVEEN
U-24
Scissors Feint
100%
5*
SC HEERENVEEN
Aggressive (Pressuring)
Scissors Feint
100%
4*
SC HEERENVEEN
Aggressive (Pressuring)
Scissors Feint
100%
3*
SC HEERENVEEN
Aggressive (Pressuring)
Scissors Feint
100%
5*
NORWAY
Long-pass (Build Up)
Scissors Feint
100%
4*
NORWAY
Long-pass (Build Up)
Scissors Feint
100%
3*
NORWAY
Long-pass (Build Up)
Scissors Feint
100%
5*
SC HEERENVEEN
Long-pass (Build Up)
Scissors Feint
100%
4*
SC HEERENVEEN
Long-pass (Build Up)
Scissors Feint
100%
3*
SC HEERENVEEN
Long-pass (Build Up)
Scissors Feint
100%
5*
Dutch League
Long-pass (Build Up)
Scissors Feint
100%
4*
Dutch League
Long-pass (Build Up)
Scissors Feint
100%
3*
Dutch League
Long-pass (Build Up)
Scissors Feint
100%
5*
SC HEERENVEEN
Utility Players
Scissors Feint
100%
4*
SC HEERENVEEN
Utility Players
Scissors Feint
100%
3*
SC HEERENVEEN
Utility Players
Scissors Feint
100%
5*
SC HEERENVEEN
Wide (Containment Area)
Scissors Feint
100%
4*
SC HEERENVEEN
Wide (Containment Area)
Scissors Feint
100%
3*
SC HEERENVEEN
Wide (Containment Area)
Scissors Feint
100%
5*
NORWAY
Counter Attack (Attacking Styles)
Scissors Feint
100%
4*
NORWAY
Counter Attack (Attacking Styles)
Scissors Feint
100%
3*
NORWAY
Counter Attack (Attacking Styles)
Scissors Feint
100%
5*
SC HEERENVEEN
Counter Attack (Attacking Styles)
Scissors Feint
100%
4*
SC HEERENVEEN
Counter Attack (Attacking Styles)
Scissors Feint
100%
3*
SC HEERENVEEN
Counter Attack (Attacking Styles)
Scissors Feint
100%
5*
SC HEERENVEEN
Ball Control
Scissors Feint
100%
4*
SC HEERENVEEN
Ball Control
Scissors Feint
100%
3*
SC HEERENVEEN
Ball Control
Scissors Feint
100%
5*
NORWAY
Left foot
Scissors Feint
100%
4*
NORWAY
Left foot
Scissors Feint
100%
3*
NORWAY
Left foot
Scissors Feint
100%
5*
SC HEERENVEEN
Left foot
Scissors Feint
100%
4*
SC HEERENVEEN
Left foot
Scissors Feint
100%
3*
SC HEERENVEEN
Left foot
Scissors Feint
100%
5*
SC HEERENVEEN
Dribbling
Scissors Feint
100%
4*
SC HEERENVEEN
Dribbling
Scissors Feint
100%
3*
SC HEERENVEEN
Dribbling
Scissors Feint
100%
5*
SC HEERENVEEN
Frontline Pressure (Defensive Styles)
Scissors Feint
100%
4*
SC HEERENVEEN
Frontline Pressure (Defensive Styles)
Scissors Feint
100%
3*
SC HEERENVEEN
Frontline Pressure (Defensive Styles)
Scissors Feint
100%
5*
NORWAY
Strength On the Ball
Scissors Feint
100%
4*
NORWAY
Strength On the Ball
Scissors Feint
100%
3*
NORWAY
Strength On the Ball
Scissors Feint
100%
5*
SC HEERENVEEN
Strength On the Ball
Scissors Feint
100%
4*
SC HEERENVEEN
Strength On the Ball
Scissors Feint
100%
3*
SC HEERENVEEN
Strength On the Ball
Scissors Feint
100%
5*
Dutch League
Strength On the Ball
Scissors Feint
100%
4*
Dutch League
Strength On the Ball
Scissors Feint
100%
3*
Dutch League
Strength On the Ball
Scissors Feint
100%
5*
NORWAY
AMF
Centre (Attacking Area)
100%
4*
NORWAY
AMF
Centre (Attacking Area)
100%
3*
NORWAY
AMF
Centre (Attacking Area)
100%
5*
SC HEERENVEEN
NORWAY
Incisive Run
100%
4*
SC HEERENVEEN
NORWAY
Incisive Run
100%
3*
SC HEERENVEEN
NORWAY
Incisive Run
100%
5*
SC HEERENVEEN
Europe
Incisive Run
100%
4*
SC HEERENVEEN
Europe
Incisive Run
100%
3*
SC HEERENVEEN
Europe
Incisive Run
100%
5*
NORWAY
AMF
Incisive Run
100%
4*
NORWAY
AMF
Incisive Run
100%
3*
NORWAY
AMF
Incisive Run
100%
5*
SC HEERENVEEN
AMF
Incisive Run
100%
4*
SC HEERENVEEN
AMF
Incisive Run
100%
3*
SC HEERENVEEN
AMF
Incisive Run
100%
5*
Dutch League
AMF
Incisive Run
100%
4*
Dutch League
AMF
Incisive Run
100%
3*
Dutch League
AMF
Incisive Run
100%
5*
SC HEERENVEEN
U-24
Incisive Run
100%
4*
SC HEERENVEEN
U-24
Incisive Run
100%
3*
SC HEERENVEEN
U-24
Incisive Run
100%
5*
SC HEERENVEEN
Ball Control
Incisive Run
100%
4*
SC HEERENVEEN
Ball Control
Incisive Run
100%
3*
SC HEERENVEEN
Ball Control
Incisive Run
100%
5*
NORWAY
Left foot
Incisive Run
100%
4*
NORWAY
Left foot
Incisive Run
100%
3*
NORWAY
Left foot
Incisive Run
100%
5*
SC HEERENVEEN
Dribbling
Incisive Run
100%
4*
SC HEERENVEEN
Dribbling
Incisive Run
100%
3*
SC HEERENVEEN
Dribbling
Incisive Run
100%
5*
SC HEERENVEEN
Strength On the Ball
Incisive Run
100%
4*
SC HEERENVEEN
Strength On the Ball
Incisive Run
100%
3*
SC HEERENVEEN
Strength On the Ball
Incisive Run
100%
5*
SC HEERENVEEN
NORWAY
AMF
100%
4*
SC HEERENVEEN
NORWAY
AMF
100%
3*
SC HEERENVEEN
NORWAY
AMF
100%
5*
SC HEERENVEEN
NORWAY
Long Range Drive
100%
4*
SC HEERENVEEN
NORWAY
Long Range Drive
100%
3*
SC HEERENVEEN
NORWAY
Long Range Drive
100%
5*
Dutch League
NORWAY
Long Range Drive
100%
4*
Dutch League
NORWAY
Long Range Drive
100%
3*
Dutch League
NORWAY
Long Range Drive
100%
5*
SC HEERENVEEN
Long Range Drive
-
100%
4*
SC HEERENVEEN
Long Range Drive
-
100%
3*
SC HEERENVEEN
Long Range Drive
-
100%
5*
SC HEERENVEEN
Maintain Formation (Positioning)
Long Range Drive
100%
4*
SC HEERENVEEN
Maintain Formation (Positioning)
Long Range Drive
100%
3*
SC HEERENVEEN
Maintain Formation (Positioning)
Long Range Drive
100%
5*
SC HEERENVEEN
Europe
Long Range Drive
100%
4*
SC HEERENVEEN
Europe
Long Range Drive
100%
3*
SC HEERENVEEN
Europe
Long Range Drive
100%
5*
SC HEERENVEEN
Centre (Attacking Area)
Long Range Drive
100%
4*
SC HEERENVEEN
Centre (Attacking Area)
Long Range Drive
100%
3*
SC HEERENVEEN
Centre (Attacking Area)
Long Range Drive
100%
5*
NORWAY
AMF
Long Range Drive
100%
4*
NORWAY
AMF
Long Range Drive
100%
3*
NORWAY
AMF
Long Range Drive
100%
5*
SC HEERENVEEN
AMF
Long Range Drive
100%
4*
SC HEERENVEEN
AMF
Long Range Drive
100%
3*
SC HEERENVEEN
AMF
Long Range Drive
100%
5*
SC HEERENVEEN
U-24
Long Range Drive
100%
4*
SC HEERENVEEN
U-24
Long Range Drive
100%
3*
SC HEERENVEEN
U-24
Long Range Drive
100%
5*
SC HEERENVEEN
Aggressive (Pressuring)
Long Range Drive
100%
4*
SC HEERENVEEN
Aggressive (Pressuring)
Long Range Drive
100%
3*
SC HEERENVEEN
Aggressive (Pressuring)
Long Range Drive
100%
5*
NORWAY
Long-pass (Build Up)
Long Range Drive
100%
4*
NORWAY
Long-pass (Build Up)
Long Range Drive
100%
3*
NORWAY
Long-pass (Build Up)
Long Range Drive
100%
5*
SC HEERENVEEN
Long-pass (Build Up)
Long Range Drive
100%
4*
SC HEERENVEEN
Long-pass (Build Up)
Long Range Drive
100%
3*
SC HEERENVEEN
Long-pass (Build Up)
Long Range Drive
100%
5*
SC HEERENVEEN
Utility Players
Long Range Drive
100%
4*
SC HEERENVEEN
Utility Players
Long Range Drive
100%
3*
SC HEERENVEEN
Utility Players
Long Range Drive
100%
5*
SC HEERENVEEN
Wide (Containment Area)
Long Range Drive
100%
4*
SC HEERENVEEN
Wide (Containment Area)
Long Range Drive
100%
3*
SC HEERENVEEN
Wide (Containment Area)
Long Range Drive
100%
5*
SC HEERENVEEN
Counter Attack (Attacking Styles)
Long Range Drive
100%
4*
SC HEERENVEEN
Counter Attack (Attacking Styles)
Long Range Drive
100%
3*
SC HEERENVEEN
Counter Attack (Attacking Styles)
Long Range Drive
100%
5*
SC HEERENVEEN
Ball Control
Long Range Drive
100%
4*
SC HEERENVEEN
Ball Control
Long Range Drive
100%
3*
SC HEERENVEEN
Ball Control
Long Range Drive
100%
5*
SC HEERENVEEN
Left foot
Long Range Drive
100%
4*
SC HEERENVEEN
Left foot
Long Range Drive
100%
3*
SC HEERENVEEN
Left foot
Long Range Drive
100%
5*
SC HEERENVEEN
Dribbling
Long Range Drive
100%
4*
SC HEERENVEEN
Dribbling
Long Range Drive
100%
3*
SC HEERENVEEN
Dribbling
Long Range Drive
100%
5*
SC HEERENVEEN
Frontline Pressure (Defensive Styles)
Long Range Drive
100%
4*
SC HEERENVEEN
Frontline Pressure (Defensive Styles)
Long Range Drive
100%
3*
SC HEERENVEEN
Frontline Pressure (Defensive Styles)
Long Range Drive
100%
5*
SC HEERENVEEN
Strength On the Ball
Long Range Drive
100%
4*
SC HEERENVEEN
Strength On the Ball
Long Range Drive
100%
3*
SC HEERENVEEN
Strength On the Ball
Long Range Drive
100%
5*
NORWAY
AMF
Long-pass (Build Up)
100%
4*
NORWAY
AMF
Long-pass (Build Up)
100%
3*
NORWAY
AMF
Long-pass (Build Up)
100%
5*
SC HEERENVEEN
NORWAY
Rabona
100%
4*
SC HEERENVEEN
NORWAY
Rabona
100%
3*
SC HEERENVEEN
NORWAY
Rabona
100%
5*
Dutch League
NORWAY
Rabona
100%
4*
Dutch League
NORWAY
Rabona
100%
3*
Dutch League
NORWAY
Rabona
100%
5*
SC HEERENVEEN
Rabona
-
100%
4*
SC HEERENVEEN
Rabona
-
100%
3*
SC HEERENVEEN
Rabona
-
100%
5*
SC HEERENVEEN
Maintain Formation (Positioning)
Rabona
100%
4*
SC HEERENVEEN
Maintain Formation (Positioning)
Rabona
100%
3*
SC HEERENVEEN
Maintain Formation (Positioning)
Rabona
100%
5*
Dutch League
Maintain Formation (Positioning)
Rabona
100%
4*
Dutch League
Maintain Formation (Positioning)
Rabona
100%
3*
Dutch League
Maintain Formation (Positioning)
Rabona
100%
5*
SC HEERENVEEN
Europe
Rabona
100%
4*
SC HEERENVEEN
Europe
Rabona
100%
3*
SC HEERENVEEN
Europe
Rabona
100%
5*
Dutch League
Europe
Rabona
100%
4*
Dutch League
Europe
Rabona
100%
3*
Dutch League
Europe
Rabona
100%
5*
Dutch League
Rabona
-
100%
4*
Dutch League
Rabona
-
100%
3*
Dutch League
Rabona
-
100%
5*
SC HEERENVEEN
Centre (Attacking Area)
Rabona
100%
4*
SC HEERENVEEN
Centre (Attacking Area)
Rabona
100%
3*
SC HEERENVEEN
Centre (Attacking Area)
Rabona
100%
5*
Dutch League
Centre (Attacking Area)
Rabona
100%
4*
Dutch League
Centre (Attacking Area)
Rabona
100%
3*
Dutch League
Centre (Attacking Area)
Rabona
100%
5*
NORWAY
AMF
Rabona
100%
4*
NORWAY
AMF
Rabona
100%
3*
NORWAY
AMF
Rabona
100%
5*
SC HEERENVEEN
AMF
Rabona
100%
4*
SC HEERENVEEN
AMF
Rabona
100%
3*
SC HEERENVEEN
AMF
Rabona
100%
5*
Dutch League
AMF
Rabona
100%
4*
Dutch League
AMF
Rabona
100%
3*
Dutch League
AMF
Rabona
100%
5*
SC HEERENVEEN
U-24
Rabona
100%
4*
SC HEERENVEEN
U-24
Rabona
100%
3*
SC HEERENVEEN
U-24
Rabona
100%
5*
Dutch League
U-24
Rabona
100%
4*
Dutch League
U-24
Rabona
100%
3*
Dutch League
U-24
Rabona
100%
5*
SC HEERENVEEN
Aggressive (Pressuring)
Rabona
100%
4*
SC HEERENVEEN
Aggressive (Pressuring)
Rabona
100%
3*
SC HEERENVEEN
Aggressive (Pressuring)
Rabona
100%
5*
Dutch League
Aggressive (Pressuring)
Rabona
100%
4*
Dutch League
Aggressive (Pressuring)
Rabona
100%
3*
Dutch League
Aggressive (Pressuring)
Rabona
100%
5*
NORWAY
Long-pass (Build Up)
Rabona
100%
4*
NORWAY
Long-pass (Build Up)
Rabona
100%
3*
NORWAY
Long-pass (Build Up)
Rabona
100%
5*
SC HEERENVEEN
Long-pass (Build Up)
Rabona
100%
4*
SC HEERENVEEN
Long-pass (Build Up)
Rabona
100%
3*
SC HEERENVEEN
Long-pass (Build Up)
Rabona
100%
5*
Dutch League
Long-pass (Build Up)
Rabona
100%
4*
Dutch League
Long-pass (Build Up)
Rabona
100%
3*
Dutch League
Long-pass (Build Up)
Rabona
100%
5*
Strength On the Ball
Long-pass (Build Up)
Rabona
100%
4*
Strength On the Ball
Long-pass (Build Up)
Rabona
100%
3*
Strength On the Ball
Long-pass (Build Up)
Rabona
100%
5*
SC HEERENVEEN
Utility Players
Rabona
100%
4*
SC HEERENVEEN
Utility Players
Rabona
100%
3*
SC HEERENVEEN
Utility Players
Rabona
100%
5*
Dutch League
Utility Players
Rabona
100%
4*
Dutch League
Utility Players
Rabona
100%
3*
Dutch League
Utility Players
Rabona
100%
5*
SC HEERENVEEN
Wide (Containment Area)
Rabona
100%
4*
SC HEERENVEEN
Wide (Containment Area)
Rabona
100%
3*
SC HEERENVEEN
Wide (Containment Area)
Rabona
100%
5*
Dutch League
Wide (Containment Area)
Rabona
100%
4*
Dutch League
Wide (Containment Area)
Rabona
100%
3*
Dutch League
Wide (Containment Area)
Rabona
100%
5*
NORWAY
Counter Attack (Attacking Styles)
Rabona
100%
4*
NORWAY
Counter Attack (Attacking Styles)
Rabona
100%
3*
NORWAY
Counter Attack (Attacking Styles)
Rabona
100%
5*
SC HEERENVEEN
Counter Attack (Attacking Styles)
Rabona
100%
4*
SC HEERENVEEN
Counter Attack (Attacking Styles)
Rabona
100%
3*
SC HEERENVEEN
Counter Attack (Attacking Styles)
Rabona
100%
5*
Dutch League
Counter Attack (Attacking Styles)
Rabona
100%
4*
Dutch League
Counter Attack (Attacking Styles)
Rabona
100%
3*
Dutch League
Counter Attack (Attacking Styles)
Rabona
100%
5*
NORWAY
Ball Control
Rabona
100%
4*
NORWAY
Ball Control
Rabona
100%
3*
NORWAY
Ball Control
Rabona
100%
5*
SC HEERENVEEN
Ball Control
Rabona
100%
4*
SC HEERENVEEN
Ball Control
Rabona
100%
3*
SC HEERENVEEN
Ball Control
Rabona
100%
5*
Dutch League
Ball Control
Rabona
100%
4*
Dutch League
Ball Control
Rabona
100%
3*
Dutch League
Ball Control
Rabona
100%
5*
NORWAY
Left foot
Rabona
100%
4*
NORWAY
Left foot
Rabona
100%
3*
NORWAY
Left foot
Rabona
100%
5*
SC HEERENVEEN
Left foot
Rabona
100%
4*
SC HEERENVEEN
Left foot
Rabona
100%
3*
SC HEERENVEEN
Left foot
Rabona
100%
5*
Dutch League
Left foot
Rabona
100%
4*
Dutch League
Left foot
Rabona
100%
3*
Dutch League
Left foot
Rabona
100%
5*
SC HEERENVEEN
Dribbling
Rabona
100%
4*
SC HEERENVEEN
Dribbling
Rabona
100%
3*
SC HEERENVEEN
Dribbling
Rabona
100%
5*
Dutch League
Dribbling
Rabona
100%
4*
Dutch League
Dribbling
Rabona
100%
3*
Dutch League
Dribbling
Rabona
100%
5*
SC HEERENVEEN
Frontline Pressure (Defensive Styles)
Rabona
100%
4*
SC HEERENVEEN
Frontline Pressure (Defensive Styles)
Rabona
100%
3*
SC HEERENVEEN
Frontline Pressure (Defensive Styles)
Rabona
100%
5*
Dutch League
Frontline Pressure (Defensive Styles)
Rabona
100%
4*
Dutch League
Frontline Pressure (Defensive Styles)
Rabona
100%
3*
Dutch League
Frontline Pressure (Defensive Styles)
Rabona
100%
5*
SC HEERENVEEN
Strength On the Ball
Rabona
100%
4*
SC HEERENVEEN
Strength On the Ball
Rabona
100%
3*
SC HEERENVEEN
Strength On the Ball
Rabona
100%
5*
Dutch League
Strength On the Ball
Rabona
100%
4*
Dutch League
Strength On the Ball
Rabona
100%
3*
Dutch League
Strength On the Ball
Rabona
100%
5*
SC HEERENVEEN
NORWAY
Trickster
100%
4*
SC HEERENVEEN
NORWAY
Trickster
100%
3*
SC HEERENVEEN
NORWAY
Trickster
100%
5*
Dutch League
NORWAY
Trickster
100%
4*
Dutch League
NORWAY
Trickster
100%
3*
Dutch League
NORWAY
Trickster
100%
5*
NORWAY
AMF
Trickster
100%
4*
NORWAY
AMF
Trickster
100%
3*
NORWAY
AMF
Trickster
100%
5*
SC HEERENVEEN
AMF
Trickster
100%
4*
SC HEERENVEEN
AMF
Trickster
100%
3*
SC HEERENVEEN
AMF
Trickster
100%
5*
SC HEERENVEEN
Left foot
Trickster
100%
4*
SC HEERENVEEN
Left foot
Trickster
100%
3*
SC HEERENVEEN
Left foot
Trickster
100%
5*
SC HEERENVEEN
Strength On the Ball
Trickster
100%
4*
SC HEERENVEEN
Strength On the Ball
Trickster
100%
3*
SC HEERENVEEN
Strength On the Ball
Trickster
100%
5*
NORWAY
AMF
Counter Attack (Attacking Styles)
100%
4*
NORWAY
AMF
Counter Attack (Attacking Styles)
100%
3*
NORWAY
AMF
Counter Attack (Attacking Styles)
100%
5*
NORWAY
Ball Control
Counter Attack (Attacking Styles)
100%
4*
NORWAY
Ball Control
Counter Attack (Attacking Styles)
100%
3*
NORWAY
Ball Control
Counter Attack (Attacking Styles)
100%
5*
SC HEERENVEEN
NORWAY
Ball Control
100%
4*
SC HEERENVEEN
NORWAY
Ball Control
100%
3*
SC HEERENVEEN
NORWAY
Ball Control
100%
5*
NORWAY
AMF
Ball Control
100%
4*
NORWAY
AMF
Ball Control
100%
3*
NORWAY
AMF
Ball Control
100%
5*
SC HEERENVEEN
AMF
Ball Control
100%
4*
SC HEERENVEEN
AMF
Ball Control
100%
3*
SC HEERENVEEN
AMF
Ball Control
100%
5*
SC HEERENVEEN
NORWAY
Pinpoint Crossing
100%
4*
SC HEERENVEEN
NORWAY
Pinpoint Crossing
100%
3*
SC HEERENVEEN
NORWAY
Pinpoint Crossing
100%
5*
Dutch League
NORWAY
Pinpoint Crossing
100%
4*
Dutch League
NORWAY
Pinpoint Crossing
100%
3*
Dutch League
NORWAY
Pinpoint Crossing
100%
5*
SC HEERENVEEN
Pinpoint Crossing
-
100%
4*
SC HEERENVEEN
Pinpoint Crossing
-
100%
3*
SC HEERENVEEN
Pinpoint Crossing
-
100%
5*
SC HEERENVEEN
Maintain Formation (Positioning)
Pinpoint Crossing
100%
4*
SC HEERENVEEN
Maintain Formation (Positioning)
Pinpoint Crossing
100%
3*
SC HEERENVEEN
Maintain Formation (Positioning)
Pinpoint Crossing
100%
5*
SC HEERENVEEN
Europe
Pinpoint Crossing
100%
4*
SC HEERENVEEN
Europe
Pinpoint Crossing
100%
3*
SC HEERENVEEN
Europe
Pinpoint Crossing
100%
5*
SC HEERENVEEN
Centre (Attacking Area)
Pinpoint Crossing
100%
4*
SC HEERENVEEN
Centre (Attacking Area)
Pinpoint Crossing
100%
3*
SC HEERENVEEN
Centre (Attacking Area)
Pinpoint Crossing
100%
3*
Dutch League
Centre (Attacking Area)
Pinpoint Crossing
100%
5*
NORWAY
AMF
Pinpoint Crossing
100%
4*
NORWAY
AMF
Pinpoint Crossing
100%
3*
NORWAY
AMF
Pinpoint Crossing
100%
5*
SC HEERENVEEN
AMF
Pinpoint Crossing
100%
4*
SC HEERENVEEN
AMF
Pinpoint Crossing
100%
3*
SC HEERENVEEN
AMF
Pinpoint Crossing
100%
3*
Dutch League
AMF
Pinpoint Crossing
100%
5*
SC HEERENVEEN
U-24
Pinpoint Crossing
100%
4*
SC HEERENVEEN
U-24
Pinpoint Crossing
100%
3*
SC HEERENVEEN
U-24
Pinpoint Crossing
100%
5*
SC HEERENVEEN
Aggressive (Pressuring)
Pinpoint Crossing
100%
4*
SC HEERENVEEN
Aggressive (Pressuring)
Pinpoint Crossing
100%
3*
SC HEERENVEEN
Aggressive (Pressuring)
Pinpoint Crossing
100%
5*
NORWAY
Long-pass (Build Up)
Pinpoint Crossing
100%
4*
NORWAY
Long-pass (Build Up)
Pinpoint Crossing
100%
3*
NORWAY
Long-pass (Build Up)
Pinpoint Crossing
100%
5*
SC HEERENVEEN
Long-pass (Build Up)
Pinpoint Crossing
100%
4*
SC HEERENVEEN
Long-pass (Build Up)
Pinpoint Crossing
100%
3*
SC HEERENVEEN
Long-pass (Build Up)
Pinpoint Crossing
100%
5*
Dutch League
Long-pass (Build Up)
Pinpoint Crossing
100%
4*
Dutch League
Long-pass (Build Up)
Pinpoint Crossing
100%
3*
Dutch League
Long-pass (Build Up)
Pinpoint Crossing
100%
5*
SC HEERENVEEN
Utility Players
Pinpoint Crossing
100%
4*
SC HEERENVEEN
Utility Players
Pinpoint Crossing
100%
3*
SC HEERENVEEN
Utility Players
Pinpoint Crossing
100%
5*
SC HEERENVEEN
Wide (Containment Area)
Pinpoint Crossing
100%
4*
SC HEERENVEEN
Wide (Containment Area)
Pinpoint Crossing
100%
3*
SC HEERENVEEN
Wide (Containment Area)
Pinpoint Crossing
100%
3*
Dutch League
Wide (Containment Area)
Pinpoint Crossing
100%
5*
NORWAY
Counter Attack (Attacking Styles)
Pinpoint Crossing
100%
4*
NORWAY
Counter Attack (Attacking Styles)
Pinpoint Crossing
100%
3*
NORWAY
Counter Attack (Attacking Styles)
Pinpoint Crossing
100%
5*
SC HEERENVEEN
Counter Attack (Attacking Styles)
Pinpoint Crossing
100%
4*
SC HEERENVEEN
Counter Attack (Attacking Styles)
Pinpoint Crossing
100%
3*
SC HEERENVEEN
Counter Attack (Attacking Styles)
Pinpoint Crossing
100%
5*
NORWAY
Ball Control
Pinpoint Crossing
100%
4*
NORWAY
Ball Control
Pinpoint Crossing
100%
3*
NORWAY
Ball Control
Pinpoint Crossing
100%
5*
SC HEERENVEEN
Ball Control
Pinpoint Crossing
100%
4*
SC HEERENVEEN
Ball Control
Pinpoint Crossing
100%
3*
SC HEERENVEEN
Ball Control
Pinpoint Crossing
100%
5*
NORWAY
Left foot
Pinpoint Crossing
100%
4*
NORWAY
Left foot
Pinpoint Crossing
100%
3*
NORWAY
Left foot
Pinpoint Crossing
100%
5*
SC HEERENVEEN
Left foot
Pinpoint Crossing
100%
4*
SC HEERENVEEN
Left foot
Pinpoint Crossing
100%
3*
SC HEERENVEEN
Left foot
Pinpoint Crossing
100%
5*
SC HEERENVEEN
Dribbling
Pinpoint Crossing
100%
4*
SC HEERENVEEN
Dribbling
Pinpoint Crossing
100%
3*
SC HEERENVEEN
Dribbling
Pinpoint Crossing
100%
5*
SC HEERENVEEN
Frontline Pressure (Defensive Styles)
Pinpoint Crossing
100%
4*
SC HEERENVEEN
Frontline Pressure (Defensive Styles)
Pinpoint Crossing
100%
3*
SC HEERENVEEN
Frontline Pressure (Defensive Styles)
Pinpoint Crossing
100%
3*
Dutch League
Frontline Pressure (Defensive Styles)
Pinpoint Crossing
100%
5*
SC HEERENVEEN
Strength On the Ball
Pinpoint Crossing
100%
4*
SC HEERENVEEN
Strength On the Ball
Pinpoint Crossing
100%
3*
SC HEERENVEEN
Strength On the Ball
Pinpoint Crossing
100%
5*
Dutch League
Strength On the Ball
Pinpoint Crossing
100%
4*
Dutch League
Strength On the Ball
Pinpoint Crossing
100%
3*
Dutch League
Strength On the Ball
Pinpoint Crossing
100%
5*
SC HEERENVEEN
NORWAY
Left foot
100%
4*
SC HEERENVEEN
NORWAY
Left foot
100%
3*
SC HEERENVEEN
NORWAY
Left foot
100%
5*
Dutch League
NORWAY
Left foot
100%
4*
Dutch League
NORWAY
Left foot
100%
3*
Dutch League
NORWAY
Left foot
100%
5*
NORWAY
AMF
Left foot
100%
4*
NORWAY
AMF
Left foot
100%
3*
NORWAY
AMF
Left foot
100%
5*
NORWAY
Dribbling
Left foot
100%
4*
NORWAY
Dribbling
Left foot
100%
3*
NORWAY
Dribbling
Left foot
100%
5*
SC HEERENVEEN
Strength On the Ball
Left foot
100%
4*
SC HEERENVEEN
Strength On the Ball
Left foot
100%
3*
SC HEERENVEEN
Strength On the Ball
Left foot
100%
5*
SC HEERENVEEN
NORWAY
Dribbling
100%
4*
SC HEERENVEEN
NORWAY
Dribbling
100%
3*
SC HEERENVEEN
NORWAY
Dribbling
100%
5*
Dutch League
NORWAY
Dribbling
100%
4*
Dutch League
NORWAY
Dribbling
100%
3*
Dutch League
NORWAY
Dribbling
100%
5*
NORWAY
AMF
Dribbling
100%
4*
NORWAY
AMF
Dribbling
100%
3*
NORWAY
AMF
Dribbling
100%
5*
SC HEERENVEEN
AMF
Dribbling
100%
4*
SC HEERENVEEN
AMF
Dribbling
100%
3*
SC HEERENVEEN
AMF
Dribbling
100%
5*
SC HEERENVEEN
NORWAY
Weighted Pass
100%
4*
SC HEERENVEEN
NORWAY
Weighted Pass
100%
3*
SC HEERENVEEN
NORWAY
Weighted Pass
100%
5*
Dutch League
NORWAY
Weighted Pass
100%
4*
Dutch League
NORWAY
Weighted Pass
100%
3*
Dutch League
NORWAY
Weighted Pass
100%
5*
SC HEERENVEEN
Weighted Pass
-
100%
4*
SC HEERENVEEN
Weighted Pass
-
100%
3*
SC HEERENVEEN
Weighted Pass
-
100%
5*
SC HEERENVEEN
Maintain Formation (Positioning)
Weighted Pass
100%
4*
SC HEERENVEEN
Maintain Formation (Positioning)
Weighted Pass
100%
3*
SC HEERENVEEN
Maintain Formation (Positioning)
Weighted Pass
100%
5*
SC HEERENVEEN
Europe
Weighted Pass
100%
4*
SC HEERENVEEN
Europe
Weighted Pass
100%
3*
SC HEERENVEEN
Europe
Weighted Pass
100%
5*
SC HEERENVEEN
Centre (Attacking Area)
Weighted Pass
100%
4*
SC HEERENVEEN
Centre (Attacking Area)
Weighted Pass
100%
3*
SC HEERENVEEN
Centre (Attacking Area)
Weighted Pass
100%
5*
Dutch League
Centre (Attacking Area)
Weighted Pass
100%
4*
Dutch League
Centre (Attacking Area)
Weighted Pass
100%
3*
Dutch League
Centre (Attacking Area)
Weighted Pass
100%
5*
NORWAY
AMF
Weighted Pass
100%
4*
NORWAY
AMF
Weighted Pass
100%
3*
NORWAY
AMF
Weighted Pass
100%
5*
SC HEERENVEEN
AMF
Weighted Pass
100%
4*
SC HEERENVEEN
AMF
Weighted Pass
100%
3*
SC HEERENVEEN
AMF
Weighted Pass
100%
5*
Dutch League
AMF
Weighted Pass
100%
4*
Dutch League
AMF
Weighted Pass
100%
3*
Dutch League
AMF
Weighted Pass
100%
5*
SC HEERENVEEN
U-24
Weighted Pass
100%
4*
SC HEERENVEEN
U-24
Weighted Pass
100%
3*
SC HEERENVEEN
U-24
Weighted Pass
100%
5*
Dutch League
U-24
Weighted Pass
100%
4*
Dutch League
U-24
Weighted Pass
100%
3*
Dutch League
U-24
Weighted Pass
100%
5*
SC HEERENVEEN
Aggressive (Pressuring)
Weighted Pass
100%
4*
SC HEERENVEEN
Aggressive (Pressuring)
Weighted Pass
100%
3*
SC HEERENVEEN
Aggressive (Pressuring)
Weighted Pass
100%
5*
SC HEERENVEEN
Long-pass (Build Up)
Weighted Pass
100%
4*
SC HEERENVEEN
Long-pass (Build Up)
Weighted Pass
100%
3*
SC HEERENVEEN
Long-pass (Build Up)
Weighted Pass
100%
5*
Dutch League
Long-pass (Build Up)
Weighted Pass
100%
4*
Dutch League
Long-pass (Build Up)
Weighted Pass
100%
3*
Dutch League
Long-pass (Build Up)
Weighted Pass
100%
5*
SC HEERENVEEN
Utility Players
Weighted Pass
100%
4*
SC HEERENVEEN
Utility Players
Weighted Pass
100%
3*
SC HEERENVEEN
Utility Players
Weighted Pass
100%
5*
SC HEERENVEEN
Wide (Containment Area)
Weighted Pass
100%
4*
SC HEERENVEEN
Wide (Containment Area)
Weighted Pass
100%
3*
SC HEERENVEEN
Wide (Containment Area)
Weighted Pass
100%
5*
NORWAY
Counter Attack (Attacking Styles)
Weighted Pass
100%
4*
NORWAY
Counter Attack (Attacking Styles)
Weighted Pass
100%
3*
NORWAY
Counter Attack (Attacking Styles)
Weighted Pass
100%
5*
SC HEERENVEEN
Counter Attack (Attacking Styles)
Weighted Pass
100%
4*
SC HEERENVEEN
Counter Attack (Attacking Styles)
Weighted Pass
100%
3*
SC HEERENVEEN
Counter Attack (Attacking Styles)
Weighted Pass
100%
5*
Dutch League
Counter Attack (Attacking Styles)
Weighted Pass
100%
4*
Dutch League
Counter Attack (Attacking Styles)
Weighted Pass
100%
3*
Dutch League
Counter Attack (Attacking Styles)
Weighted Pass
100%
5*
SC HEERENVEEN
Ball Control
Weighted Pass
100%
4*
SC HEERENVEEN
Ball Control
Weighted Pass
100%
3*
SC HEERENVEEN
Ball Control
Weighted Pass
100%
5*
Dutch League
Ball Control
Weighted Pass
100%
4*
Dutch League
Ball Control
Weighted Pass
100%
3*
Dutch League
Ball Control
Weighted Pass
100%
5*
SC HEERENVEEN
Left foot
Weighted Pass
100%
4*
SC HEERENVEEN
Left foot
Weighted Pass
100%
3*
SC HEERENVEEN
Left foot
Weighted Pass
100%
5*
NORWAY
Dribbling
Weighted Pass
100%
4*
NORWAY
Dribbling
Weighted Pass
100%
3*
NORWAY
Dribbling
Weighted Pass
100%
5*
SC HEERENVEEN
Dribbling
Weighted Pass
100%
4*
SC HEERENVEEN
Dribbling
Weighted Pass
100%
3*
SC HEERENVEEN
Dribbling
Weighted Pass
100%
5*
SC HEERENVEEN
Frontline Pressure (Defensive Styles)
Weighted Pass
100%
4*
SC HEERENVEEN
Frontline Pressure (Defensive Styles)
Weighted Pass
100%
3*
SC HEERENVEEN
Frontline Pressure (Defensive Styles)
Weighted Pass
100%
5*
SC HEERENVEEN
Strength On the Ball
Weighted Pass
100%
4*
SC HEERENVEEN
Strength On the Ball
Weighted Pass
100%
3*
SC HEERENVEEN
Strength On the Ball
Weighted Pass
100%
5*
Dutch League
Strength On the Ball
Weighted Pass
100%
4*
Dutch League
Strength On the Ball
Weighted Pass
100%
3*
Dutch League
Strength On the Ball
Weighted Pass
100%
5*
SC HEERENVEEN
NORWAY
Sombrero
100%
4*
SC HEERENVEEN
NORWAY
Sombrero
100%
3*
SC HEERENVEEN
NORWAY
Sombrero
100%
5*
Dutch League
NORWAY
Sombrero
100%
4*
Dutch League
NORWAY
Sombrero
100%
3*
Dutch League
NORWAY
Sombrero
100%
5*
SC HEERENVEEN
Sombrero
-
100%
4*
SC HEERENVEEN
Sombrero
-
100%
3*
SC HEERENVEEN
Sombrero
-
100%
5*
SC HEERENVEEN
Maintain Formation (Positioning)
Sombrero
100%
4*
SC HEERENVEEN
Maintain Formation (Positioning)
Sombrero
100%
3*
SC HEERENVEEN
Maintain Formation (Positioning)
Sombrero
100%
5*
Dutch League
Maintain Formation (Positioning)
Sombrero
100%
4*
Dutch League
Maintain Formation (Positioning)
Sombrero
100%
3*
Dutch League
Maintain Formation (Positioning)
Sombrero
100%
5*
SC HEERENVEEN
Europe
Sombrero
100%
4*
SC HEERENVEEN
Europe
Sombrero
100%
3*
SC HEERENVEEN
Europe
Sombrero
100%
5*
Dutch League
Europe
Sombrero
100%
4*
Dutch League
Europe
Sombrero
100%
3*
Dutch League
Europe
Sombrero
100%
5*
Dutch League
Sombrero
-
100%
4*
Dutch League
Sombrero
-
100%
3*
Dutch League
Sombrero
-
100%
5*
SC HEERENVEEN
Centre (Attacking Area)
Sombrero
100%
4*
SC HEERENVEEN
Centre (Attacking Area)
Sombrero
100%
3*
SC HEERENVEEN
Centre (Attacking Area)
Sombrero
100%
5*
Dutch League
Centre (Attacking Area)
Sombrero
100%
4*
Dutch League
Centre (Attacking Area)
Sombrero
100%
3*
Dutch League
Centre (Attacking Area)
Sombrero
100%
5*
NORWAY
AMF
Sombrero
100%
4*
NORWAY
AMF
Sombrero
100%
3*
NORWAY
AMF
Sombrero
100%
5*
SC HEERENVEEN
AMF
Sombrero
100%
4*
SC HEERENVEEN
AMF
Sombrero
100%
3*
SC HEERENVEEN
AMF
Sombrero
100%
5*
Dutch League
AMF
Sombrero
100%
4*
Dutch League
AMF
Sombrero
100%
3*
Dutch League
AMF
Sombrero
100%
5*
SC HEERENVEEN
U-24
Sombrero
100%
4*
SC HEERENVEEN
U-24
Sombrero
100%
3*
SC HEERENVEEN
U-24
Sombrero
100%
5*
Dutch League
U-24
Sombrero
100%
4*
Dutch League
U-24
Sombrero
100%
3*
Dutch League
U-24
Sombrero
100%
5*
SC HEERENVEEN
Aggressive (Pressuring)
Sombrero
100%
4*
SC HEERENVEEN
Aggressive (Pressuring)
Sombrero
100%
3*
SC HEERENVEEN
Aggressive (Pressuring)
Sombrero
100%
5*
Dutch League
Aggressive (Pressuring)
Sombrero
100%
4*
Dutch League
Aggressive (Pressuring)
Sombrero
100%
3*
Dutch League
Aggressive (Pressuring)
Sombrero
100%
5*
NORWAY
Long-pass (Build Up)
Sombrero
100%
4*
NORWAY
Long-pass (Build Up)
Sombrero
100%
3*
NORWAY
Long-pass (Build Up)
Sombrero
100%
5*
SC HEERENVEEN
Long-pass (Build Up)
Sombrero
100%
4*
SC HEERENVEEN
Long-pass (Build Up)
Sombrero
100%
3*
SC HEERENVEEN
Long-pass (Build Up)
Sombrero
100%
5*
Dutch League
Long-pass (Build Up)
Sombrero
100%
4*
Dutch League
Long-pass (Build Up)
Sombrero
100%
3*
Dutch League
Long-pass (Build Up)
Sombrero
100%
5*
SC HEERENVEEN
Utility Players
Sombrero
100%
4*
SC HEERENVEEN
Utility Players
Sombrero
100%
3*
SC HEERENVEEN
Utility Players
Sombrero
100%
5*
Dutch League
Utility Players
Sombrero
100%
4*
Dutch League
Utility Players
Sombrero
100%
3*
Dutch League
Utility Players
Sombrero
100%
5*
SC HEERENVEEN
Wide (Containment Area)
Sombrero
100%
4*
SC HEERENVEEN
Wide (Containment Area)
Sombrero
100%
3*
SC HEERENVEEN
Wide (Containment Area)
Sombrero
100%
5*
Dutch League
Wide (Containment Area)
Sombrero
100%
4*
Dutch League
Wide (Containment Area)
Sombrero
100%
3*
Dutch League
Wide (Containment Area)
Sombrero
100%
5*
NORWAY
Counter Attack (Attacking Styles)
Sombrero
100%
4*
NORWAY
Counter Attack (Attacking Styles)
Sombrero
100%
3*
NORWAY
Counter Attack (Attacking Styles)
Sombrero
100%
5*
SC HEERENVEEN
Counter Attack (Attacking Styles)
Sombrero
100%
4*
SC HEERENVEEN
Counter Attack (Attacking Styles)
Sombrero
100%
3*
SC HEERENVEEN
Counter Attack (Attacking Styles)
Sombrero
100%
5*
Dutch League
Counter Attack (Attacking Styles)
Sombrero
100%
4*
Dutch League
Counter Attack (Attacking Styles)
Sombrero
100%
3*
Dutch League
Counter Attack (Attacking Styles)
Sombrero
100%
5*
NORWAY
Ball Control
Sombrero
100%
4*
NORWAY
Ball Control
Sombrero
100%
3*
NORWAY
Ball Control
Sombrero
100%
5*
SC HEERENVEEN
Ball Control
Sombrero
100%
4*
SC HEERENVEEN
Ball Control
Sombrero
100%
3*
SC HEERENVEEN
Ball Control
Sombrero
100%
5*
Dutch League
Ball Control
Sombrero
100%
4*
Dutch League
Ball Control
Sombrero
100%
3*
Dutch League
Ball Control
Sombrero
100%
5*
NORWAY
Left foot
Sombrero
100%
4*
NORWAY
Left foot
Sombrero
100%
3*
NORWAY
Left foot
Sombrero
100%
5*
SC HEERENVEEN
Left foot
Sombrero
100%
4*
SC HEERENVEEN
Left foot
Sombrero
100%
3*
SC HEERENVEEN
Left foot
Sombrero
100%
5*
Dutch League
Left foot
Sombrero
100%
4*
Dutch League
Left foot
Sombrero
100%
3*
Dutch League
Left foot
Sombrero
100%
5*
SC HEERENVEEN
Dribbling
Sombrero
100%
4*
SC HEERENVEEN
Dribbling
Sombrero
100%
3*
SC HEERENVEEN
Dribbling
Sombrero
100%
5*
Dutch League
Dribbling
Sombrero
100%
4*
Dutch League
Dribbling
Sombrero
100%
3*
Dutch League
Dribbling
Sombrero
100%
5*
SC HEERENVEEN
Frontline Pressure (Defensive Styles)
Sombrero
100%
4*
SC HEERENVEEN
Frontline Pressure (Defensive Styles)
Sombrero
100%
3*
SC HEERENVEEN
Frontline Pressure (Defensive Styles)
Sombrero
100%
5*
Dutch League
Frontline Pressure (Defensive Styles)
Sombrero
100%
4*
Dutch League
Frontline Pressure (Defensive Styles)
Sombrero
100%
3*
Dutch League
Frontline Pressure (Defensive Styles)
Sombrero
100%
5*
SC HEERENVEEN
Strength On the Ball
Sombrero
100%
4*
SC HEERENVEEN
Strength On the Ball
Sombrero
100%
3*
SC HEERENVEEN
Strength On the Ball
Sombrero
100%
5*
Dutch League
Strength On the Ball
Sombrero
100%
4*
Dutch League
Strength On the Ball
Sombrero
100%
3*
Dutch League
Strength On the Ball
Sombrero
100%
5*
SC HEERENVEEN
NORWAY
Strength On the Ball
100%
4*
SC HEERENVEEN
NORWAY
Strength On the Ball
100%
3*
SC HEERENVEEN
NORWAY
Strength On the Ball
100%
5*
NORWAY
AMF
Strength On the Ball
100%
4*
NORWAY
AMF
Strength On the Ball
100%
3*
NORWAY
AMF
Strength On the Ball
100%
5*
SC HEERENVEEN
AMF
Strength On the Ball
100%
4*
SC HEERENVEEN
AMF
Strength On the Ball
100%
3*
SC HEERENVEEN
AMF
Strength On the Ball
100%
5*
SC HEERENVEEN
U-24
Strength On the Ball
100%
4*
SC HEERENVEEN
U-24
Strength On the Ball
100%
3*
SC HEERENVEEN
U-24
Strength On the Ball
100%
5*
Dutch League
AMF
Creative Playmaker
50%
4*
Dutch League
AMF
Creative Playmaker
50%
5*
Dutch League
U-24
Creative Playmaker
50%
4*
Dutch League
U-24
Creative Playmaker
50%
5*
Dutch League
Ball Control
Creative Playmaker
50%
4*
Dutch League
Ball Control
Creative Playmaker
50%
5*
Dutch League
Left foot
Creative Playmaker
50%
4*
Dutch League
Left foot
Creative Playmaker
50%
5*
Dutch League
Dribbling
Creative Playmaker
50%
4*
Dutch League
Dribbling
Creative Playmaker
50%
5*
Dutch League
AMF
Flip Flap
50%
4*
Dutch League
AMF
Flip Flap
50%
5*
Dutch League
Centre (Attacking Area)
Pinpoint Crossing
50%
4*
Dutch League
Centre (Attacking Area)
Pinpoint Crossing
50%
5*
Dutch League
AMF
Pinpoint Crossing
50%
4*
Dutch League
AMF
Pinpoint Crossing
50%
5*
Dutch League
Wide (Containment Area)
Pinpoint Crossing
50%
4*
Dutch League
Wide (Containment Area)
Pinpoint Crossing
50%
5*
Dutch League
Frontline Pressure (Defensive Styles)
Pinpoint Crossing
50%
4*
Dutch League
Frontline Pressure (Defensive Styles)
Pinpoint Crossing
50%
5*
Dutch League
Europe
Creative Playmaker
50%
4*
Dutch League
Europe
Creative Playmaker
50%
5*
Strength On the Ball
Long-pass (Build Up)
Heel Trick
50%
4*
Strength On the Ball
Long-pass (Build Up)
Heel Trick
50%
5*
NORWAY
Marseille Turn
-
50%
4*
NORWAY
Marseille Turn
-
50%
3*
NORWAY
Marseille Turn
-
50%
5*
NORWAY
Maintain Formation (Positioning)
Marseille Turn
50%
4*
NORWAY
Maintain Formation (Positioning)
Marseille Turn
50%
3*
NORWAY
Maintain Formation (Positioning)
Marseille Turn
50%
5*
NORWAY
Centre (Attacking Area)
Marseille Turn
50%
4*
NORWAY
Centre (Attacking Area)
Marseille Turn
50%
3*
NORWAY
Centre (Attacking Area)
Marseille Turn
50%
5*
NORWAY
U-24
Marseille Turn
50%
4*
NORWAY
U-24
Marseille Turn
50%
3*
NORWAY
U-24
Marseille Turn
50%
5*
NORWAY
Aggressive (Pressuring)
Marseille Turn
50%
4*
NORWAY
Aggressive (Pressuring)
Marseille Turn
50%
3*
NORWAY
Aggressive (Pressuring)
Marseille Turn
50%
5*
NORWAY
Utility Players
Marseille Turn
50%
4*
NORWAY
Utility Players
Marseille Turn
50%
3*
NORWAY
Utility Players
Marseille Turn
50%
5*
NORWAY
Wide (Containment Area)
Marseille Turn
50%
4*
NORWAY
Wide (Containment Area)
Marseille Turn
50%
3*
NORWAY
Wide (Containment Area)
Marseille Turn
50%
5*
Dutch League
Left foot
Marseille Turn
50%
4*
Dutch League
Left foot
Marseille Turn
50%
3*
Dutch League
Left foot
Marseille Turn
50%
5*
NORWAY
Dribbling
Marseille Turn
50%
4*
NORWAY
Dribbling
Marseille Turn
50%
3*
NORWAY
Dribbling
Marseille Turn
50%
5*
NORWAY
Frontline Pressure (Defensive Styles)
Marseille Turn
50%
4*
NORWAY
Frontline Pressure (Defensive Styles)
Marseille Turn
50%
3*
NORWAY
Frontline Pressure (Defensive Styles)
Marseille Turn
50%
5*
NORWAY
Strength On the Ball
Marseille Turn
50%
4*
NORWAY
Strength On the Ball
Marseille Turn
50%
3*
NORWAY
Strength On the Ball
Marseille Turn
50%
5*
NORWAY
Dribbling
Flip Flap
50%
4*
NORWAY
Dribbling
Flip Flap
50%
3*
NORWAY
Dribbling
Flip Flap
50%
5*
NORWAY
Dribbling
Long Range Drive
50%
4*
NORWAY
Dribbling
Long Range Drive
50%
3*
NORWAY
Dribbling
Long Range Drive
50%
3*
Strength On the Ball
Centre (Attacking Area)
Rabona
50%
5*
NORWAY
U-24
Rabona
50%
4*
NORWAY
U-24
Rabona
50%
3*
NORWAY
U-24
Rabona
50%
5*
NORWAY
Wide (Containment Area)
Rabona
50%
4*
NORWAY
Wide (Containment Area)
Rabona
50%
3*
NORWAY
Wide (Containment Area)
Rabona
50%
3*
Europe
Left foot
Rabona
50%
5*
NORWAY
Strength On the Ball
Rabona
50%
4*
NORWAY
Strength On the Ball
Rabona
50%
3*
NORWAY
Strength On the Ball
Rabona
50%
5*
NORWAY
Dribbling
Wide (Containment Area)
50%
4*
NORWAY
Dribbling
Wide (Containment Area)
50%
3*
NORWAY
Dribbling
Wide (Containment Area)
50%
5*
NORWAY
Strength On the Ball
Wide (Containment Area)
50%
4*
NORWAY
Strength On the Ball
Wide (Containment Area)
50%
3*
NORWAY
Strength On the Ball
Wide (Containment Area)
50%
5*
NORWAY
Pinpoint Crossing
-
50%
4*
NORWAY
Pinpoint Crossing
-
50%
3*
NORWAY
Pinpoint Crossing
-
50%
5*
NORWAY
Maintain Formation (Positioning)
Pinpoint Crossing
50%
4*
NORWAY
Maintain Formation (Positioning)
Pinpoint Crossing
50%
3*
NORWAY
Maintain Formation (Positioning)
Pinpoint Crossing
50%
5*
NORWAY
Centre (Attacking Area)
Pinpoint Crossing
50%
4*
NORWAY
Centre (Attacking Area)
Pinpoint Crossing
50%
3*
NORWAY
Centre (Attacking Area)
Pinpoint Crossing
50%
5*
NORWAY
U-24
Pinpoint Crossing
50%
4*
NORWAY
U-24
Pinpoint Crossing
50%
3*
NORWAY
U-24
Pinpoint Crossing
50%
5*
NORWAY
Aggressive (Pressuring)
Pinpoint Crossing
50%
4*
NORWAY
Aggressive (Pressuring)
Pinpoint Crossing
50%
3*
NORWAY
Aggressive (Pressuring)
Pinpoint Crossing
50%
5*
NORWAY
Utility Players
Pinpoint Crossing
50%
4*
NORWAY
Utility Players
Pinpoint Crossing
50%
3*
NORWAY
Utility Players
Pinpoint Crossing
50%
5*
NORWAY
Wide (Containment Area)
Pinpoint Crossing
50%
4*
NORWAY
Wide (Containment Area)
Pinpoint Crossing
50%
3*
NORWAY
Wide (Containment Area)
Pinpoint Crossing
50%
5*
NORWAY
Dribbling
Pinpoint Crossing
50%
4*
NORWAY
Dribbling
Pinpoint Crossing
50%
3*
NORWAY
Dribbling
Pinpoint Crossing
50%
5*
NORWAY
Frontline Pressure (Defensive Styles)
Pinpoint Crossing
50%
4*
NORWAY
Frontline Pressure (Defensive Styles)
Pinpoint Crossing
50%
3*
NORWAY
Frontline Pressure (Defensive Styles)
Pinpoint Crossing
50%
5*
NORWAY
Strength On the Ball
Pinpoint Crossing
50%
4*
NORWAY
Strength On the Ball
Pinpoint Crossing
50%
3*
NORWAY
Strength On the Ball
Pinpoint Crossing
50%
5*
SC HEERENVEEN
Ball Control
Left foot
50%
4*
SC HEERENVEEN
Ball Control
Left foot
50%
3*
SC HEERENVEEN
Ball Control
Left foot
50%
5*
Dutch League
Maintain Formation (Positioning)
Weighted Pass
50%
4*
Dutch League
Maintain Formation (Positioning)
Weighted Pass
50%
3*
Dutch League
Maintain Formation (Positioning)
Weighted Pass
50%
5*
Dutch League
Europe
Weighted Pass
50%
4*
Dutch League
Europe
Weighted Pass
50%
3*
Dutch League
Europe
Weighted Pass
50%
5*
Dutch League
Weighted Pass
-
50%
4*
Dutch League
Weighted Pass
-
50%
3*
Dutch League
Weighted Pass
-
50%
5*
Dutch League
Aggressive (Pressuring)
Weighted Pass
50%
4*
Dutch League
Aggressive (Pressuring)
Weighted Pass
50%
3*
Dutch League
Aggressive (Pressuring)
Weighted Pass
50%
5*
Dutch League
Utility Players
Weighted Pass
50%
4*
Dutch League
Utility Players
Weighted Pass
50%
3*
Dutch League
Utility Players
Weighted Pass
50%
5*
Dutch League
Wide (Containment Area)
Weighted Pass
50%
4*
Dutch League
Wide (Containment Area)
Weighted Pass
50%
3*
Dutch League
Wide (Containment Area)
Weighted Pass
50%
5*
Dutch League
Left foot
Weighted Pass
50%
4*
Dutch League
Left foot
Weighted Pass
50%
3*
Dutch League
Left foot
Weighted Pass
50%
5*
Dutch League
Dribbling
Weighted Pass
50%
4*
Dutch League
Dribbling
Weighted Pass
50%
3*
Dutch League
Dribbling
Weighted Pass
50%
5*
Dutch League
Frontline Pressure (Defensive Styles)
Weighted Pass
50%
4*
Dutch League
Frontline Pressure (Defensive Styles)
Weighted Pass
50%
3*
Dutch League
Frontline Pressure (Defensive Styles)
Weighted Pass
50%
5*
NORWAY
Sombrero
-
50%
4*
NORWAY
Sombrero
-
50%
3*
NORWAY
Sombrero
-
50%
5*
NORWAY
Maintain Formation (Positioning)
Sombrero
50%
4*
NORWAY
Maintain Formation (Positioning)
Sombrero
50%
3*
NORWAY
Maintain Formation (Positioning)
Sombrero
50%
5*
NORWAY
Centre (Attacking Area)
Sombrero
50%
4*
NORWAY
Centre (Attacking Area)
Sombrero
50%
3*
NORWAY
Centre (Attacking Area)
Sombrero
50%
5*
NORWAY
U-24
Sombrero
50%
4*
NORWAY
U-24
Sombrero
50%
3*
NORWAY
U-24
Sombrero
50%
5*
NORWAY
Aggressive (Pressuring)
Sombrero
50%
4*
NORWAY
Aggressive (Pressuring)
Sombrero
50%
3*
NORWAY
Aggressive (Pressuring)
Sombrero
50%
5*
NORWAY
Utility Players
Sombrero
50%
4*
NORWAY
Utility Players
Sombrero
50%
3*
NORWAY
Utility Players
Sombrero
50%
5*
NORWAY
Wide (Containment Area)
Sombrero
50%
4*
NORWAY
Wide (Containment Area)
Sombrero
50%
3*
NORWAY
Wide (Containment Area)
Sombrero
50%
5*
NORWAY
Dribbling
Sombrero
50%
4*
NORWAY
Dribbling
Sombrero
50%
3*
NORWAY
Dribbling
Sombrero
50%
5*
NORWAY
Frontline Pressure (Defensive Styles)
Sombrero
50%
4*
NORWAY
Frontline Pressure (Defensive Styles)
Sombrero
50%
3*
NORWAY
Frontline Pressure (Defensive Styles)
Sombrero
50%
5*
NORWAY
Strength On the Ball
Sombrero
50%
4*
NORWAY
Strength On the Ball
Sombrero
50%
3*
NORWAY
Strength On the Ball
Sombrero
50%
5*
NORWAY
Maintain Formation (Positioning)
Heel Trick
50%
4*
NORWAY
Maintain Formation (Positioning)
Heel Trick
50%
3*
NORWAY
Maintain Formation (Positioning)
Heel Trick
50%
5*
NORWAY
Centre (Attacking Area)
Heel Trick
50%
4*
NORWAY
Centre (Attacking Area)
Heel Trick
50%
3*
NORWAY
Centre (Attacking Area)
Heel Trick
50%
5*
NORWAY
Aggressive (Pressuring)
Heel Trick
50%
4*
NORWAY
Aggressive (Pressuring)
Heel Trick
50%
3*
NORWAY
Aggressive (Pressuring)
Heel Trick
50%
5*
NORWAY
Wide (Containment Area)
Heel Trick
50%
4*
NORWAY
Wide (Containment Area)
Heel Trick
50%
3*
NORWAY
Wide (Containment Area)
Heel Trick
50%
5*
NORWAY
Maintain Formation (Positioning)
Scissors Feint
50%
4*
NORWAY
Maintain Formation (Positioning)
Scissors Feint
50%
3*
NORWAY
Maintain Formation (Positioning)
Scissors Feint
50%
5*
NORWAY
Centre (Attacking Area)
Scissors Feint
50%
4*
NORWAY
Centre (Attacking Area)
Scissors Feint
50%
3*
NORWAY
Centre (Attacking Area)
Scissors Feint
50%
5*
NORWAY
Aggressive (Pressuring)
Scissors Feint
50%
4*
NORWAY
Aggressive (Pressuring)
Scissors Feint
50%
3*
NORWAY
Aggressive (Pressuring)
Scissors Feint
50%
5*
NORWAY
Wide (Containment Area)
Scissors Feint
50%
4*
NORWAY
Wide (Containment Area)
Scissors Feint
50%
3*
NORWAY
Wide (Containment Area)
Scissors Feint
50%
5*
NORWAY
Frontline Pressure (Defensive Styles)
Scissors Feint
50%
4*
NORWAY
Frontline Pressure (Defensive Styles)
Scissors Feint
50%
3*
NORWAY
Frontline Pressure (Defensive Styles)
Scissors Feint
50%
5*
NORWAY
Ball Control
Long-pass (Build Up)
50%
4*
NORWAY
Ball Control
Long-pass (Build Up)
50%
3*
NORWAY
Ball Control
Long-pass (Build Up)
50%
5*
NORWAY
Left foot
Long-pass (Build Up)
50%
4*
NORWAY
Left foot
Long-pass (Build Up)
50%
3*
NORWAY
Left foot
Long-pass (Build Up)
50%
5*
NORWAY
Long-pass (Build Up)
Weighted Pass
50%
4*
NORWAY
Long-pass (Build Up)
Weighted Pass
50%
3*
NORWAY
Long-pass (Build Up)
Weighted Pass
50%
5*
Dutch League
Ball Control
Marseille Turn
50%
4*
Dutch League
Ball Control
Marseille Turn
50%
3*
Dutch League
Ball Control
Marseille Turn
50%
5*
Dutch League
NORWAY
Flip Flap
50%
4*
Dutch League
NORWAY
Flip Flap
50%
3*
Dutch League
NORWAY
Flip Flap
50%
3*
Dutch League
Ball Control
Flip Flap
50%
5*
Dutch League
NORWAY
Heel Trick
50%
4*
Dutch League
NORWAY
Heel Trick
50%
3*
Dutch League
NORWAY
Heel Trick
50%
5*
NORWAY
U-24
Heel Trick
50%
4*
NORWAY
U-24
Heel Trick
50%
3*
NORWAY
U-24
Heel Trick
50%
5*
NORWAY
Utility Players
Heel Trick
50%
4*
NORWAY
Utility Players
Heel Trick
50%
3*
NORWAY
Utility Players
Heel Trick
50%
5*
NORWAY
Strength On the Ball
Heel Trick
50%
4*
NORWAY
Strength On the Ball
Heel Trick
50%
3*
NORWAY
Strength On the Ball
Heel Trick
50%
5*
Dutch League
Strength On the Ball
Heel Trick
50%
4*
Dutch League
Strength On the Ball
Heel Trick
50%
3*
Dutch League
Strength On the Ball
Heel Trick
50%
5*
Dutch League
Wide (Containment Area)
Scissors Feint
50%
4*
Dutch League
Wide (Containment Area)
Scissors Feint
50%
3*
Dutch League
Wide (Containment Area)
Scissors Feint
50%
5*
Dutch League
Left foot
Scissors Feint
50%
4*
Dutch League
Left foot
Scissors Feint
50%
3*
Dutch League
Left foot
Scissors Feint
50%
5*
SC HEERENVEEN
Incisive Run
-
50%
4*
SC HEERENVEEN
Incisive Run
-
50%
3*
SC HEERENVEEN
Incisive Run
-
50%
5*
SC HEERENVEEN
Maintain Formation (Positioning)
Incisive Run
50%
4*
SC HEERENVEEN
Maintain Formation (Positioning)
Incisive Run
50%
3*
SC HEERENVEEN
Maintain Formation (Positioning)
Incisive Run
50%
5*
SC HEERENVEEN
Centre (Attacking Area)
Incisive Run
50%
4*
SC HEERENVEEN
Centre (Attacking Area)
Incisive Run
50%
3*
SC HEERENVEEN
Centre (Attacking Area)
Incisive Run
50%
5*
SC HEERENVEEN
Aggressive (Pressuring)
Incisive Run
50%
4*
SC HEERENVEEN
Aggressive (Pressuring)
Incisive Run
50%
3*
SC HEERENVEEN
Aggressive (Pressuring)
Incisive Run
50%
5*
SC HEERENVEEN
Long-pass (Build Up)
Incisive Run
50%
4*
SC HEERENVEEN
Long-pass (Build Up)
Incisive Run
50%
3*
SC HEERENVEEN
Long-pass (Build Up)
Incisive Run
50%
5*
SC HEERENVEEN
Utility Players
Incisive Run
50%
4*
SC HEERENVEEN
Utility Players
Incisive Run
50%
3*
SC HEERENVEEN
Utility Players
Incisive Run
50%
5*
SC HEERENVEEN
Wide (Containment Area)
Incisive Run
50%
4*
SC HEERENVEEN
Wide (Containment Area)
Incisive Run
50%
3*
SC HEERENVEEN
Wide (Containment Area)
Incisive Run
50%
5*
SC HEERENVEEN
Counter Attack (Attacking Styles)
Incisive Run
50%
4*
SC HEERENVEEN
Counter Attack (Attacking Styles)
Incisive Run
50%
3*
SC HEERENVEEN
Counter Attack (Attacking Styles)
Incisive Run
50%
5*
SC HEERENVEEN
Left foot
Incisive Run
50%
4*
SC HEERENVEEN
Left foot
Incisive Run
50%
3*
SC HEERENVEEN
Left foot
Incisive Run
50%
5*
SC HEERENVEEN
Frontline Pressure (Defensive Styles)
Incisive Run
50%
4*
SC HEERENVEEN
Frontline Pressure (Defensive Styles)
Incisive Run
50%
3*
SC HEERENVEEN
Frontline Pressure (Defensive Styles)
Incisive Run
50%
5*
Dutch League
Strength On the Ball
Incisive Run
50%
4*
Dutch League
Strength On the Ball
Incisive Run
50%
3*
Dutch League
Strength On the Ball
Incisive Run
50%
5*
Dutch League
Long-pass (Build Up)
Long Range Drive
50%
4*
Dutch League
Long-pass (Build Up)
Long Range Drive
50%
3*
Dutch League
Long-pass (Build Up)
Long Range Drive
50%
5*
NORWAY
Counter Attack (Attacking Styles)
Long Range Drive
50%
4*
NORWAY
Counter Attack (Attacking Styles)
Long Range Drive
50%
3*
NORWAY
Counter Attack (Attacking Styles)
Long Range Drive
50%
5*
NORWAY
Ball Control
Long Range Drive
50%
4*
NORWAY
Ball Control
Long Range Drive
50%
3*
NORWAY
Ball Control
Long Range Drive
50%
5*
NORWAY
Left foot
Long Range Drive
50%
4*
NORWAY
Left foot
Long Range Drive
50%
3*
NORWAY
Left foot
Long Range Drive
50%
5*
SC HEERENVEEN
NORWAY
Utility Players
50%
4*
SC HEERENVEEN
NORWAY
Utility Players
50%
3*
SC HEERENVEEN
NORWAY
Utility Players
50%
5*
SC HEERENVEEN
Trickster
-
50%
4*
SC HEERENVEEN
Trickster
-
50%
3*
SC HEERENVEEN
Trickster
-
50%
5*
SC HEERENVEEN
Maintain Formation (Positioning)
Trickster
50%
4*
SC HEERENVEEN
Maintain Formation (Positioning)
Trickster
50%
3*
SC HEERENVEEN
Maintain Formation (Positioning)
Trickster
50%
5*
SC HEERENVEEN
Europe
Trickster
50%
4*
SC HEERENVEEN
Europe
Trickster
50%
3*
SC HEERENVEEN
Europe
Trickster
50%
5*
SC HEERENVEEN
Centre (Attacking Area)
Trickster
50%
4*
SC HEERENVEEN
Centre (Attacking Area)
Trickster
50%
3*
SC HEERENVEEN
Centre (Attacking Area)
Trickster
50%
5*
SC HEERENVEEN
U-24
Trickster
50%
4*
SC HEERENVEEN
U-24
Trickster
50%
3*
SC HEERENVEEN
U-24
Trickster
50%
5*
SC HEERENVEEN
Aggressive (Pressuring)
Trickster
50%
4*
SC HEERENVEEN
Aggressive (Pressuring)
Trickster
50%
3*
SC HEERENVEEN
Aggressive (Pressuring)
Trickster
50%
5*
SC HEERENVEEN
Long-pass (Build Up)
Trickster
50%
4*
SC HEERENVEEN
Long-pass (Build Up)
Trickster
50%
3*
SC HEERENVEEN
Long-pass (Build Up)
Trickster
50%
5*
SC HEERENVEEN
Utility Players
Trickster
50%
4*
SC HEERENVEEN
Utility Players
Trickster
50%
3*
SC HEERENVEEN
Utility Players
Trickster
50%
5*
SC HEERENVEEN
Wide (Containment Area)
Trickster
50%
4*
SC HEERENVEEN
Wide (Containment Area)
Trickster
50%
3*
SC HEERENVEEN
Wide (Containment Area)
Trickster
50%
5*
SC HEERENVEEN
Counter Attack (Attacking Styles)
Trickster
50%
4*
SC HEERENVEEN
Counter Attack (Attacking Styles)
Trickster
50%
3*
SC HEERENVEEN
Counter Attack (Attacking Styles)
Trickster
50%
5*
SC HEERENVEEN
Ball Control
Trickster
50%
4*
SC HEERENVEEN
Ball Control
Trickster
50%
3*
SC HEERENVEEN
Ball Control
Trickster
50%
5*
SC HEERENVEEN
Dribbling
Trickster
50%
4*
SC HEERENVEEN
Dribbling
Trickster
50%
3*
SC HEERENVEEN
Dribbling
Trickster
50%
5*
SC HEERENVEEN
Frontline Pressure (Defensive Styles)
Trickster
50%
4*
SC HEERENVEEN
Frontline Pressure (Defensive Styles)
Trickster
50%
3*
SC HEERENVEEN
Frontline Pressure (Defensive Styles)
Trickster
50%
3*
Dutch League
Maintain Formation (Positioning)
Pinpoint Crossing
50%
5*
Dutch League
Europe
Pinpoint Crossing
50%
4*
Dutch League
Europe
Pinpoint Crossing
50%
3*
Dutch League
Europe
Pinpoint Crossing
50%
3*
Dutch League
Pinpoint Crossing
-
50%
3*
Dutch League
U-24
Pinpoint Crossing
50%
3*
Dutch League
Aggressive (Pressuring)
Pinpoint Crossing
50%
3*
Dutch League
Utility Players
Pinpoint Crossing
50%
3*
Dutch League
Counter Attack (Attacking Styles)
Pinpoint Crossing
50%
3*
Dutch League
Ball Control
Pinpoint Crossing
50%
3*
Dutch League
Left foot
Pinpoint Crossing
50%
3*
Dutch League
Dribbling
Pinpoint Crossing
50%
3*
Left foot
Centre (Attacking Area)
Sombrero
50%
3*
Europe
Left foot
Sombrero
50%
5*
Dutch League
NORWAY
Strength On the Ball
50%
4*
Dutch League
NORWAY
Strength On the Ball
50%
3*
Dutch League
NORWAY
Strength On the Ball
50%
5*
SC HEERENVEEN
Marseille Turn
-
50%
4*
SC HEERENVEEN
Marseille Turn
-
50%
3*
SC HEERENVEEN
Marseille Turn
-
50%
5*
SC HEERENVEEN
Maintain Formation (Positioning)
Marseille Turn
50%
4*
SC HEERENVEEN
Maintain Formation (Positioning)
Marseille Turn
50%
3*
SC HEERENVEEN
Maintain Formation (Positioning)
Marseille Turn
50%
5*
SC HEERENVEEN
Centre (Attacking Area)
Marseille Turn
50%
4*
SC HEERENVEEN
Centre (Attacking Area)
Marseille Turn
50%
3*
SC HEERENVEEN
Centre (Attacking Area)
Marseille Turn
50%
5*
SC HEERENVEEN
Aggressive (Pressuring)
Marseille Turn
50%
4*
SC HEERENVEEN
Aggressive (Pressuring)
Marseille Turn
50%
3*
SC HEERENVEEN
Aggressive (Pressuring)
Marseille Turn
50%
5*
SC HEERENVEEN
Long-pass (Build Up)
Marseille Turn
50%
4*
SC HEERENVEEN
Long-pass (Build Up)
Marseille Turn
50%
3*
SC HEERENVEEN
Long-pass (Build Up)
Marseille Turn
50%
5*
SC HEERENVEEN
Utility Players
Marseille Turn
50%
4*
SC HEERENVEEN
Utility Players
Marseille Turn
50%
3*
SC HEERENVEEN
Utility Players
Marseille Turn
50%
5*
SC HEERENVEEN
Wide (Containment Area)
Marseille Turn
50%
4*
SC HEERENVEEN
Wide (Containment Area)
Marseille Turn
50%
3*
SC HEERENVEEN
Wide (Containment Area)
Marseille Turn
50%
5*
SC HEERENVEEN
Counter Attack (Attacking Styles)
Marseille Turn
50%
4*
SC HEERENVEEN
Counter Attack (Attacking Styles)
Marseille Turn
50%
3*
SC HEERENVEEN
Counter Attack (Attacking Styles)
Marseille Turn
50%
5*
SC HEERENVEEN
Dribbling
Marseille Turn
50%
4*
SC HEERENVEEN
Dribbling
Marseille Turn
50%
3*
SC HEERENVEEN
Dribbling
Marseille Turn
50%
5*
SC HEERENVEEN
Frontline Pressure (Defensive Styles)
Marseille Turn
50%
4*
SC HEERENVEEN
Frontline Pressure (Defensive Styles)
Marseille Turn
50%
3*
SC HEERENVEEN
Frontline Pressure (Defensive Styles)
Marseille Turn
50%
5*
SC HEERENVEEN
Strength On the Ball
Marseille Turn
50%
4*
SC HEERENVEEN
Strength On the Ball
Marseille Turn
50%
3*
SC HEERENVEEN
Strength On the Ball
Marseille Turn
50%
5*
SC HEERENVEEN
Heel Trick
-
50%
4*
SC HEERENVEEN
Heel Trick
-
50%
3*
SC HEERENVEEN
Heel Trick
-
50%
5*
SC HEERENVEEN
Maintain Formation (Positioning)
Heel Trick
50%
4*
SC HEERENVEEN
Maintain Formation (Positioning)
Heel Trick
50%
3*
SC HEERENVEEN
Maintain Formation (Positioning)
Heel Trick
50%
5*
Dutch League
Maintain Formation (Positioning)
Heel Trick
50%
4*
Dutch League
Maintain Formation (Positioning)
Heel Trick
50%
3*
Dutch League
Maintain Formation (Positioning)
Heel Trick
50%
5*
SC HEERENVEEN
Centre (Attacking Area)
Heel Trick
50%
4*
SC HEERENVEEN
Centre (Attacking Area)
Heel Trick
50%
3*
SC HEERENVEEN
Centre (Attacking Area)
Heel Trick
50%
5*
SC HEERENVEEN
AMF
Heel Trick
50%
4*
SC HEERENVEEN
AMF
Heel Trick
50%
3*
SC HEERENVEEN
AMF
Heel Trick
50%
5*
SC HEERENVEEN
Aggressive (Pressuring)
Heel Trick
50%
4*
SC HEERENVEEN
Aggressive (Pressuring)
Heel Trick
50%
3*
SC HEERENVEEN
Aggressive (Pressuring)
Heel Trick
50%
5*
SC HEERENVEEN
Long-pass (Build Up)
Heel Trick
50%
4*
SC HEERENVEEN
Long-pass (Build Up)
Heel Trick
50%
3*
SC HEERENVEEN
Long-pass (Build Up)
Heel Trick
50%
5*
Dutch League
Long-pass (Build Up)
Heel Trick
50%
4*
Dutch League
Long-pass (Build Up)
Heel Trick
50%
3*
Dutch League
Long-pass (Build Up)
Heel Trick
50%
5*
SC HEERENVEEN
Utility Players
Heel Trick
50%
4*
SC HEERENVEEN
Utility Players
Heel Trick
50%
3*
SC HEERENVEEN
Utility Players
Heel Trick
50%
5*
SC HEERENVEEN
Wide (Containment Area)
Heel Trick
50%
4*
SC HEERENVEEN
Wide (Containment Area)
Heel Trick
50%
3*
SC HEERENVEEN
Wide (Containment Area)
Heel Trick
50%
5*
Dutch League
Wide (Containment Area)
Heel Trick
50%
4*
Dutch League
Wide (Containment Area)
Heel Trick
50%
3*
Dutch League
Wide (Containment Area)
Heel Trick
50%
5*
SC HEERENVEEN
Counter Attack (Attacking Styles)
Heel Trick
50%
4*
SC HEERENVEEN
Counter Attack (Attacking Styles)
Heel Trick
50%
3*
SC HEERENVEEN
Counter Attack (Attacking Styles)
Heel Trick
50%
5*
Dutch League
Counter Attack (Attacking Styles)
Heel Trick
50%
4*
Dutch League
Counter Attack (Attacking Styles)
Heel Trick
50%
3*
Dutch League
Counter Attack (Attacking Styles)
Heel Trick
50%
5*
SC HEERENVEEN
Left foot
Heel Trick
50%
4*
SC HEERENVEEN
Left foot
Heel Trick
50%
3*
SC HEERENVEEN
Left foot
Heel Trick
50%
5*
Dutch League
Left foot
Heel Trick
50%
4*
Dutch League
Left foot
Heel Trick
50%
3*
Dutch League
Left foot
Heel Trick
50%
5*
SC HEERENVEEN
Frontline Pressure (Defensive Styles)
Heel Trick
50%
4*
SC HEERENVEEN
Frontline Pressure (Defensive Styles)
Heel Trick
50%
3*
SC HEERENVEEN
Frontline Pressure (Defensive Styles)
Heel Trick
50%
5*
SC HEERENVEEN
Europe
AMF
50%
4*
SC HEERENVEEN
Europe
AMF
50%
3*
SC HEERENVEEN
Europe
AMF
50%
5*
SC HEERENVEEN
AMF
U-24
50%
4*
SC HEERENVEEN
AMF
U-24
50%
3*
SC HEERENVEEN
AMF
U-24
50%
3*
Dutch League
AMF
Long Range Drive
50%
5*
SC HEERENVEEN
AMF
Left foot
50%
4*
SC HEERENVEEN
AMF
Left foot
50%
3*
SC HEERENVEEN
AMF
Left foot
50%
5*
NORWAY
Strength On the Ball
Left foot
50%
4*
NORWAY
Strength On the Ball
Left foot
50%
3*
NORWAY
Strength On the Ball
Left foot
50%
5*
NORWAY
Strength On the Ball
Weighted Pass
50%
4*
NORWAY
Strength On the Ball
Weighted Pass
50%
3*
NORWAY
Strength On the Ball
Weighted Pass
50%
5*
Left foot
Long-pass (Build Up)
Sombrero
50%
4*
Left foot
Long-pass (Build Up)
Sombrero
50%
3*
Left foot
Long-pass (Build Up)
Sombrero
50%
5*
SC HEERENVEEN
Utility Players
Strength On the Ball
50%
4*
SC HEERENVEEN
Utility Players
Strength On the Ball
50%
3*
SC HEERENVEEN
Utility Players
Strength On the Ball
50%
5*
NORWAY
U-24
Scissors Feint
50%
4*
NORWAY
U-24
Scissors Feint
50%
3*
NORWAY
U-24
Scissors Feint
50%
5*
NORWAY
Utility Players
Scissors Feint
50%
4*
NORWAY
Utility Players
Scissors Feint
50%
3*
NORWAY
Utility Players
Scissors Feint
50%
5*
NORWAY
Ball Control
Scissors Feint
50%
4*
NORWAY
Ball Control
Scissors Feint
50%
3*
NORWAY
Ball Control
Scissors Feint
50%
5*
NORWAY
Dribbling
Scissors Feint
50%
4*
NORWAY
Dribbling
Scissors Feint
50%
3*
NORWAY
Dribbling
Scissors Feint
50%
5*
NORWAY
Ball Control
Incisive Run
50%
4*
NORWAY
Ball Control
Incisive Run
50%
3*
NORWAY
Ball Control
Incisive Run
50%
5*
NORWAY
Ball Control
Trickster
50%
4*
NORWAY
Ball Control
Trickster
50%
3*
NORWAY
Ball Control
Trickster
50%
5*
Dutch League
NORWAY
Ball Control
50%
4*
Dutch League
NORWAY
Ball Control
50%
3*
Dutch League
NORWAY
Ball Control
50%
5*
Dutch League
U-24
Marseille Turn
50%
4*
Dutch League
U-24
Marseille Turn
50%
3*
Dutch League
U-24
Marseille Turn
50%
5*
Dutch League
Ball Control
Heel Trick
50%
4*
Dutch League
Ball Control
Heel Trick
50%
3*
Dutch League
Ball Control
Heel Trick
50%
5*
Dutch League
Dribbling
Heel Trick
50%
4*
Dutch League
Dribbling
Heel Trick
50%
3*
Dutch League
Dribbling
Heel Trick
50%
5*
NORWAY
Left foot
Trickster
50%
4*
NORWAY
Left foot
Trickster
50%
3*
NORWAY
Left foot
Trickster
50%
3*
U-24
Long-pass (Build Up)
Rabona
50%
5*
NORWAY
Long-pass (Build Up)
Incisive Run
50%
4*
NORWAY
Long-pass (Build Up)
Incisive Run
50%
3*
NORWAY
Long-pass (Build Up)
Incisive Run
50%
5*
NORWAY
Dribbling
Long-pass (Build Up)
50%
4*
NORWAY
Dribbling
Long-pass (Build Up)
50%
3*
NORWAY
Dribbling
Long-pass (Build Up)
50%
5*
NORWAY
Strength On the Ball
Long-pass (Build Up)
50%
4*
NORWAY
Strength On the Ball
Long-pass (Build Up)
50%
3*
NORWAY
Strength On the Ball
Long-pass (Build Up)
50%
5*
NORWAY
Long-pass (Build Up)
Trickster
50%
4*
NORWAY
Long-pass (Build Up)
Trickster
50%
3*
NORWAY
Long-pass (Build Up)
Trickster
50%
5*
NORWAY
Counter Attack (Attacking Styles)
Trickster
50%
4*
NORWAY
Counter Attack (Attacking Styles)
Trickster
50%
3*
NORWAY
Counter Attack (Attacking Styles)
Trickster
50%
5*
NORWAY
Dribbling
Counter Attack (Attacking Styles)
50%
4*
NORWAY
Dribbling
Counter Attack (Attacking Styles)
50%
3*
NORWAY
Dribbling
Counter Attack (Attacking Styles)
50%
5*
NORWAY
Strength On the Ball
Counter Attack (Attacking Styles)
50%
4*
NORWAY
Strength On the Ball
Counter Attack (Attacking Styles)
50%
3*
NORWAY
Strength On the Ball
Counter Attack (Attacking Styles)
50%
5*
SC HEERENVEEN
Dribbling
Left foot
50%
4*
SC HEERENVEEN
Dribbling
Left foot
50%
3*
SC HEERENVEEN
Dribbling
Left foot
50%
5*
SC HEERENVEEN
Europe
Strength On the Ball
50%
4*
SC HEERENVEEN
Europe
Strength On the Ball
50%
3*
SC HEERENVEEN
Europe
Strength On the Ball
50%
5*
NORWAY
AMF
Maintain Formation (Positioning)
50%
4*
NORWAY
AMF
Maintain Formation (Positioning)
50%
3*
NORWAY
AMF
Maintain Formation (Positioning)
50%
5*
Dutch League
NORWAY
AMF
50%
4*
Dutch League
NORWAY
AMF
50%
3*
Dutch League
NORWAY
AMF
50%
5*
NORWAY
AMF
-
50%
4*
NORWAY
AMF
-
50%
3*
NORWAY
AMF
-
50%
5*
NORWAY
AMF
U-24
50%
4*
NORWAY
AMF
U-24
50%
3*
NORWAY
AMF
U-24
50%
5*
NORWAY
AMF
Aggressive (Pressuring)
50%
4*
NORWAY
AMF
Aggressive (Pressuring)
50%
3*
NORWAY
AMF
Aggressive (Pressuring)
50%
5*
NORWAY
AMF
Wide (Containment Area)
50%
4*
NORWAY
AMF
Wide (Containment Area)
50%
3*
NORWAY
AMF
Wide (Containment Area)
50%
5*
NORWAY
AMF
Frontline Pressure (Defensive Styles)
50%
4*
NORWAY
AMF
Frontline Pressure (Defensive Styles)
50%
3*
NORWAY
AMF
Frontline Pressure (Defensive Styles)
50%
5*
Dutch League
Maintain Formation (Positioning)
Creative Playmaker
33%
4*
Dutch League
Maintain Formation (Positioning)
Creative Playmaker
33%
5*
Dutch League
Creative Playmaker
-
33%
4*
Dutch League
Creative Playmaker
-
33%
5*
Dutch League
Centre (Attacking Area)
Creative Playmaker
33%
4*
Dutch League
Centre (Attacking Area)
Creative Playmaker
33%
5*
Dutch League
Aggressive (Pressuring)
Creative Playmaker
33%
4*
Dutch League
Aggressive (Pressuring)
Creative Playmaker
33%
5*
Dutch League
Utility Players
Creative Playmaker
33%
4*
Dutch League
Utility Players
Creative Playmaker
33%
5*
Dutch League
Wide (Containment Area)
Creative Playmaker
33%
4*
Dutch League
Wide (Containment Area)
Creative Playmaker
33%
5*
Dutch League
Counter Attack (Attacking Styles)
Creative Playmaker
33%
4*
Dutch League
Counter Attack (Attacking Styles)
Creative Playmaker
33%
5*
Dutch League
Frontline Pressure (Defensive Styles)
Creative Playmaker
33%
4*
Dutch League
Frontline Pressure (Defensive Styles)
Creative Playmaker
33%
4*
Europe
Left foot
Rabona
33%
5*
Dutch League
Ball Control
Flip Flap
33%
4*
Dutch League
Ball Control
Flip Flap
33%
3*
AMF
Strength On the Ball
Flip Flap
33%
5*
Dutch League
AMF
Long Range Drive
33%
4*
Dutch League
AMF
Long Range Drive
33%
3*
Europe
Strength On the Ball
Rabona
33%
5*
Dutch League
Maintain Formation (Positioning)
Pinpoint Crossing
33%
4*
Dutch League
Maintain Formation (Positioning)
Pinpoint Crossing
33%
5*
Dutch League
Pinpoint Crossing
-
33%
4*
Dutch League
Pinpoint Crossing
-
33%
5*
Dutch League
U-24
Pinpoint Crossing
33%
4*
Dutch League
U-24
Pinpoint Crossing
33%
5*
Dutch League
Aggressive (Pressuring)
Pinpoint Crossing
33%
4*
Dutch League
Aggressive (Pressuring)
Pinpoint Crossing
33%
5*
Dutch League
Utility Players
Pinpoint Crossing
33%
4*
Dutch League
Utility Players
Pinpoint Crossing
33%
5*
Dutch League
Counter Attack (Attacking Styles)
Pinpoint Crossing
33%
4*
Dutch League
Counter Attack (Attacking Styles)
Pinpoint Crossing
33%
5*
Dutch League
Ball Control
Pinpoint Crossing
33%
4*
Dutch League
Ball Control
Pinpoint Crossing
33%
5*
Dutch League
Left foot
Pinpoint Crossing
33%
4*
Dutch League
Left foot
Pinpoint Crossing
33%
5*
Dutch League
Dribbling
Pinpoint Crossing
33%
4*
Dutch League
Dribbling
Pinpoint Crossing
33%
5*
NORWAY
Maintain Formation (Positioning)
Flip Flap
33%
4*
NORWAY
Maintain Formation (Positioning)
Flip Flap
33%
3*
NORWAY
Maintain Formation (Positioning)
Flip Flap
33%
5*
NORWAY
Centre (Attacking Area)
Flip Flap
33%
4*
NORWAY
Centre (Attacking Area)
Flip Flap
33%
3*
NORWAY
Centre (Attacking Area)
Flip Flap
33%
5*
NORWAY
Aggressive (Pressuring)
Flip Flap
33%
4*
NORWAY
Aggressive (Pressuring)
Flip Flap
33%
3*
NORWAY
Aggressive (Pressuring)
Flip Flap
33%
5*
NORWAY
Wide (Containment Area)
Flip Flap
33%
4*
NORWAY
Wide (Containment Area)
Flip Flap
33%
3*
NORWAY
Wide (Containment Area)
Flip Flap
33%
3*
Dutch League
Wide (Containment Area)
Flip Flap
33%
3*
Dutch League
Left foot
Flip Flap
33%
3*
Dutch League
Dribbling
Flip Flap
33%
5*
NORWAY
Wide (Containment Area)
Trickster
33%
4*
NORWAY
Wide (Containment Area)
Trickster
33%
3*
NORWAY
Wide (Containment Area)
Trickster
33%
5*
SC HEERENVEEN
Utility Players
Ball Control
33%
4*
SC HEERENVEEN
Utility Players
Ball Control
33%
3*
SC HEERENVEEN
Utility Players
Ball Control
33%
5*
NORWAY
U-24
Weighted Pass
33%
4*
NORWAY
U-24
Weighted Pass
33%
3*
NORWAY
U-24
Weighted Pass
33%
3*
Dutch League
Wide (Containment Area)
Marseille Turn
33%
5*
Dutch League
Dribbling
Marseille Turn
33%
4*
Dutch League
Dribbling
Marseille Turn
33%
3*
Dutch League
Dribbling
Marseille Turn
33%
5*
NORWAY
U-24
Flip Flap
33%
4*
NORWAY
U-24
Flip Flap
33%
3*
NORWAY
U-24
Flip Flap
33%
5*
NORWAY
Utility Players
Flip Flap
33%
4*
NORWAY
Utility Players
Flip Flap
33%
3*
NORWAY
Utility Players
Flip Flap
33%
5*
NORWAY
Strength On the Ball
Flip Flap
33%
4*
NORWAY
Strength On the Ball
Flip Flap
33%
3*
NORWAY
Strength On the Ball
Flip Flap
33%
5*
NORWAY
Heel Trick
-
33%
4*
NORWAY
Heel Trick
-
33%
3*
NORWAY
Heel Trick
-
33%
5*
NORWAY
Frontline Pressure (Defensive Styles)
Heel Trick
33%
4*
NORWAY
Frontline Pressure (Defensive Styles)
Heel Trick
33%
3*
NORWAY
Frontline Pressure (Defensive Styles)
Heel Trick
33%
3*
Dutch League
Centre (Attacking Area)
Long Range Drive
33%
5*
NORWAY
Rabona
-
33%
4*
NORWAY
Rabona
-
33%
3*
NORWAY
Rabona
-
33%
5*
NORWAY
Maintain Formation (Positioning)
Rabona
33%
4*
NORWAY
Maintain Formation (Positioning)
Rabona
33%
3*
NORWAY
Maintain Formation (Positioning)
Rabona
33%
5*
NORWAY
Centre (Attacking Area)
Rabona
33%
4*
NORWAY
Centre (Attacking Area)
Rabona
33%
3*
NORWAY
Centre (Attacking Area)
Rabona
33%
5*
NORWAY
Aggressive (Pressuring)
Rabona
33%
4*
NORWAY
Aggressive (Pressuring)
Rabona
33%
3*
NORWAY
Aggressive (Pressuring)
Rabona
33%
5*
NORWAY
Utility Players
Rabona
33%
4*
NORWAY
Utility Players
Rabona
33%
3*
NORWAY
Utility Players
Rabona
33%
5*
NORWAY
Dribbling
Rabona
33%
4*
NORWAY
Dribbling
Rabona
33%
3*
NORWAY
Dribbling
Rabona
33%
5*
NORWAY
Frontline Pressure (Defensive Styles)
Rabona
33%
4*
NORWAY
Frontline Pressure (Defensive Styles)
Rabona
33%
3*
NORWAY
Frontline Pressure (Defensive Styles)
Rabona
33%
5*
NORWAY
Ball Control
Wide (Containment Area)
33%
4*
NORWAY
Ball Control
Wide (Containment Area)
33%
3*
NORWAY
Ball Control
Wide (Containment Area)
33%
5*
NORWAY
Ball Control
Left foot
33%
4*
NORWAY
Ball Control
Left foot
33%
3*
NORWAY
Ball Control
Left foot
33%
5*
NORWAY
Wide (Containment Area)
Weighted Pass
33%
4*
NORWAY
Wide (Containment Area)
Weighted Pass
33%
3*
NORWAY
Wide (Containment Area)
Weighted Pass
33%
5*
NORWAY
Ball Control
Weighted Pass
33%
4*
NORWAY
Ball Control
Weighted Pass
33%
3*
NORWAY
Ball Control
Weighted Pass
33%
3*
Dutch League
Europe
Marseille Turn
33%
3*
Dutch League
Centre (Attacking Area)
Flip Flap
33%
3*
Dutch League
Counter Attack (Attacking Styles)
Flip Flap
33%
5*
Dutch League
Strength On the Ball
Flip Flap
33%
4*
Dutch League
Strength On the Ball
Flip Flap
33%
3*
Dutch League
Strength On the Ball
Flip Flap
33%
5*
NORWAY
Scissors Feint
-
33%
4*
NORWAY
Scissors Feint
-
33%
3*
NORWAY
Scissors Feint
-
33%
5*
Dutch League
Maintain Formation (Positioning)
Scissors Feint
33%
4*
Dutch League
Maintain Formation (Positioning)
Scissors Feint
33%
3*
Dutch League
Maintain Formation (Positioning)
Scissors Feint
33%
5*
Dutch League
Centre (Attacking Area)
Scissors Feint
33%
4*
Dutch League
Centre (Attacking Area)
Scissors Feint
33%
3*
Dutch League
Centre (Attacking Area)
Scissors Feint
33%
5*
Dutch League
U-24
Scissors Feint
33%
4*
Dutch League
U-24
Scissors Feint
33%
3*
Dutch League
U-24
Scissors Feint
33%
5*
Dutch League
Counter Attack (Attacking Styles)
Scissors Feint
33%
4*
Dutch League
Counter Attack (Attacking Styles)
Scissors Feint
33%
3*
Dutch League
Counter Attack (Attacking Styles)
Scissors Feint
33%
5*
Dutch League
Frontline Pressure (Defensive Styles)
Scissors Feint
33%
4*
Dutch League
Frontline Pressure (Defensive Styles)
Scissors Feint
33%
3*
Dutch League
Frontline Pressure (Defensive Styles)
Scissors Feint
33%
5*
NORWAY
Wide (Containment Area)
Incisive Run
33%
4*
NORWAY
Wide (Containment Area)
Incisive Run
33%
3*
NORWAY
Wide (Containment Area)
Incisive Run
33%
3*
Dutch League
U-24
Long Range Drive
33%
3*
Dutch League
Ball Control
Long Range Drive
33%
5*
NORWAY
Left foot
Counter Attack (Attacking Styles)
33%
4*
NORWAY
Left foot
Counter Attack (Attacking Styles)
33%
3*
NORWAY
Left foot
Counter Attack (Attacking Styles)
33%
5*
SC HEERENVEEN
Utility Players
Dribbling
33%
4*
SC HEERENVEEN
Utility Players
Dribbling
33%
3*
SC HEERENVEEN
Utility Players
Dribbling
33%
5*
Strength On the Ball
Long-pass (Build Up)
Sombrero
33%
4*
Strength On the Ball
Long-pass (Build Up)
Sombrero
33%
3*
Strength On the Ball
Long-pass (Build Up)
Sombrero
33%
5*
SC HEERENVEEN
NORWAY
-
33%
4*
SC HEERENVEEN
NORWAY
-
33%
3*
SC HEERENVEEN
NORWAY
-
33%
3*
Dutch League
Centre (Attacking Area)
Marseille Turn
33%
5*
Dutch League
Strength On the Ball
Marseille Turn
33%
4*
Dutch League
Strength On the Ball
Marseille Turn
33%
3*
Dutch League
Strength On the Ball
Marseille Turn
33%
5*
SC HEERENVEEN
NORWAY
Maintain Formation (Positioning)
33%
4*
SC HEERENVEEN
NORWAY
Maintain Formation (Positioning)
33%
3*
SC HEERENVEEN
NORWAY
Maintain Formation (Positioning)
33%
5*
SC HEERENVEEN
AMF
Maintain Formation (Positioning)
33%
4*
SC HEERENVEEN
AMF
Maintain Formation (Positioning)
33%
3*
SC HEERENVEEN
AMF
Maintain Formation (Positioning)
33%
5*
SC HEERENVEEN
NORWAY
Centre (Attacking Area)
33%
4*
SC HEERENVEEN
NORWAY
Centre (Attacking Area)
33%
3*
SC HEERENVEEN
NORWAY
Centre (Attacking Area)
33%
5*
SC HEERENVEEN
AMF
Centre (Attacking Area)
33%
4*
SC HEERENVEEN
AMF
Centre (Attacking Area)
33%
3*
SC HEERENVEEN
AMF
Centre (Attacking Area)
33%
5*
Dutch League
NORWAY
Incisive Run
33%
4*
Dutch League
NORWAY
Incisive Run
33%
3*
Dutch League
NORWAY
Incisive Run
33%
5*
Dutch League
Long-pass (Build Up)
Incisive Run
33%
4*
Dutch League
Long-pass (Build Up)
Incisive Run
33%
3*
Dutch League
Long-pass (Build Up)
Incisive Run
33%
5*
SC HEERENVEEN
AMF
-
33%
4*
SC HEERENVEEN
AMF
-
33%
3*
SC HEERENVEEN
AMF
-
33%
5*
SC HEERENVEEN
NORWAY
U-24
33%
4*
SC HEERENVEEN
NORWAY
U-24
33%
3*
SC HEERENVEEN
NORWAY
U-24
33%
5*
NORWAY
Strength On the Ball
Long Range Drive
33%
4*
NORWAY
Strength On the Ball
Long Range Drive
33%
3*
NORWAY
Strength On the Ball
Long Range Drive
33%
5*
Dutch League
Strength On the Ball
Long Range Drive
33%
4*
Dutch League
Strength On the Ball
Long Range Drive
33%
3*
Dutch League
Strength On the Ball
Long Range Drive
33%
5*
SC HEERENVEEN
NORWAY
Aggressive (Pressuring)
33%
4*
SC HEERENVEEN
NORWAY
Aggressive (Pressuring)
33%
3*
SC HEERENVEEN
NORWAY
Aggressive (Pressuring)
33%
5*
SC HEERENVEEN
AMF
Aggressive (Pressuring)
33%
4*
SC HEERENVEEN
AMF
Aggressive (Pressuring)
33%
3*
SC HEERENVEEN
AMF
Aggressive (Pressuring)
33%
5*
SC HEERENVEEN
NORWAY
Long-pass (Build Up)
33%
4*
SC HEERENVEEN
NORWAY
Long-pass (Build Up)
33%
3*
SC HEERENVEEN
NORWAY
Long-pass (Build Up)
33%
5*
Dutch League
NORWAY
Long-pass (Build Up)
33%
4*
Dutch League
NORWAY
Long-pass (Build Up)
33%
3*
Dutch League
NORWAY
Long-pass (Build Up)
33%
5*
SC HEERENVEEN
AMF
Long-pass (Build Up)
33%
4*
SC HEERENVEEN
AMF
Long-pass (Build Up)
33%
3*
SC HEERENVEEN
AMF
Long-pass (Build Up)
33%
5*
U-24
Long-pass (Build Up)
Rabona
33%
4*
U-24
Long-pass (Build Up)
Rabona
33%
5*
SC HEERENVEEN
NORWAY
Wide (Containment Area)
33%
4*
SC HEERENVEEN
NORWAY
Wide (Containment Area)
33%
3*
SC HEERENVEEN
NORWAY
Wide (Containment Area)
33%
5*
SC HEERENVEEN
AMF
Wide (Containment Area)
33%
4*
SC HEERENVEEN
AMF
Wide (Containment Area)
33%
3*
SC HEERENVEEN
AMF
Wide (Containment Area)
33%
5*
SC HEERENVEEN
NORWAY
Counter Attack (Attacking Styles)
33%
4*
SC HEERENVEEN
NORWAY
Counter Attack (Attacking Styles)
33%
3*
SC HEERENVEEN
NORWAY
Counter Attack (Attacking Styles)
33%
5*
SC HEERENVEEN
AMF
Counter Attack (Attacking Styles)
33%
4*
SC HEERENVEEN
AMF
Counter Attack (Attacking Styles)
33%
3*
SC HEERENVEEN
AMF
Counter Attack (Attacking Styles)
33%
5*
SC HEERENVEEN
NORWAY
Frontline Pressure (Defensive Styles)
33%
4*
SC HEERENVEEN
NORWAY
Frontline Pressure (Defensive Styles)
33%
3*
SC HEERENVEEN
NORWAY
Frontline Pressure (Defensive Styles)
33%
5*
SC HEERENVEEN
AMF
Frontline Pressure (Defensive Styles)
33%
4*
SC HEERENVEEN
AMF
Frontline Pressure (Defensive Styles)
33%
3*
SC HEERENVEEN
AMF
Frontline Pressure (Defensive Styles)
33%
5*
Dutch League
Europe
Heel Trick
33%
4*
Dutch League
Europe
Heel Trick
33%
3*
Dutch League
Europe
Heel Trick
33%
5*
Dutch League
Centre (Attacking Area)
Heel Trick
33%
4*
Dutch League
Centre (Attacking Area)
Heel Trick
33%
3*
Dutch League
Centre (Attacking Area)
Heel Trick
33%
5*
Dutch League
AMF
Heel Trick
33%
4*
Dutch League
AMF
Heel Trick
33%
3*
Dutch League
AMF
Heel Trick
33%
5*
Dutch League
U-24
Heel Trick
33%
4*
Dutch League
U-24
Heel Trick
33%
3*
Dutch League
U-24
Heel Trick
33%
5*
Dutch League
Aggressive (Pressuring)
Heel Trick
33%
4*
Dutch League
Aggressive (Pressuring)
Heel Trick
33%
3*
Dutch League
Aggressive (Pressuring)
Heel Trick
33%
5*
NORWAY
Strength On the Ball
Trickster
33%
4*
NORWAY
Strength On the Ball
Trickster
33%
3*
NORWAY
Strength On the Ball
Trickster
33%
5*
Dutch League
Long-pass (Build Up)
Marseille Turn
33%
4*
Dutch League
Long-pass (Build Up)
Marseille Turn
33%
3*
Dutch League
Long-pass (Build Up)
Marseille Turn
33%
4*
Strength On the Ball
Counter Attack (Attacking Styles)
Heel Trick
33%
3*
Strength On the Ball
Counter Attack (Attacking Styles)
Heel Trick
33%
5*
SC HEERENVEEN
U-24
Ball Control
33%
4*
SC HEERENVEEN
U-24
Ball Control
33%
3*
SC HEERENVEEN
U-24
Ball Control
33%
3*
Strength On the Ball
Long-pass (Build Up)
Flip Flap
33%
5*
SC HEERENVEEN
Strength On the Ball
Maintain Formation (Positioning)
33%
4*
SC HEERENVEEN
Strength On the Ball
Maintain Formation (Positioning)
33%
3*
SC HEERENVEEN
Strength On the Ball
Maintain Formation (Positioning)
33%
5*
SC HEERENVEEN
Strength On the Ball
Centre (Attacking Area)
33%
4*
SC HEERENVEEN
Strength On the Ball
Centre (Attacking Area)
33%
3*
SC HEERENVEEN
Strength On the Ball
Centre (Attacking Area)
33%
5*
NORWAY
Counter Attack (Attacking Styles)
Incisive Run
33%
4*
NORWAY
Counter Attack (Attacking Styles)
Incisive Run
33%
3*
NORWAY
Counter Attack (Attacking Styles)
Incisive Run
33%
5*
SC HEERENVEEN
Strength On the Ball
Aggressive (Pressuring)
33%
4*
SC HEERENVEEN
Strength On the Ball
Aggressive (Pressuring)
33%
3*
SC HEERENVEEN
Strength On the Ball
Aggressive (Pressuring)
33%
5*
SC HEERENVEEN
Strength On the Ball
Long-pass (Build Up)
33%
4*
SC HEERENVEEN
Strength On the Ball
Long-pass (Build Up)
33%
3*
SC HEERENVEEN
Strength On the Ball
Long-pass (Build Up)
33%
5*
SC HEERENVEEN
Strength On the Ball
Wide (Containment Area)
33%
4*
SC HEERENVEEN
Strength On the Ball
Wide (Containment Area)
33%
3*
SC HEERENVEEN
Strength On the Ball
Wide (Containment Area)
33%
5*
SC HEERENVEEN
Strength On the Ball
Counter Attack (Attacking Styles)
33%
4*
SC HEERENVEEN
Strength On the Ball
Counter Attack (Attacking Styles)
33%
3*
SC HEERENVEEN
Strength On the Ball
Counter Attack (Attacking Styles)
33%
5*
SC HEERENVEEN
Strength On the Ball
Frontline Pressure (Defensive Styles)
33%
4*
SC HEERENVEEN
Strength On the Ball
Frontline Pressure (Defensive Styles)
33%
3*
SC HEERENVEEN
Strength On the Ball
Frontline Pressure (Defensive Styles)
33%
5*
SC HEERENVEEN
Strength On the Ball
-
33%
4*
SC HEERENVEEN
Strength On the Ball
-
33%
3*
SC HEERENVEEN
Strength On the Ball
-
33%
5*
Europe
Left foot
Rabona
25%
4*
Strength On the Ball
Centre (Attacking Area)
Rabona
25%
5*
Dutch League
Wide (Containment Area)
Flip Flap
25%
4*
Dutch League
Wide (Containment Area)
Flip Flap
25%
5*
Dutch League
Left foot
Flip Flap
25%
4*
Dutch League
Left foot
Flip Flap
25%
5*
Dutch League
Dribbling
Flip Flap
25%
4*
Dutch League
Dribbling
Flip Flap
25%
5*
Europe
Strength On the Ball
Rabona
25%
4*
Europe
Strength On the Ball
Rabona
25%
5*
Dutch League
Centre (Attacking Area)
Flip Flap
25%
4*
Dutch League
Centre (Attacking Area)
Flip Flap
25%
5*
Dutch League
Counter Attack (Attacking Styles)
Flip Flap
25%
4*
Dutch League
Counter Attack (Attacking Styles)
Flip Flap
25%
3*
Dutch League
Wide (Containment Area)
Long Range Drive
25%
5*
Dutch League
Wide (Containment Area)
Marseille Turn
25%
4*
Dutch League
Wide (Containment Area)
Marseille Turn
25%
5*
NORWAY
Flip Flap
-
25%
4*
NORWAY
Flip Flap
-
25%
3*
NORWAY
Flip Flap
-
25%
5*
NORWAY
Frontline Pressure (Defensive Styles)
Flip Flap
25%
4*
NORWAY
Frontline Pressure (Defensive Styles)
Flip Flap
25%
3*
NORWAY
Frontline Pressure (Defensive Styles)
Flip Flap
25%
5*
Dutch League
Ball Control
Incisive Run
25%
4*
Dutch League
Ball Control
Incisive Run
25%
3*
Dutch League
Ball Control
Incisive Run
25%
3*
Dutch League
Counter Attack (Attacking Styles)
Long Range Drive
25%
5*
Dutch League
Ball Control
Long Range Drive
25%
4*
Dutch League
Ball Control
Long Range Drive
25%
5*
AMF
Long-pass (Build Up)
Rabona
25%
4*
AMF
Long-pass (Build Up)
Rabona
25%
3*
AMF
Long-pass (Build Up)
Rabona
25%
5*
Dutch League
Europe
Marseille Turn
25%
4*
Dutch League
Europe
Marseille Turn
25%
5*
Dutch League
Centre (Attacking Area)
Marseille Turn
25%
4*
Dutch League
Centre (Attacking Area)
Marseille Turn
25%
3*
Dutch League
Aggressive (Pressuring)
Marseille Turn
25%
3*
Dutch League
Utility Players
Marseille Turn
25%
3*
Dutch League
Frontline Pressure (Defensive Styles)
Marseille Turn
25%
3*
Dutch League
Maintain Formation (Positioning)
Flip Flap
25%
5*
Strength On the Ball
Counter Attack (Attacking Styles)
Heel Trick
25%
5*
NORWAY
Centre (Attacking Area)
Incisive Run
25%
4*
NORWAY
Centre (Attacking Area)
Incisive Run
25%
3*
NORWAY
Centre (Attacking Area)
Incisive Run
25%
5*
Dutch League
Left foot
Incisive Run
25%
4*
Dutch League
Left foot
Incisive Run
25%
3*
Dutch League
Left foot
Incisive Run
25%
5*
NORWAY
Wide (Containment Area)
Long Range Drive
25%
4*
NORWAY
Wide (Containment Area)
Long Range Drive
25%
3*
NORWAY
Wide (Containment Area)
Long Range Drive
25%
3*
Dutch League
Dribbling
Long Range Drive
25%
3*
Strength On the Ball
Maintain Formation (Positioning)
Rabona
25%
3*
Europe
AMF
Rabona
25%
3*
Strength On the Ball
Frontline Pressure (Defensive Styles)
Rabona
25%
5*
NORWAY
Left foot
Wide (Containment Area)
25%
4*
NORWAY
Left foot
Wide (Containment Area)
25%
3*
NORWAY
Left foot
Wide (Containment Area)
25%
5*
SC HEERENVEEN
Utility Players
Left foot
25%
4*
SC HEERENVEEN
Utility Players
Left foot
25%
3*
SC HEERENVEEN
Utility Players
Left foot
25%
5*
Dutch League
Europe
Flip Flap
25%
4*
Dutch League
Europe
Flip Flap
25%
3*
Dutch League
Europe
Flip Flap
25%
5*
NORWAY
Ball Control
Maintain Formation (Positioning)
25%
4*
NORWAY
Ball Control
Maintain Formation (Positioning)
25%
3*
NORWAY
Ball Control
Maintain Formation (Positioning)
25%
5*
Dutch League
Europe
Scissors Feint
25%
4*
Dutch League
Europe
Scissors Feint
25%
3*
Dutch League
Europe
Scissors Feint
25%
5*
Dutch League
Scissors Feint
-
25%
4*
Dutch League
Scissors Feint
-
25%
3*
Dutch League
Scissors Feint
-
25%
5*
Dutch League
Aggressive (Pressuring)
Scissors Feint
25%
4*
Dutch League
Aggressive (Pressuring)
Scissors Feint
25%
3*
Dutch League
Aggressive (Pressuring)
Scissors Feint
25%
5*
Dutch League
Utility Players
Scissors Feint
25%
4*
Dutch League
Utility Players
Scissors Feint
25%
3*
Dutch League
Utility Players
Scissors Feint
25%
5*
Dutch League
Ball Control
Scissors Feint
25%
4*
Dutch League
Ball Control
Scissors Feint
25%
3*
Dutch League
Ball Control
Scissors Feint
25%
5*
Dutch League
Dribbling
Scissors Feint
25%
4*
Dutch League
Dribbling
Scissors Feint
25%
3*
Dutch League
Dribbling
Scissors Feint
25%
5*
NORWAY
Ball Control
Centre (Attacking Area)
25%
4*
NORWAY
Ball Control
Centre (Attacking Area)
25%
3*
NORWAY
Ball Control
Centre (Attacking Area)
25%
5*
NORWAY
U-24
Long Range Drive
25%
4*
NORWAY
U-24
Long Range Drive
25%
3*
NORWAY
U-24
Long Range Drive
25%
5*
NORWAY
Ball Control
Aggressive (Pressuring)
25%
4*
NORWAY
Ball Control
Aggressive (Pressuring)
25%
3*
NORWAY
Ball Control
Aggressive (Pressuring)
25%
3*
U-24
Maintain Formation (Positioning)
Rabona
25%
3*
U-24
Centre (Attacking Area)
Rabona
25%
3*
Europe
Long-pass (Build Up)
Rabona
25%
3*
Strength On the Ball
Counter Attack (Attacking Styles)
Rabona
25%
5*
NORWAY
Utility Players
Weighted Pass
25%
4*
NORWAY
Utility Players
Weighted Pass
25%
3*
NORWAY
Utility Players
Weighted Pass
25%
5*
NORWAY
Left foot
Weighted Pass
25%
4*
NORWAY
Left foot
Weighted Pass
25%
3*
NORWAY
Left foot
Weighted Pass
25%
3*
AMF
Long-pass (Build Up)
Sombrero
25%
3*
Strength On the Ball
Left foot
Sombrero
25%
5*
NORWAY
Ball Control
Frontline Pressure (Defensive Styles)
25%
4*
NORWAY
Ball Control
Frontline Pressure (Defensive Styles)
25%
3*
NORWAY
Ball Control
Frontline Pressure (Defensive Styles)
25%
3*
Dutch League
U-24
Flip Flap
25%
5*
SC HEERENVEEN
Ball Control
Maintain Formation (Positioning)
25%
4*
SC HEERENVEEN
Ball Control
Maintain Formation (Positioning)
25%
3*
SC HEERENVEEN
Ball Control
Maintain Formation (Positioning)
25%
3*
Strength On the Ball
Aggressive (Pressuring)
Heel Trick
25%
5*
SC HEERENVEEN
Ball Control
Centre (Attacking Area)
25%
4*
SC HEERENVEEN
Ball Control
Centre (Attacking Area)
25%
3*
SC HEERENVEEN
Ball Control
Centre (Attacking Area)
25%
5*
NORWAY
Dribbling
Centre (Attacking Area)
25%
4*
NORWAY
Dribbling
Centre (Attacking Area)
25%
3*
NORWAY
Dribbling
Centre (Attacking Area)
25%
5*
NORWAY
Strength On the Ball
Centre (Attacking Area)
25%
4*
NORWAY
Strength On the Ball
Centre (Attacking Area)
25%
3*
NORWAY
Strength On the Ball
Centre (Attacking Area)
25%
5*
NORWAY
Strength On the Ball
Incisive Run
25%
4*
NORWAY
Strength On the Ball
Incisive Run
25%
3*
NORWAY
Strength On the Ball
Incisive Run
25%
5*
SC HEERENVEEN
Ball Control
Aggressive (Pressuring)
25%
4*
SC HEERENVEEN
Ball Control
Aggressive (Pressuring)
25%
3*
SC HEERENVEEN
Ball Control
Aggressive (Pressuring)
25%
5*
NORWAY
Utility Players
Long-pass (Build Up)
25%
4*
NORWAY
Utility Players
Long-pass (Build Up)
25%
3*
NORWAY
Utility Players
Long-pass (Build Up)
25%
5*
SC HEERENVEEN
Ball Control
Long-pass (Build Up)
25%
4*
SC HEERENVEEN
Ball Control
Long-pass (Build Up)
25%
3*
SC HEERENVEEN
Ball Control
Long-pass (Build Up)
25%
3*
Left foot
Long-pass (Build Up)
Rabona
25%
5*
SC HEERENVEEN
Ball Control
Wide (Containment Area)
25%
4*
SC HEERENVEEN
Ball Control
Wide (Containment Area)
25%
3*
SC HEERENVEEN
Ball Control
Wide (Containment Area)
25%
5*
SC HEERENVEEN
Ball Control
Counter Attack (Attacking Styles)
25%
4*
SC HEERENVEEN
Ball Control
Counter Attack (Attacking Styles)
25%
3*
SC HEERENVEEN
Ball Control
Counter Attack (Attacking Styles)
25%
5*
SC HEERENVEEN
Ball Control
-
25%
4*
SC HEERENVEEN
Ball Control
-
25%
3*
SC HEERENVEEN
Ball Control
-
25%
5*
SC HEERENVEEN
Europe
Ball Control
25%
4*
SC HEERENVEEN
Europe
Ball Control
25%
3*
SC HEERENVEEN
Europe
Ball Control
25%
5*
NORWAY
U-24
Ball Control
25%
4*
NORWAY
U-24
Ball Control
25%
3*
NORWAY
U-24
Ball Control
25%
5*
NORWAY
U-24
Left foot
25%
4*
NORWAY
U-24
Left foot
25%
3*
NORWAY
U-24
Left foot
25%
5*
SC HEERENVEEN
Ball Control
Frontline Pressure (Defensive Styles)
25%
4*
SC HEERENVEEN
Ball Control
Frontline Pressure (Defensive Styles)
25%
3*
SC HEERENVEEN
Ball Control
Frontline Pressure (Defensive Styles)
25%
3*
Dutch League
Counter Attack (Attacking Styles)
Marseille Turn
25%
3*
AMF
Long-pass (Build Up)
Flip Flap
25%
5*
Strength On the Ball
Long-pass (Build Up)
Flip Flap
25%
4*
Strength On the Ball
Long-pass (Build Up)
Flip Flap
25%
5*
Dutch League
Heel Trick
-
25%
4*
Dutch League
Heel Trick
-
25%
3*
Dutch League
Heel Trick
-
25%
5*
Dutch League
Utility Players
Heel Trick
25%
4*
Dutch League
Utility Players
Heel Trick
25%
3*
Dutch League
Utility Players
Heel Trick
25%
5*
Dutch League
Frontline Pressure (Defensive Styles)
Heel Trick
25%
4*
Dutch League
Frontline Pressure (Defensive Styles)
Heel Trick
25%
3*
Dutch League
Frontline Pressure (Defensive Styles)
Heel Trick
25%
5*
NORWAY
Dribbling
Incisive Run
25%
4*
NORWAY
Dribbling
Incisive Run
25%
3*
NORWAY
Dribbling
Incisive Run
25%
5*
NORWAY
U-24
Trickster
25%
4*
NORWAY
U-24
Trickster
25%
3*
NORWAY
U-24
Trickster
25%
5*
NORWAY
U-24
Dribbling
25%
4*
NORWAY
U-24
Dribbling
25%
3*
NORWAY
U-24
Dribbling
25%
5*
SC HEERENVEEN
Europe
Dribbling
25%
4*
SC HEERENVEEN
Europe
Dribbling
25%
3*
SC HEERENVEEN
Europe
Dribbling
25%
5*
SC HEERENVEEN
U-24
Dribbling
25%
4*
SC HEERENVEEN
U-24
Dribbling
25%
3*
SC HEERENVEEN
U-24
Dribbling
25%
5*
SC HEERENVEEN
U-24
Left foot
25%
4*
SC HEERENVEEN
U-24
Left foot
25%
3*
SC HEERENVEEN
U-24
Left foot
25%
5*
Strength On the Ball
Centre (Attacking Area)
Rabona
20%
5*
AMF
Strength On the Ball
Flip Flap
20%
4*
AMF
Strength On the Ball
Flip Flap
20%
5*
Dutch League
Centre (Attacking Area)
Long Range Drive
20%
4*
Dutch League
Centre (Attacking Area)
Long Range Drive
20%
4*
Left foot
Centre (Attacking Area)
Sombrero
20%
4*
Europe
Left foot
Sombrero
20%
5*
Dutch League
Maintain Formation (Positioning)
Flip Flap
20%
4*
Dutch League
Maintain Formation (Positioning)
Flip Flap
20%
5*
Dutch League
U-24
Long Range Drive
20%
4*
Dutch League
U-24
Long Range Drive
20%
3*
Europe
AMF
Flip Flap
20%
3*
Europe
Centre (Attacking Area)
Rabona
20%
5*
Ball Control
Long-pass (Build Up)
Rabona
20%
4*
Ball Control
Long-pass (Build Up)
Rabona
20%
3*
Ball Control
Long-pass (Build Up)
Rabona
20%
4*
Strength On the Ball
Counter Attack (Attacking Styles)
Rabona
20%
3*
Strength On the Ball
Centre (Attacking Area)
Sombrero
20%
5*
AMF
Long-pass (Build Up)
Sombrero
20%
4*
AMF
Long-pass (Build Up)
Sombrero
20%
4*
Strength On the Ball
Left foot
Sombrero
20%
3*
Strength On the Ball
Frontline Pressure (Defensive Styles)
Sombrero
20%
5*
Dutch League
Aggressive (Pressuring)
Marseille Turn
20%
4*
Dutch League
Aggressive (Pressuring)
Marseille Turn
20%
5*
Dutch League
Utility Players
Marseille Turn
20%
4*
Dutch League
Utility Players
Marseille Turn
20%
5*
Dutch League
Frontline Pressure (Defensive Styles)
Marseille Turn
20%
4*
Dutch League
Frontline Pressure (Defensive Styles)
Marseille Turn
20%
5*
Dutch League
U-24
Flip Flap
20%
4*
Dutch League
U-24
Flip Flap
20%
3*
Dutch League
Frontline Pressure (Defensive Styles)
Flip Flap
20%
3*
Dutch League
Left foot
Long Range Drive
20%
3*
AMF
Centre (Attacking Area)
Rabona
20%
5*
Europe
Long-pass (Build Up)
Rabona
20%
4*
Europe
Long-pass (Build Up)
Rabona
20%
5*
Strength On the Ball
Wide (Containment Area)
Rabona
20%
4*
Strength On the Ball
Wide (Containment Area)
Rabona
20%
3*
Strength On the Ball
Wide (Containment Area)
Rabona
20%
3*
U-24
Counter Attack (Attacking Styles)
Rabona
20%
3*
Left foot
Maintain Formation (Positioning)
Sombrero
20%
3*
Europe
Strength On the Ball
Sombrero
20%
3*
Dutch League
Aggressive (Pressuring)
Flip Flap
20%
5*
AMF
Long-pass (Build Up)
Flip Flap
20%
4*
AMF
Long-pass (Build Up)
Flip Flap
20%
5*
NORWAY
Maintain Formation (Positioning)
Long Range Drive
20%
4*
NORWAY
Maintain Formation (Positioning)
Long Range Drive
20%
3*
NORWAY
Maintain Formation (Positioning)
Long Range Drive
20%
3*
Dutch League
Europe
Long Range Drive
20%
5*
NORWAY
Centre (Attacking Area)
Long Range Drive
20%
4*
NORWAY
Centre (Attacking Area)
Long Range Drive
20%
3*
NORWAY
Centre (Attacking Area)
Long Range Drive
20%
3*
Europe
U-24
Rabona
20%
5*
Left foot
Long-pass (Build Up)
Rabona
20%
4*
Left foot
Long-pass (Build Up)
Rabona
20%
3*
AMF
Long-pass (Build Up)
Pinpoint Crossing
20%
5*
NORWAY
Weighted Pass
-
20%
4*
NORWAY
Weighted Pass
-
20%
3*
NORWAY
Weighted Pass
-
20%
5*
NORWAY
Maintain Formation (Positioning)
Weighted Pass
20%
4*
NORWAY
Maintain Formation (Positioning)
Weighted Pass
20%
3*
NORWAY
Maintain Formation (Positioning)
Weighted Pass
20%
5*
NORWAY
Centre (Attacking Area)
Weighted Pass
20%
4*
NORWAY
Centre (Attacking Area)
Weighted Pass
20%
3*
NORWAY
Centre (Attacking Area)
Weighted Pass
20%
5*
NORWAY
Aggressive (Pressuring)
Weighted Pass
20%
4*
NORWAY
Aggressive (Pressuring)
Weighted Pass
20%
3*
NORWAY
Aggressive (Pressuring)
Weighted Pass
20%
5*
NORWAY
Frontline Pressure (Defensive Styles)
Weighted Pass
20%
4*
NORWAY
Frontline Pressure (Defensive Styles)
Weighted Pass
20%
3*
NORWAY
Frontline Pressure (Defensive Styles)
Weighted Pass
20%
3*
Europe
AMF
Sombrero
20%
3*
AMF
Left foot
Sombrero
20%
3*
U-24
Left foot
Sombrero
20%
5*
AMF
Strength On the Ball
Sombrero
20%
4*
AMF
Strength On the Ball
Sombrero
20%
3*
AMF
Strength On the Ball
Sombrero
20%
3*
Dutch League
Maintain Formation (Positioning)
Marseille Turn
20%
3*
Dutch League
Marseille Turn
-
20%
5*
Dutch League
Counter Attack (Attacking Styles)
Marseille Turn
20%
4*
Dutch League
Counter Attack (Attacking Styles)
Marseille Turn
20%
3*
Strength On the Ball
Left foot
Heel Trick
20%
3*
AMF
Long-pass (Build Up)
Scissors Feint
20%
5*
NORWAY
Maintain Formation (Positioning)
Incisive Run
20%
4*
NORWAY
Maintain Formation (Positioning)
Incisive Run
20%
3*
NORWAY
Maintain Formation (Positioning)
Incisive Run
20%
5*
NORWAY
Aggressive (Pressuring)
Incisive Run
20%
4*
NORWAY
Aggressive (Pressuring)
Incisive Run
20%
3*
NORWAY
Aggressive (Pressuring)
Incisive Run
20%
5*
NORWAY
Utility Players
Long Range Drive
20%
4*
NORWAY
Utility Players
Long Range Drive
20%
3*
NORWAY
Utility Players
Long Range Drive
20%
5*
NORWAY
Ball Control
-
20%
4*
NORWAY
Ball Control
-
20%
3*
NORWAY
Ball Control
-
20%
5*
NORWAY
Utility Players
Ball Control
20%
4*
NORWAY
Utility Players
Ball Control
20%
3*
NORWAY
Utility Players
Ball Control
20%
4*
U-24
Long-pass (Build Up)
Sombrero
20%
3*
U-24
Long-pass (Build Up)
Sombrero
20%
5*
Dutch League
NORWAY
Centre (Attacking Area)
20%
4*
Dutch League
NORWAY
Centre (Attacking Area)
20%
3*
Dutch League
NORWAY
Centre (Attacking Area)
20%
5*
NORWAY
Long-pass (Build Up)
-
20%
4*
NORWAY
Long-pass (Build Up)
-
20%
3*
NORWAY
Long-pass (Build Up)
-
20%
5*
NORWAY
U-24
Long-pass (Build Up)
20%
4*
NORWAY
U-24
Long-pass (Build Up)
20%
3*
NORWAY
U-24
Long-pass (Build Up)
20%
5*
NORWAY
Dribbling
Maintain Formation (Positioning)
20%
4*
NORWAY
Dribbling
Maintain Formation (Positioning)
20%
3*
NORWAY
Dribbling
Maintain Formation (Positioning)
20%
5*
NORWAY
Strength On the Ball
Maintain Formation (Positioning)
20%
4*
NORWAY
Strength On the Ball
Maintain Formation (Positioning)
20%
3*
NORWAY
Strength On the Ball
Maintain Formation (Positioning)
20%
3*
AMF
Strength On the Ball
Heel Trick
20%
5*
NORWAY
Dribbling
Aggressive (Pressuring)
20%
4*
NORWAY
Dribbling
Aggressive (Pressuring)
20%
3*
NORWAY
Dribbling
Aggressive (Pressuring)
20%
5*
NORWAY
Strength On the Ball
Aggressive (Pressuring)
20%
4*
NORWAY
Strength On the Ball
Aggressive (Pressuring)
20%
3*
NORWAY
Strength On the Ball
Aggressive (Pressuring)
20%
5*
NORWAY
Dribbling
Trickster
20%
4*
NORWAY
Dribbling
Trickster
20%
3*
NORWAY
Dribbling
Trickster
20%
5*
Dutch League
NORWAY
Counter Attack (Attacking Styles)
20%
4*
Dutch League
NORWAY
Counter Attack (Attacking Styles)
20%
3*
Dutch League
NORWAY
Counter Attack (Attacking Styles)
20%
5*
NORWAY
Dribbling
Frontline Pressure (Defensive Styles)
20%
4*
NORWAY
Dribbling
Frontline Pressure (Defensive Styles)
20%
3*
NORWAY
Dribbling
Frontline Pressure (Defensive Styles)
20%
5*
NORWAY
U-24
Strength On the Ball
20%
4*
NORWAY
U-24
Strength On the Ball
20%
3*
NORWAY
U-24
Strength On the Ball
20%
5*
SC HEERENVEEN
Dribbling
Maintain Formation (Positioning)
20%
4*
SC HEERENVEEN
Dribbling
Maintain Formation (Positioning)
20%
3*
SC HEERENVEEN
Dribbling
Maintain Formation (Positioning)
20%
5*
SC HEERENVEEN
Dribbling
Centre (Attacking Area)
20%
4*
SC HEERENVEEN
Dribbling
Centre (Attacking Area)
20%
3*
SC HEERENVEEN
Dribbling
Centre (Attacking Area)
20%
5*
SC HEERENVEEN
Dribbling
Aggressive (Pressuring)
20%
4*
SC HEERENVEEN
Dribbling
Aggressive (Pressuring)
20%
3*
SC HEERENVEEN
Dribbling
Aggressive (Pressuring)
20%
5*
SC HEERENVEEN
Dribbling
Long-pass (Build Up)
20%
4*
SC HEERENVEEN
Dribbling
Long-pass (Build Up)
20%
3*
SC HEERENVEEN
Dribbling
Long-pass (Build Up)
20%
5*
SC HEERENVEEN
Dribbling
Wide (Containment Area)
20%
4*
SC HEERENVEEN
Dribbling
Wide (Containment Area)
20%
3*
SC HEERENVEEN
Dribbling
Wide (Containment Area)
20%
5*
Dutch League
AMF
Trickster
20%
4*
Dutch League
AMF
Trickster
20%
3*
Dutch League
AMF
Trickster
20%
5*
SC HEERENVEEN
Dribbling
Counter Attack (Attacking Styles)
20%
4*
SC HEERENVEEN
Dribbling
Counter Attack (Attacking Styles)
20%
3*
SC HEERENVEEN
Dribbling
Counter Attack (Attacking Styles)
20%
5*
SC HEERENVEEN
Dribbling
-
20%
4*
SC HEERENVEEN
Dribbling
-
20%
3*
SC HEERENVEEN
Dribbling
-
20%
5*
SC HEERENVEEN
Dribbling
Frontline Pressure (Defensive Styles)
20%
4*
SC HEERENVEEN
Dribbling
Frontline Pressure (Defensive Styles)
20%
3*
SC HEERENVEEN
Dribbling
Frontline Pressure (Defensive Styles)
20%
5*
Dutch League
NORWAY
Wide (Containment Area)
20%
4*
Dutch League
NORWAY
Wide (Containment Area)
20%
3*
Dutch League
NORWAY
Wide (Containment Area)
20%
5*
Europe
Left foot
Sombrero
17%
5*
Dutch League
Wide (Containment Area)
Long Range Drive
17%
4*
Dutch League
Wide (Containment Area)
Long Range Drive
17%
5*
Strength On the Ball
Left foot
Sombrero
17%
4*
Strength On the Ball
Frontline Pressure (Defensive Styles)
Sombrero
17%
5*
Dutch League
Counter Attack (Attacking Styles)
Long Range Drive
17%
4*
Dutch League
Counter Attack (Attacking Styles)
Long Range Drive
17%
5*
Dutch League
Left foot
Long Range Drive
17%
4*
Dutch League
Left foot
Long Range Drive
17%
5*
Dutch League
Dribbling
Long Range Drive
17%
4*
Dutch League
Dribbling
Long Range Drive
17%
5*
Europe
AMF
Rabona
17%
4*
Europe
AMF
Rabona
17%
5*
Strength On the Ball
Counter Attack (Attacking Styles)
Rabona
17%
4*
Strength On the Ball
Frontline Pressure (Defensive Styles)
Rabona
17%
4*
Strength On the Ball
Centre (Attacking Area)
Sombrero
17%
3*
Left foot
Wide (Containment Area)
Sombrero
17%
4*
Europe
Strength On the Ball
Sombrero
17%
5*
Dutch League
Aggressive (Pressuring)
Flip Flap
17%
4*
Dutch League
Aggressive (Pressuring)
Flip Flap
17%
5*
Dutch League
Frontline Pressure (Defensive Styles)
Flip Flap
17%
4*
Dutch League
Frontline Pressure (Defensive Styles)
Flip Flap
17%
3*
Left foot
Centre (Attacking Area)
Rabona
17%
3*
Left foot
Aggressive (Pressuring)
Sombrero
17%
5*
U-24
Long-pass (Build Up)
Sombrero
17%
3*
Left foot
Counter Attack (Attacking Styles)
Sombrero
17%
3*
Left foot
Frontline Pressure (Defensive Styles)
Sombrero
17%
4*
Strength On the Ball
Aggressive (Pressuring)
Heel Trick
17%
3*
Dutch League
Maintain Formation (Positioning)
Long Range Drive
17%
5*
Dutch League
Europe
Long Range Drive
17%
4*
Dutch League
Europe
Long Range Drive
17%
5*
Europe
AMF
Sombrero
17%
4*
Europe
AMF
Sombrero
17%
3*
Strength On the Ball
Counter Attack (Attacking Styles)
Sombrero
17%
3*
Ball Control
Left foot
Sombrero
17%
5*
Dutch League
Maintain Formation (Positioning)
Marseille Turn
17%
4*
Dutch League
Maintain Formation (Positioning)
Marseille Turn
17%
5*
Dutch League
Marseille Turn
-
17%
4*
Dutch League
Marseille Turn
-
17%
3*
Dutch League
Flip Flap
-
17%
3*
AMF
U-24
Flip Flap
17%
3*
Dutch League
Utility Players
Flip Flap
17%
5*
NORWAY
Long Range Drive
-
17%
4*
NORWAY
Long Range Drive
-
17%
3*
NORWAY
Long Range Drive
-
17%
5*
NORWAY
Aggressive (Pressuring)
Long Range Drive
17%
4*
NORWAY
Aggressive (Pressuring)
Long Range Drive
17%
3*
NORWAY
Aggressive (Pressuring)
Long Range Drive
17%
3*
Strength On the Ball
Long-pass (Build Up)
Long Range Drive
17%
5*
NORWAY
Frontline Pressure (Defensive Styles)
Long Range Drive
17%
4*
NORWAY
Frontline Pressure (Defensive Styles)
Long Range Drive
17%
3*
NORWAY
Frontline Pressure (Defensive Styles)
Long Range Drive
17%
5*
NORWAY
Centre (Attacking Area)
Trickster
17%
4*
NORWAY
Centre (Attacking Area)
Trickster
17%
3*
NORWAY
Centre (Attacking Area)
Trickster
17%
4*
AMF
Strength On the Ball
Pinpoint Crossing
17%
3*
AMF
Strength On the Ball
Pinpoint Crossing
17%
3*
AMF
Centre (Attacking Area)
Sombrero
17%
4*
Europe
Long-pass (Build Up)
Sombrero
17%
3*
Europe
Long-pass (Build Up)
Sombrero
17%
3*
Dutch League
Centre (Attacking Area)
Incisive Run
17%
5*
NORWAY
Frontline Pressure (Defensive Styles)
Incisive Run
17%
4*
NORWAY
Frontline Pressure (Defensive Styles)
Incisive Run
17%
3*
NORWAY
Frontline Pressure (Defensive Styles)
Incisive Run
17%
5*
Dutch League
Strength On the Ball
Trickster
17%
4*
Dutch League
Strength On the Ball
Trickster
17%
3*
Dutch League
Strength On the Ball
Trickster
17%
3*
Dutch League
Counter Attack (Attacking Styles)
Incisive Run
17%
5*
SC HEERENVEEN
Utility Players
U-24
17%
4*
SC HEERENVEEN
Utility Players
U-24
17%
3*
SC HEERENVEEN
Utility Players
U-24
17%
5*
NORWAY
Utility Players
Counter Attack (Attacking Styles)
17%
4*
NORWAY
Utility Players
Counter Attack (Attacking Styles)
17%
3*
NORWAY
Utility Players
Counter Attack (Attacking Styles)
17%
5*
Strength On the Ball
Long-pass (Build Up)
Pinpoint Crossing
17%
4*
Strength On the Ball
Long-pass (Build Up)
Pinpoint Crossing
17%
3*
Strength On the Ball
Long-pass (Build Up)
Pinpoint Crossing
17%
5*
NORWAY
Utility Players
Left foot
17%
4*
NORWAY
Utility Players
Left foot
17%
3*
NORWAY
Utility Players
Left foot
17%
3*
Strength On the Ball
Centre (Attacking Area)
Heel Trick
17%
3*
U-24
Long-pass (Build Up)
Heel Trick
17%
5*
NORWAY
U-24
Incisive Run
17%
4*
NORWAY
U-24
Incisive Run
17%
3*
NORWAY
U-24
Incisive Run
17%
5*
NORWAY
U-24
Counter Attack (Attacking Styles)
17%
4*
NORWAY
U-24
Counter Attack (Attacking Styles)
17%
3*
NORWAY
U-24
Counter Attack (Attacking Styles)
17%
5*
NORWAY
Dribbling
-
17%
4*
NORWAY
Dribbling
-
17%
3*
NORWAY
Dribbling
-
17%
5*
NORWAY
Utility Players
Dribbling
17%
4*
NORWAY
Utility Players
Dribbling
17%
3*
NORWAY
Utility Players
Dribbling
17%
5*
NORWAY
Strength On the Ball
Frontline Pressure (Defensive Styles)
17%
4*
NORWAY
Strength On the Ball
Frontline Pressure (Defensive Styles)
17%
3*
NORWAY
Strength On the Ball
Frontline Pressure (Defensive Styles)
17%
5*
NORWAY
Strength On the Ball
-
17%
4*
NORWAY
Strength On the Ball
-
17%
3*
NORWAY
Strength On the Ball
-
17%
5*
NORWAY
Utility Players
Strength On the Ball
17%
4*
NORWAY
Utility Players
Strength On the Ball
17%
3*
NORWAY
Utility Players
Strength On the Ball
17%
5*
Dutch League
NORWAY
Utility Players
17%
4*
Dutch League
NORWAY
Utility Players
17%
3*
Dutch League
NORWAY
Utility Players
17%
5*
SC HEERENVEEN
Europe
Left foot
17%
4*
SC HEERENVEEN
Europe
Left foot
17%
3*
SC HEERENVEEN
Europe
Left foot
17%
5*
Strength On the Ball
Frontline Pressure (Defensive Styles)
Rabona
14%
5*
Europe
Strength On the Ball
Sombrero
14%
3*
AMF
Centre (Attacking Area)
Flip Flap
14%
4*
Europe
AMF
Flip Flap
14%
5*
Strength On the Ball
Maintain Formation (Positioning)
Rabona
14%
4*
Strength On the Ball
Maintain Formation (Positioning)
Rabona
14%
5*
U-24
Centre (Attacking Area)
Rabona
14%
4*
U-24
Centre (Attacking Area)
Rabona
14%
4*
Left foot
Wide (Containment Area)
Sombrero
14%
4*
Left foot
Counter Attack (Attacking Styles)
Sombrero
14%
5*
AMF
Centre (Attacking Area)
Rabona
14%
4*
AMF
Centre (Attacking Area)
Rabona
14%
3*
Europe
Ball Control
Rabona
14%
5*
AMF
Strength On the Ball
Pinpoint Crossing
14%
4*
Left foot
Maintain Formation (Positioning)
Sombrero
14%
4*
Strength On the Ball
Maintain Formation (Positioning)
Sombrero
14%
3*
Strength On the Ball
Maintain Formation (Positioning)
Sombrero
14%
5*
Europe
Long-pass (Build Up)
Sombrero
14%
4*
Strength On the Ball
Counter Attack (Attacking Styles)
Sombrero
14%
4*
U-24
Left foot
Sombrero
14%
5*
Dutch League
Flip Flap
-
14%
4*
Dutch League
Flip Flap
-
14%
5*
AMF
U-24
Flip Flap
14%
4*
AMF
U-24
Flip Flap
14%
5*
Dutch League
Utility Players
Flip Flap
14%
4*
Dutch League
Utility Players
Flip Flap
14%
4*
Strength On the Ball
Left foot
Heel Trick
14%
5*
AMF
Long-pass (Build Up)
Scissors Feint
14%
4*
AMF
Long-pass (Build Up)
Scissors Feint
14%
3*
Dutch League
Dribbling
Incisive Run
14%
3*
Dutch League
Utility Players
Long Range Drive
14%
3*
Dribbling
Long-pass (Build Up)
Rabona
14%
3*
U-24
Ball Control
Rabona
14%
3*
Strength On the Ball
Centre (Attacking Area)
Pinpoint Crossing
14%
5*
AMF
Left foot
Sombrero
14%
4*
AMF
Left foot
Sombrero
14%
3*
Dutch League
Aggressive (Pressuring)
Long Range Drive
14%
5*
Strength On the Ball
Long-pass (Build Up)
Long Range Drive
14%
4*
Strength On the Ball
Long-pass (Build Up)
Long Range Drive
14%
3*
Left foot
Maintain Formation (Positioning)
Rabona
14%
3*
Strength On the Ball
Aggressive (Pressuring)
Rabona
14%
3*
Left foot
Counter Attack (Attacking Styles)
Rabona
14%
5*
Dutch League
Wide (Containment Area)
Trickster
14%
4*
Dutch League
Wide (Containment Area)
Trickster
14%
3*
Dutch League
Wide (Containment Area)
Trickster
14%
5*
AMF
Centre (Attacking Area)
Sombrero
14%
4*
AMF
Centre (Attacking Area)
Sombrero
14%
3*
Dribbling
Long-pass (Build Up)
Sombrero
14%
3*
Dribbling
Left foot
Sombrero
14%
3*
AMF
Centre (Attacking Area)
Heel Trick
14%
5*
AMF
Long-pass (Build Up)
Heel Trick
14%
4*
AMF
Long-pass (Build Up)
Heel Trick
14%
3*
AMF
Long-pass (Build Up)
Heel Trick
14%
4*
AMF
Strength On the Ball
Heel Trick
14%
3*
Utility Players
Long-pass (Build Up)
Rabona
14%
3*
Strength On the Ball
Left foot
Rabona
14%
5*
NORWAY
Maintain Formation (Positioning)
Trickster
14%
4*
NORWAY
Maintain Formation (Positioning)
Trickster
14%
3*
NORWAY
Maintain Formation (Positioning)
Trickster
14%
5*
Dutch League
Centre (Attacking Area)
Trickster
14%
4*
Dutch League
Centre (Attacking Area)
Trickster
14%
3*
Dutch League
Centre (Attacking Area)
Trickster
14%
5*
NORWAY
Aggressive (Pressuring)
Trickster
14%
4*
NORWAY
Aggressive (Pressuring)
Trickster
14%
3*
NORWAY
Aggressive (Pressuring)
Trickster
14%
5*
NORWAY
Frontline Pressure (Defensive Styles)
Trickster
14%
4*
NORWAY
Frontline Pressure (Defensive Styles)
Trickster
14%
3*
NORWAY
Frontline Pressure (Defensive Styles)
Trickster
14%
3*
AMF
U-24
Pinpoint Crossing
14%
3*
U-24
Long-pass (Build Up)
Flip Flap
14%
5*
U-24
Long-pass (Build Up)
Heel Trick
14%
4*
U-24
Long-pass (Build Up)
Heel Trick
14%
5*
NORWAY
Left foot
Centre (Attacking Area)
14%
4*
NORWAY
Left foot
Centre (Attacking Area)
14%
3*
NORWAY
Left foot
Centre (Attacking Area)
14%
5*
NORWAY
Incisive Run
-
14%
4*
NORWAY
Incisive Run
-
14%
3*
NORWAY
Incisive Run
-
14%
5*
NORWAY
Utility Players
Incisive Run
14%
4*
NORWAY
Utility Players
Incisive Run
14%
3*
NORWAY
Utility Players
Incisive Run
14%
5*
NORWAY
Left foot
Aggressive (Pressuring)
14%
4*
NORWAY
Left foot
Aggressive (Pressuring)
14%
3*
NORWAY
Left foot
Aggressive (Pressuring)
14%
5*
NORWAY
Utility Players
Trickster
14%
4*
NORWAY
Utility Players
Trickster
14%
3*
NORWAY
Utility Players
Trickster
14%
3*
AMF
Centre (Attacking Area)
Pinpoint Crossing
14%
5*
NORWAY
Left foot
Frontline Pressure (Defensive Styles)
14%
4*
NORWAY
Left foot
Frontline Pressure (Defensive Styles)
14%
3*
NORWAY
Left foot
Frontline Pressure (Defensive Styles)
14%
3*
Strength On the Ball
Wide (Containment Area)
Heel Trick
14%
5*
Dutch League
Long-pass (Build Up)
Trickster
14%
4*
Dutch League
Long-pass (Build Up)
Trickster
14%
3*
Dutch League
Long-pass (Build Up)
Trickster
14%
5*
Dutch League
NORWAY
Maintain Formation (Positioning)
14%
4*
Dutch League
NORWAY
Maintain Formation (Positioning)
14%
3*
Dutch League
NORWAY
Maintain Formation (Positioning)
14%
5*
Dutch League
NORWAY
U-24
14%
4*
Dutch League
NORWAY
U-24
14%
3*
Dutch League
NORWAY
U-24
14%
5*
Dutch League
NORWAY
Aggressive (Pressuring)
14%
4*
Dutch League
NORWAY
Aggressive (Pressuring)
14%
3*
Dutch League
NORWAY
Aggressive (Pressuring)
14%
5*
Dutch League
NORWAY
Frontline Pressure (Defensive Styles)
14%
4*
Dutch League
NORWAY
Frontline Pressure (Defensive Styles)
14%
3*
Dutch League
NORWAY
Frontline Pressure (Defensive Styles)
14%
5*
Left foot
Centre (Attacking Area)
Sombrero
13%
5*
Strength On the Ball
Centre (Attacking Area)
Sombrero
13%
5*
Strength On the Ball
Frontline Pressure (Defensive Styles)
Sombrero
13%
5*
Strength On the Ball
Aggressive (Pressuring)
Heel Trick
13%
5*
U-24
Left foot
Sombrero
13%
5*
U-24
Counter Attack (Attacking Styles)
Rabona
13%
4*
U-24
Counter Attack (Attacking Styles)
Rabona
13%
5*
Strength On the Ball
Counter Attack (Attacking Styles)
Sombrero
13%
3*
Left foot
Centre (Attacking Area)
Heel Trick
13%
5*
Dutch League
Maintain Formation (Positioning)
Long Range Drive
13%
4*
Dutch League
Maintain Formation (Positioning)
Long Range Drive
13%
3*
Ball Control
Centre (Attacking Area)
Rabona
13%
4*
Strength On the Ball
Centre (Attacking Area)
Pinpoint Crossing
13%
3*
Strength On the Ball
Wide (Containment Area)
Sombrero
13%
5*
AMF
Strength On the Ball
Heel Trick
13%
3*
AMF
Maintain Formation (Positioning)
Rabona
13%
5*
Dribbling
Long-pass (Build Up)
Rabona
13%
4*
Dribbling
Long-pass (Build Up)
Rabona
13%
4*
Left foot
Counter Attack (Attacking Styles)
Rabona
13%
3*
U-24
Strength On the Ball
Rabona
13%
5*
Dribbling
Long-pass (Build Up)
Sombrero
13%
4*
Dribbling
Long-pass (Build Up)
Sombrero
13%
3*
U-24
Strength On the Ball
Sombrero
13%
3*
AMF
Centre (Attacking Area)
Scissors Feint
13%
5*
Dutch League
Centre (Attacking Area)
Incisive Run
13%
4*
Dutch League
Centre (Attacking Area)
Incisive Run
13%
3*
Dutch League
Wide (Containment Area)
Incisive Run
13%
5*
Dutch League
Counter Attack (Attacking Styles)
Incisive Run
13%
4*
Dutch League
Counter Attack (Attacking Styles)
Incisive Run
13%
3*
U-24
Left foot
Rabona
13%
4*
Strength On the Ball
Left foot
Rabona
13%
3*
AMF
Strength On the Ball
Rabona
13%
3*
Left foot
Centre (Attacking Area)
Weighted Pass
13%
3*
Ball Control
Long-pass (Build Up)
Sombrero
13%
3*
AMF
Counter Attack (Attacking Styles)
Sombrero
13%
3*
Left foot
Centre (Attacking Area)
Creative Playmaker
13%
4*
U-24
Long-pass (Build Up)
Flip Flap
13%
3*
Strength On the Ball
Left foot
Flip Flap
13%
4*
Strength On the Ball
Centre (Attacking Area)
Heel Trick
13%
3*
Europe
Long-pass (Build Up)
Heel Trick
13%
3*
Europe
Maintain Formation (Positioning)
Rabona
13%
3*
U-24
Frontline Pressure (Defensive Styles)
Rabona
13%
5*
AMF
Wide (Containment Area)
Sombrero
13%
4*
AMF
Wide (Containment Area)
Sombrero
13%
3*
AMF
Wide (Containment Area)
Sombrero
13%
5*
SC HEERENVEEN
Europe
Utility Players
13%
4*
SC HEERENVEEN
Europe
Utility Players
13%
3*
SC HEERENVEEN
Europe
Utility Players
13%
5*
NORWAY
Utility Players
Wide (Containment Area)
13%
4*
NORWAY
Utility Players
Wide (Containment Area)
13%
3*
NORWAY
Utility Players
Wide (Containment Area)
13%
5*
NORWAY
Trickster
-
13%
4*
NORWAY
Trickster
-
13%
3*
NORWAY
Trickster
-
13%
5*
Dutch League
Left foot
Trickster
13%
4*
Dutch League
Left foot
Trickster
13%
3*
Dutch League
Left foot
Trickster
13%
3*
Strength On the Ball
Maintain Formation (Positioning)
Heel Trick
13%
3*
Europe
AMF
Heel Trick
13%
4*
Strength On the Ball
Wide (Containment Area)
Heel Trick
13%
5*
NORWAY
U-24
Wide (Containment Area)
13%
4*
NORWAY
U-24
Wide (Containment Area)
13%
3*
NORWAY
U-24
Wide (Containment Area)
13%
3*
U-24
Long-pass (Build Up)
Marseille Turn
13%
5*
SC HEERENVEEN
Left foot
Maintain Formation (Positioning)
13%
4*
SC HEERENVEEN
Left foot
Maintain Formation (Positioning)
13%
3*
SC HEERENVEEN
Left foot
Maintain Formation (Positioning)
13%
3*
Utility Players
Strength On the Ball
Heel Trick
13%
5*
SC HEERENVEEN
Left foot
Centre (Attacking Area)
13%
4*
SC HEERENVEEN
Left foot
Centre (Attacking Area)
13%
3*
SC HEERENVEEN
Left foot
Centre (Attacking Area)
13%
5*
SC HEERENVEEN
Left foot
Aggressive (Pressuring)
13%
4*
SC HEERENVEEN
Left foot
Aggressive (Pressuring)
13%
3*
SC HEERENVEEN
Left foot
Aggressive (Pressuring)
13%
5*
SC HEERENVEEN
Left foot
Long-pass (Build Up)
13%
4*
SC HEERENVEEN
Left foot
Long-pass (Build Up)
13%
3*
SC HEERENVEEN
Left foot
Long-pass (Build Up)
13%
5*
SC HEERENVEEN
Left foot
Wide (Containment Area)
13%
4*
SC HEERENVEEN
Left foot
Wide (Containment Area)
13%
3*
SC HEERENVEEN
Left foot
Wide (Containment Area)
13%
5*
SC HEERENVEEN
Left foot
Counter Attack (Attacking Styles)
13%
4*
SC HEERENVEEN
Left foot
Counter Attack (Attacking Styles)
13%
3*
SC HEERENVEEN
Left foot
Counter Attack (Attacking Styles)
13%
5*
SC HEERENVEEN
Left foot
-
13%
4*
SC HEERENVEEN
Left foot
-
13%
3*
SC HEERENVEEN
Left foot
-
13%
5*
SC HEERENVEEN
Left foot
Frontline Pressure (Defensive Styles)
13%
4*
SC HEERENVEEN
Left foot
Frontline Pressure (Defensive Styles)
13%
3*
SC HEERENVEEN
Left foot
Frontline Pressure (Defensive Styles)
13%
5*
Dutch League
NORWAY
-
13%
4*
Dutch League
NORWAY
-
13%
3*
Dutch League
NORWAY
-
13%
3*
Strength On the Ball
Long-pass (Build Up)
Marseille Turn
13%
4*
U-24
Strength On the Ball
Heel Trick
13%
3*
U-24
Strength On the Ball
Heel Trick
13%
5*
Dutch League
AMF
Strength On the Ball
13%
4*
Dutch League
AMF
Strength On the Ball
13%
3*
Dutch League
AMF
Strength On the Ball
13%
5*
Europe
AMF
Flip Flap
11%
5*
Strength On the Ball
Left foot
Heel Trick
11%
5*
Strength On the Ball
Maintain Formation (Positioning)
Sombrero
11%
4*
Left foot
Aggressive (Pressuring)
Sombrero
11%
3*
AMF
Left foot
Flip Flap
11%
4*
Strength On the Ball
Wide (Containment Area)
Sombrero
11%
4*
Ball Control
Left foot
Sombrero
11%
4*
Left foot
Frontline Pressure (Defensive Styles)
Sombrero
11%
5*
Dutch League
Dribbling
Incisive Run
11%
4*
Dutch League
Dribbling
Incisive Run
11%
5*
Dutch League
Aggressive (Pressuring)
Long Range Drive
11%
4*
Dutch League
Aggressive (Pressuring)
Long Range Drive
11%
5*
Dutch League
Utility Players
Long Range Drive
11%
4*
Dutch League
Utility Players
Long Range Drive
11%
3*
Ball Control
Maintain Formation (Positioning)
Rabona
11%
5*
U-24
Ball Control
Rabona
11%
4*
U-24
Ball Control
Rabona
11%
3*
Ball Control
Left foot
Rabona
11%
4*
AMF
Long-pass (Build Up)
Pinpoint Crossing
11%
3*
Europe
Maintain Formation (Positioning)
Sombrero
11%
5*
U-24
Long-pass (Build Up)
Flip Flap
11%
3*
Strength On the Ball
Wide (Containment Area)
Flip Flap
11%
4*
AMF
Centre (Attacking Area)
Heel Trick
11%
3*
Left foot
Long-pass (Build Up)
Heel Trick
11%
3*
Europe
Wide (Containment Area)
Rabona
11%
3*
U-24
Wide (Containment Area)
Rabona
11%
3*
Europe
Counter Attack (Attacking Styles)
Rabona
11%
5*
Strength On the Ball
Left foot
Rabona
11%
3*
Left foot
Frontline Pressure (Defensive Styles)
Rabona
11%
3*
Ball Control
Centre (Attacking Area)
Pinpoint Crossing
11%
3*
Strength On the Ball
Aggressive (Pressuring)
Sombrero
11%
4*
Ball Control
Long-pass (Build Up)
Sombrero
11%
5*
AMF
Counter Attack (Attacking Styles)
Sombrero
11%
4*
AMF
Counter Attack (Attacking Styles)
Sombrero
11%
4*
U-24
Strength On the Ball
Sombrero
11%
3*
Strength On the Ball
Maintain Formation (Positioning)
Flip Flap
11%
3*
AMF
Counter Attack (Attacking Styles)
Flip Flap
11%
3*
Dutch League
Frontline Pressure (Defensive Styles)
Long Range Drive
11%
5*
Utility Players
Long-pass (Build Up)
Rabona
11%
4*
Utility Players
Long-pass (Build Up)
Rabona
11%
3*
Long-pass (Build Up)
Rabona
-
11%
5*
AMF
Wide (Containment Area)
Rabona
11%
4*
AMF
Wide (Containment Area)
Rabona
11%
3*
AMF
Wide (Containment Area)
Rabona
11%
3*
AMF
Counter Attack (Attacking Styles)
Rabona
11%
5*
AMF
Strength On the Ball
Rabona
11%
4*
AMF
Strength On the Ball
Rabona
11%
3*
Utility Players
Strength On the Ball
Rabona
11%
3*
Strength On the Ball
Rabona
-
11%
3*
AMF
Counter Attack (Attacking Styles)
Pinpoint Crossing
11%
3*
U-24
Ball Control
Pinpoint Crossing
11%
3*
U-24
Centre (Attacking Area)
Sombrero
11%
3*
Utility Players
Long-pass (Build Up)
Sombrero
11%
3*
Strength On the Ball
Counter Attack (Attacking Styles)
Flip Flap
11%
3*
U-24
Strength On the Ball
Flip Flap
11%
3*
Dutch League
Maintain Formation (Positioning)
Incisive Run
11%
3*
AMF
U-24
Rabona
11%
3*
U-24
Aggressive (Pressuring)
Rabona
11%
5*
Strength On the Ball
Long-pass (Build Up)
Weighted Pass
11%
4*
Strength On the Ball
Long-pass (Build Up)
Weighted Pass
11%
3*
Strength On the Ball
Long-pass (Build Up)
Weighted Pass
11%
5*
AMF
U-24
Sombrero
11%
4*
AMF
U-24
Sombrero
11%
3*
AMF
U-24
Sombrero
11%
5*
NORWAY
Left foot
Maintain Formation (Positioning)
11%
4*
NORWAY
Left foot
Maintain Formation (Positioning)
11%
3*
NORWAY
Left foot
Maintain Formation (Positioning)
11%
4*
Europe
AMF
Heel Trick
11%
5*
NORWAY
Left foot
-
11%
4*
NORWAY
Left foot
-
11%
3*
NORWAY
Left foot
-
11%
4*
U-24
Long-pass (Build Up)
Marseille Turn
11%
3*
U-24
Left foot
Heel Trick
11%
5*
U-24
Strength On the Ball
Heel Trick
11%
5*
AMF
U-24
Heel Trick
11%
4*
AMF
U-24
Heel Trick
11%
3*
AMF
U-24
Heel Trick
11%
3*
Strength On the Ball
Frontline Pressure (Defensive Styles)
Heel Trick
11%
3*
Europe
Strength On the Ball
Heel Trick
11%
3*
Dutch League
AMF
Centre (Attacking Area)
11%
5*
Left foot
Wide (Containment Area)
Sombrero
10%
5*
U-24
Maintain Formation (Positioning)
Rabona
10%
4*
U-24
Maintain Formation (Positioning)
Rabona
10%
4*
Europe
Centre (Attacking Area)
Rabona
10%
4*
Left foot
Centre (Attacking Area)
Rabona
10%
5*
Europe
U-24
Rabona
10%
4*
Europe
U-24
Rabona
10%
5*
Strength On the Ball
Centre (Attacking Area)
Pinpoint Crossing
10%
4*
Europe
Ball Control
Rabona
10%
5*
AMF
Long-pass (Build Up)
Pinpoint Crossing
10%
5*
U-24
Strength On the Ball
Sombrero
10%
5*
Strength On the Ball
Centre (Attacking Area)
Heel Trick
10%
4*
Strength On the Ball
Aggressive (Pressuring)
Rabona
10%
5*
U-24
Wide (Containment Area)
Rabona
10%
4*
U-24
Wide (Containment Area)
Rabona
10%
3*
Ball Control
Counter Attack (Attacking Styles)
Rabona
10%
3*
Europe
Dribbling
Rabona
10%
5*
U-24
Strength On the Ball
Rabona
10%
4*
U-24
Strength On the Ball
Rabona
10%
5*
AMF
U-24
Pinpoint Crossing
10%
4*
AMF
U-24
Pinpoint Crossing
10%
4*
Strength On the Ball
Aggressive (Pressuring)
Sombrero
10%
5*
Ball Control
Long-pass (Build Up)
Sombrero
10%
4*
Dribbling
Left foot
Sombrero
10%
3*
AMF
Wide (Containment Area)
Flip Flap
10%
4*
AMF
Counter Attack (Attacking Styles)
Flip Flap
10%
3*
Dribbling
Long-pass (Build Up)
Heel Trick
10%
5*
Dutch League
Wide (Containment Area)
Incisive Run
10%
4*
Dutch League
Wide (Containment Area)
Incisive Run
10%
3*
AMF
U-24
Long Range Drive
10%
5*
U-24
Left foot
Rabona
10%
4*
U-24
Left foot
Rabona
10%
3*
Dribbling
Centre (Attacking Area)
Weighted Pass
10%
3*
Utility Players
Left foot
Sombrero
10%
3*
Left foot
Sombrero
-
10%
3*
Strength On the Ball
Centre (Attacking Area)
Flip Flap
10%
5*
Strength On the Ball
Wide (Containment Area)
Heel Trick
10%
3*
Dutch League
Long Range Drive
-
10%
5*
AMF
U-24
Rabona
10%
4*
AMF
U-24
Rabona
10%
3*
AMF
Frontline Pressure (Defensive Styles)
Rabona
10%
3*
AMF
Ball Control
Pinpoint Crossing
10%
3*
AMF
Maintain Formation (Positioning)
Sombrero
10%
4*
Utility Players
Long-pass (Build Up)
Sombrero
10%
3*
AMF
Ball Control
Sombrero
10%
3*
Europe
Frontline Pressure (Defensive Styles)
Sombrero
10%
3*
U-24
Centre (Attacking Area)
Marseille Turn
10%
5*
U-24
Long-pass (Build Up)
Marseille Turn
10%
4*
Strength On the Ball
Counter Attack (Attacking Styles)
Flip Flap
10%
3*
U-24
Left foot
Flip Flap
10%
3*
Strength On the Ball
Frontline Pressure (Defensive Styles)
Flip Flap
10%
3*
Europe
Strength On the Ball
Flip Flap
10%
4*
AMF
Counter Attack (Attacking Styles)
Heel Trick
10%
3*
AMF
Counter Attack (Attacking Styles)
Heel Trick
10%
5*
Strength On the Ball
Long-pass (Build Up)
Marseille Turn
10%
4*
Strength On the Ball
Long-pass (Build Up)
Marseille Turn
10%
4*
Strength On the Ball
Maintain Formation (Positioning)
Heel Trick
10%
3*
Strength On the Ball
Long-pass (Build Up)
Scissors Feint
10%
3*
Dutch League
U-24
Incisive Run
10%
5*
Dutch League
Ball Control
Trickster
10%
4*
Dutch League
Ball Control
Trickster
10%
3*
Dutch League
Ball Control
Trickster
10%
5*
NORWAY
Counter Attack (Attacking Styles)
-
10%
4*
NORWAY
Counter Attack (Attacking Styles)
-
10%
3*
NORWAY
Counter Attack (Attacking Styles)
-
10%
3*
U-24
Dribbling
Weighted Pass
10%
5*
Dutch League
AMF
Centre (Attacking Area)
10%
4*
Dutch League
AMF
Centre (Attacking Area)
10%
5*
Dutch League
Strength On the Ball
Centre (Attacking Area)
10%
4*
Dutch League
Strength On the Ball
Centre (Attacking Area)
10%
3*
Dutch League
Strength On the Ball
Centre (Attacking Area)
10%
5*
Left foot
Maintain Formation (Positioning)
Sombrero
9%
5*
Europe
Centre (Attacking Area)
Rabona
9%
4*
AMF
Centre (Attacking Area)
Flip Flap
9%
5*
Left foot
Centre (Attacking Area)
Rabona
9%
5*
Left foot
Counter Attack (Attacking Styles)
Rabona
9%
5*
Europe
Ball Control
Rabona
9%
5*
Strength On the Ball
Wide (Containment Area)
Sombrero
9%
5*
AMF
Centre (Attacking Area)
Heel Trick
9%
4*
Left foot
Centre (Attacking Area)
Heel Trick
9%
5*
AMF
Maintain Formation (Positioning)
Rabona
9%
4*
AMF
Maintain Formation (Positioning)
Rabona
9%
5*
Ball Control
Centre (Attacking Area)
Rabona
9%
4*
Ball Control
Centre (Attacking Area)
Rabona
9%
5*
Strength On the Ball
Aggressive (Pressuring)
Rabona
9%
5*
AMF
Counter Attack (Attacking Styles)
Rabona
9%
4*
AMF
Counter Attack (Attacking Styles)
Rabona
9%
5*
Utility Players
Long-pass (Build Up)
Sombrero
9%
5*
Strength On the Ball
Left foot
Flip Flap
9%
4*
Strength On the Ball
Left foot
Flip Flap
9%
3*
AMF
Frontline Pressure (Defensive Styles)
Flip Flap
9%
5*
Left foot
Long-pass (Build Up)
Heel Trick
9%
4*
Left foot
Long-pass (Build Up)
Heel Trick
9%
5*
AMF
Counter Attack (Attacking Styles)
Heel Trick
9%
5*
Dutch League
Frontline Pressure (Defensive Styles)
Long Range Drive
9%
4*
Dutch League
Frontline Pressure (Defensive Styles)
Long Range Drive
9%
5*
Long-pass (Build Up)
Rabona
-
9%
4*
Long-pass (Build Up)
Rabona
-
9%
3*
U-24
Dribbling
Rabona
9%
3*
Europe
Centre (Attacking Area)
Sombrero
9%
4*
U-24
Centre (Attacking Area)
Sombrero
9%
3*
Ball Control
Centre (Attacking Area)
Sombrero
9%
5*
Strength On the Ball
Counter Attack (Attacking Styles)
Flip Flap
9%
5*
U-24
Strength On the Ball
Flip Flap
9%
4*
U-24
Strength On the Ball
Flip Flap
9%
5*
Strength On the Ball
Maintain Formation (Positioning)
Heel Trick
9%
3*
AMF
Strength On the Ball
Scissors Feint
9%
3*
AMF
Left foot
Long Range Drive
9%
3*
AMF
Strength On the Ball
Long Range Drive
9%
3*
Europe
Frontline Pressure (Defensive Styles)
Rabona
9%
3*
Europe
AMF
Pinpoint Crossing
9%
3*
AMF
Dribbling
Pinpoint Crossing
9%
3*
U-24
Strength On the Ball
Pinpoint Crossing
9%
3*
Dribbling
Long-pass (Build Up)
Weighted Pass
9%
3*
Dribbling
Centre (Attacking Area)
Sombrero
9%
3*
AMF
Aggressive (Pressuring)
Sombrero
9%
3*
Europe
Counter Attack (Attacking Styles)
Sombrero
9%
3*
AMF
Frontline Pressure (Defensive Styles)
Sombrero
9%
3*
Left foot
Centre (Attacking Area)
Marseille Turn
9%
3*
AMF
Aggressive (Pressuring)
Heel Trick
9%
3*
AMF
Left foot
Heel Trick
9%
3*
Dutch League
Aggressive (Pressuring)
Incisive Run
9%
3*
Dutch League
Frontline Pressure (Defensive Styles)
Incisive Run
9%
3*
AMF
Left foot
Pinpoint Crossing
9%
5*
SC HEERENVEEN
Utility Players
Maintain Formation (Positioning)
9%
4*
SC HEERENVEEN
Utility Players
Maintain Formation (Positioning)
9%
3*
SC HEERENVEEN
Utility Players
Maintain Formation (Positioning)
9%
3*
U-24
Counter Attack (Attacking Styles)
Heel Trick
9%
3*
Europe
Left foot
Heel Trick
9%
4*
U-24
Left foot
Heel Trick
9%
4*
Europe
Strength On the Ball
Heel Trick
9%
5*
SC HEERENVEEN
Utility Players
Centre (Attacking Area)
9%
4*
SC HEERENVEEN
Utility Players
Centre (Attacking Area)
9%
3*
SC HEERENVEEN
Utility Players
Centre (Attacking Area)
9%
3*
Dutch League
Europe
Incisive Run
9%
5*
SC HEERENVEEN
Utility Players
Aggressive (Pressuring)
9%
4*
SC HEERENVEEN
Utility Players
Aggressive (Pressuring)
9%
3*
SC HEERENVEEN
Utility Players
Aggressive (Pressuring)
9%
5*
SC HEERENVEEN
Utility Players
Long-pass (Build Up)
9%
4*
SC HEERENVEEN
Utility Players
Long-pass (Build Up)
9%
3*
SC HEERENVEEN
Utility Players
Long-pass (Build Up)
9%
5*
SC HEERENVEEN
Utility Players
-
9%
4*
SC HEERENVEEN
Utility Players
-
9%
3*
SC HEERENVEEN
Utility Players
-
9%
5*
NORWAY
Wide (Containment Area)
-
9%
4*
NORWAY
Wide (Containment Area)
-
9%
3*
NORWAY
Wide (Containment Area)
-
9%
5*
SC HEERENVEEN
Utility Players
Wide (Containment Area)
9%
4*
SC HEERENVEEN
Utility Players
Wide (Containment Area)
9%
3*
SC HEERENVEEN
Utility Players
Wide (Containment Area)
9%
5*
SC HEERENVEEN
Utility Players
Counter Attack (Attacking Styles)
9%
4*
SC HEERENVEEN
Utility Players
Counter Attack (Attacking Styles)
9%
3*
SC HEERENVEEN
Utility Players
Counter Attack (Attacking Styles)
9%
5*
SC HEERENVEEN
Utility Players
Frontline Pressure (Defensive Styles)
9%
4*
SC HEERENVEEN
Utility Players
Frontline Pressure (Defensive Styles)
9%
3*
SC HEERENVEEN
Utility Players
Frontline Pressure (Defensive Styles)
9%
4*
U-24
Centre (Attacking Area)
Heel Trick
9%
3*
U-24
Centre (Attacking Area)
Heel Trick
9%
3*
Strength On the Ball
Left foot
Weighted Pass
9%
3*
U-24
Strength On the Ball
Weighted Pass
9%
3*
Strength On the Ball
Heel Trick
-
9%
5*
NORWAY
Utility Players
U-24
9%
4*
NORWAY
Utility Players
U-24
9%
3*
NORWAY
Utility Players
U-24
9%
3*
AMF
Strength On the Ball
Weighted Pass
9%
3*
Strength On the Ball
Centre (Attacking Area)
Creative Playmaker
9%
3*
Strength On the Ball
Long-pass (Build Up)
Creative Playmaker
9%
5*
Left foot
Counter Attack (Attacking Styles)
Sombrero
8%
5*
AMF
Centre (Attacking Area)
Flip Flap
8%
4*
AMF
Left foot
Flip Flap
8%
5*
Strength On the Ball
Aggressive (Pressuring)
Sombrero
8%
4*
Left foot
Maintain Formation (Positioning)
Rabona
8%
4*
Ball Control
Left foot
Rabona
8%
4*
Europe
Maintain Formation (Positioning)
Sombrero
8%
4*
Left foot
Centre (Attacking Area)
Creative Playmaker
8%
4*
AMF
Wide (Containment Area)
Flip Flap
8%
4*
Strength On the Ball
Wide (Containment Area)
Flip Flap
8%
5*
AMF
Counter Attack (Attacking Styles)
Flip Flap
8%
5*
AMF
Centre (Attacking Area)
Scissors Feint
8%
4*
AMF
Centre (Attacking Area)
Scissors Feint
8%
4*
Europe
Wide (Containment Area)
Rabona
8%
3*
Left foot
Centre (Attacking Area)
Flip Flap
8%
3*
AMF
Aggressive (Pressuring)
Flip Flap
8%
4*
Europe
Long-pass (Build Up)
Heel Trick
8%
5*
Dutch League
Long Range Drive
-
8%
4*
Dutch League
Long Range Drive
-
8%
3*
Utility Players
Centre (Attacking Area)
Rabona
8%
3*
Dribbling
Centre (Attacking Area)
Rabona
8%
4*
Strength On the Ball
Rabona
-
8%
4*
Utility Players
Strength On the Ball
Rabona
8%
5*
AMF
Maintain Formation (Positioning)
Sombrero
8%
4*
AMF
Maintain Formation (Positioning)
Sombrero
8%
3*
Utility Players
Strength On the Ball
Sombrero
8%
3*
Strength On the Ball
Sombrero
-
8%
3*
Strength On the Ball
Aggressive (Pressuring)
Flip Flap
8%
5*
U-24
Left foot
Heel Trick
8%
4*
Utility Players
Strength On the Ball
Heel Trick
8%
5*
Strength On the Ball
Long-pass (Build Up)
Scissors Feint
8%
4*
Strength On the Ball
Long-pass (Build Up)
Scissors Feint
8%
5*
Dutch League
Maintain Formation (Positioning)
Incisive Run
8%
4*
Dutch League
Maintain Formation (Positioning)
Incisive Run
8%
3*
Dribbling
Long-pass (Build Up)
Long Range Drive
8%
3*
Europe
Aggressive (Pressuring)
Rabona
8%
3*
Europe
Utility Players
Rabona
8%
3*
Left foot
Wide (Containment Area)
Rabona
8%
3*
AMF
Left foot
Rabona
8%
3*
Dribbling
Long-pass (Build Up)
Pinpoint Crossing
8%
4*
Dribbling
Long-pass (Build Up)
Weighted Pass
8%
4*
Strength On the Ball
Counter Attack (Attacking Styles)
Weighted Pass
8%
3*
Strength On the Ball
Counter Attack (Attacking Styles)
Weighted Pass
8%
3*
Europe
Dribbling
Weighted Pass
8%
3*
U-24
Ball Control
Sombrero
8%
3*
Ball Control
Left foot
Flip Flap
8%
4*
AMF
Left foot
Heel Trick
8%
3*
AMF
Frontline Pressure (Defensive Styles)
Heel Trick
8%
5*
Europe
Strength On the Ball
Heel Trick
8%
3*
Strength On the Ball
Counter Attack (Attacking Styles)
Scissors Feint
8%
5*
Dutch League
U-24
Incisive Run
8%
4*
Dutch League
U-24
Incisive Run
8%
3*
U-24
Strength On the Ball
Long Range Drive
8%
3*
Strength On the Ball
Maintain Formation (Positioning)
Pinpoint Crossing
8%
3*
Strength On the Ball
Counter Attack (Attacking Styles)
Pinpoint Crossing
8%
3*
Strength On the Ball
Centre (Attacking Area)
Weighted Pass
8%
3*
Long-pass (Build Up)
Sombrero
-
8%
3*
Europe
Wide (Containment Area)
Sombrero
8%
5*
U-24
Centre (Attacking Area)
Heel Trick
8%
4*
Strength On the Ball
Frontline Pressure (Defensive Styles)
Heel Trick
8%
3*
U-24
Frontline Pressure (Defensive Styles)
Sombrero
8%
5*
NORWAY
U-24
Centre (Attacking Area)
8%
4*
NORWAY
U-24
Centre (Attacking Area)
8%
3*
NORWAY
U-24
Centre (Attacking Area)
8%
5*
Dutch League
Aggressive (Pressuring)
Trickster
8%
4*
Dutch League
Aggressive (Pressuring)
Trickster
8%
3*
Dutch League
Aggressive (Pressuring)
Trickster
8%
3*
U-24
Left foot
Weighted Pass
8%
5*
NORWAY
U-24
Aggressive (Pressuring)
8%
4*
NORWAY
U-24
Aggressive (Pressuring)
8%
3*
NORWAY
U-24
Aggressive (Pressuring)
8%
5*
Left foot
Frontline Pressure (Defensive Styles)
Sombrero
8%
5*
Left foot
Centre (Attacking Area)
Heel Trick
8%
5*
AMF
Left foot
Flip Flap
8%
4*
Ball Control
Maintain Formation (Positioning)
Rabona
8%
5*
Strength On the Ball
Wide (Containment Area)
Flip Flap
8%
5*
Left foot
Maintain Formation (Positioning)
Rabona
8%
5*
Ball Control
Left foot
Rabona
8%
5*
U-24
Centre (Attacking Area)
Sombrero
8%
4*
Strength On the Ball
Maintain Formation (Positioning)
Flip Flap
8%
5*
Europe
AMF
Heel Trick
8%
5*
Europe
Long-pass (Build Up)
Heel Trick
8%
5*
Dribbling
Long-pass (Build Up)
Heel Trick
8%
4*
Dribbling
Long-pass (Build Up)
Heel Trick
8%
3*
Europe
AMF
Scissors Feint
8%
3*
Dribbling
Maintain Formation (Positioning)
Rabona
8%
3*
Dribbling
Counter Attack (Attacking Styles)
Rabona
8%
5*
U-24
Frontline Pressure (Defensive Styles)
Rabona
8%
4*
U-24
Frontline Pressure (Defensive Styles)
Rabona
8%
5*
Strength On the Ball
Rabona
-
8%
5*
Utility Players
Strength On the Ball
Rabona
8%
4*
Strength On the Ball
Sombrero
-
8%
4*
Utility Players
Strength On the Ball
Sombrero
8%
4*
U-24
Centre (Attacking Area)
Marseille Turn
8%
3*
Centre (Attacking Area)
Rabona
-
8%
5*
U-24
Aggressive (Pressuring)
Rabona
8%
4*
U-24
Aggressive (Pressuring)
Rabona
8%
3*
Ball Control
Wide (Containment Area)
Rabona
8%
3*
AMF
Ball Control
Rabona
8%
3*
Dribbling
Centre (Attacking Area)
Pinpoint Crossing
8%
5*
U-24
Strength On the Ball
Pinpoint Crossing
8%
4*
U-24
Strength On the Ball
Pinpoint Crossing
8%
5*
Dribbling
Long-pass (Build Up)
Weighted Pass
8%
5*
AMF
Ball Control
Sombrero
8%
4*
AMF
Ball Control
Sombrero
8%
3*
AMF
Maintain Formation (Positioning)
Flip Flap
8%
3*
AMF
Ball Control
Flip Flap
8%
5*
Europe
Strength On the Ball
Flip Flap
8%
4*
Europe
Strength On the Ball
Flip Flap
8%
3*
AMF
Dribbling
Heel Trick
8%
3*
Strength On the Ball
Counter Attack (Attacking Styles)
Long Range Drive
8%
3*
U-24
Ball Control
Long Range Drive
8%
3*
Left foot
Aggressive (Pressuring)
Rabona
8%
5*
AMF
Left foot
Rabona
8%
4*
AMF
Left foot
Rabona
8%
3*
U-24
Centre (Attacking Area)
Pinpoint Crossing
8%
3*
Ball Control
Long-pass (Build Up)
Pinpoint Crossing
8%
4*
Strength On the Ball
Counter Attack (Attacking Styles)
Pinpoint Crossing
8%
3*
U-24
Dribbling
Pinpoint Crossing
8%
4*
Long-pass (Build Up)
Sombrero
-
8%
3*
U-24
Centre (Attacking Area)
Flip Flap
8%
3*
AMF
Maintain Formation (Positioning)
Heel Trick
8%
3*
Dribbling
Centre (Attacking Area)
Heel Trick
8%
4*
U-24
Counter Attack (Attacking Styles)
Heel Trick
8%
3*
Left foot
Counter Attack (Attacking Styles)
Heel Trick
8%
3*
Strength On the Ball
Centre (Attacking Area)
Scissors Feint
8%
5*
Dutch League
Europe
Incisive Run
8%
4*
Dutch League
Europe
Incisive Run
8%
3*
Ball Control
Left foot
Long Range Drive
8%
3*
Europe
Strength On the Ball
Pinpoint Crossing
8%
3*
Europe
U-24
Sombrero
8%
3*
U-24
Counter Attack (Attacking Styles)
Sombrero
8%
3*
Dutch League
Incisive Run
-
8%
3*
Dutch League
Utility Players
Incisive Run
8%
3*
Strength On the Ball
Centre (Attacking Area)
Long Range Drive
8%
5*
Dutch League
Counter Attack (Attacking Styles)
Trickster
8%
4*
Dutch League
Counter Attack (Attacking Styles)
Trickster
8%
3*
Dutch League
Counter Attack (Attacking Styles)
Trickster
8%
5*
Dutch League
Frontline Pressure (Defensive Styles)
Trickster
8%
4*
Dutch League
Frontline Pressure (Defensive Styles)
Trickster
8%
3*
Dutch League
Frontline Pressure (Defensive Styles)
Trickster
8%
4*
Strength On the Ball
Left foot
Weighted Pass
8%
5*
U-24
Strength On the Ball
Weighted Pass
8%
4*
U-24
Strength On the Ball
Weighted Pass
8%
4*
AMF
Strength On the Ball
Weighted Pass
8%
4*
Strength On the Ball
Centre (Attacking Area)
Creative Playmaker
8%
3*
AMF
Strength On the Ball
Creative Playmaker
8%
5*
NORWAY
U-24
Frontline Pressure (Defensive Styles)
8%
4*
NORWAY
U-24
Frontline Pressure (Defensive Styles)
8%
3*
NORWAY
U-24
Frontline Pressure (Defensive Styles)
8%
5*
Strength On the Ball
Long-pass (Build Up)
Creative Playmaker
8%
4*
Strength On the Ball
Long-pass (Build Up)
Creative Playmaker
8%
5*
Left foot
Aggressive (Pressuring)
Sombrero
7%
5*
Ball Control
Left foot
Sombrero
7%
5*
Dribbling
Left foot
Sombrero
7%
5*
Europe
Wide (Containment Area)
Rabona
7%
4*
Europe
Counter Attack (Attacking Styles)
Rabona
7%
4*
Ball Control
Counter Attack (Attacking Styles)
Rabona
7%
4*
Left foot
Frontline Pressure (Defensive Styles)
Rabona
7%
5*
Strength On the Ball
Maintain Formation (Positioning)
Flip Flap
7%
4*
Europe
AMF
Scissors Feint
7%
4*
AMF
Centre (Attacking Area)
Pinpoint Crossing
7%
3*
Dribbling
Counter Attack (Attacking Styles)
Pinpoint Crossing
7%
4*
Left foot
Sombrero
-
7%
4*
Utility Players
Left foot
Sombrero
7%
4*
Strength On the Ball
Centre (Attacking Area)
Flip Flap
7%
4*
Strength On the Ball
Frontline Pressure (Defensive Styles)
Flip Flap
7%
4*
AMF
Aggressive (Pressuring)
Heel Trick
7%
5*
AMF
Left foot
Heel Trick
7%
5*
Utility Players
Strength On the Ball
Heel Trick
7%
5*
AMF
Strength On the Ball
Scissors Feint
7%
4*
AMF
Strength On the Ball
Scissors Feint
7%
5*
AMF
Strength On the Ball
Long Range Drive
7%
4*
AMF
Strength On the Ball
Long Range Drive
7%
4*
Left foot
Wide (Containment Area)
Rabona
7%
3*
Dribbling
Left foot
Rabona
7%
3*
Ball Control
Maintain Formation (Positioning)
Pinpoint Crossing
7%
3*
AMF
Aggressive (Pressuring)
Pinpoint Crossing
7%
5*
Strength On the Ball
Counter Attack (Attacking Styles)
Pinpoint Crossing
7%
3*
Europe
Ball Control
Pinpoint Crossing
7%
3*
Europe
Dribbling
Pinpoint Crossing
7%
5*
Strength On the Ball
Counter Attack (Attacking Styles)
Weighted Pass
7%
3*
Ball Control
Maintain Formation (Positioning)
Sombrero
7%
5*
AMF
Aggressive (Pressuring)
Sombrero
7%
4*
AMF
Aggressive (Pressuring)
Sombrero
7%
5*
Long-pass (Build Up)
Sombrero
-
7%
5*
AMF
Frontline Pressure (Defensive Styles)
Sombrero
7%
4*
AMF
Frontline Pressure (Defensive Styles)
Sombrero
7%
4*
AMF
Maintain Formation (Positioning)
Heel Trick
7%
3*
Ball Control
Long-pass (Build Up)
Heel Trick
7%
5*
U-24
Counter Attack (Attacking Styles)
Heel Trick
7%
5*
Strength On the Ball
Frontline Pressure (Defensive Styles)
Heel Trick
7%
5*
Dutch League
Aggressive (Pressuring)
Incisive Run
7%
4*
Dutch League
Aggressive (Pressuring)
Incisive Run
7%
5*
Dutch League
Frontline Pressure (Defensive Styles)
Incisive Run
7%
4*
Dutch League
Frontline Pressure (Defensive Styles)
Incisive Run
7%
3*
Left foot
Long-pass (Build Up)
Long Range Drive
7%
4*
U-24
Strength On the Ball
Long Range Drive
7%
3*
Europe
Rabona
-
7%
3*
Utility Players
U-24
Rabona
7%
3*
U-24
Rabona
-
7%
3*
AMF
Maintain Formation (Positioning)
Pinpoint Crossing
7%
3*
Ball Control
Counter Attack (Attacking Styles)
Pinpoint Crossing
7%
3*
Ball Control
Left foot
Pinpoint Crossing
7%
4*
Strength On the Ball
Centre (Attacking Area)
Weighted Pass
7%
3*
Europe
Ball Control
Sombrero
7%
3*
AMF
Dribbling
Sombrero
7%
4*
U-24
Frontline Pressure (Defensive Styles)
Sombrero
7%
3*
AMF
Wide (Containment Area)
Heel Trick
7%
3*
AMF
Long-pass (Build Up)
Long Range Drive
7%
5*
AMF
Strength On the Ball
Weighted Pass
7%
3*
Europe
Dribbling
Sombrero
7%
3*
Strength On the Ball
Wide (Containment Area)
Marseille Turn
7%
3*
Strength On the Ball
Left foot
Marseille Turn
7%
3*
Strength On the Ball
Frontline Pressure (Defensive Styles)
Marseille Turn
7%
3*
Ball Control
Centre (Attacking Area)
Heel Trick
7%
5*
Dutch League
Europe
Trickster
7%
4*
Dutch League
Europe
Trickster
7%
3*
Dutch League
Europe
Trickster
7%
5*
U-24
Left foot
Weighted Pass
7%
4*
U-24
Left foot
Weighted Pass
7%
3*
Europe
Strength On the Ball
Weighted Pass
7%
3*
AMF
Centre (Attacking Area)
Weighted Pass
7%
3*
U-24
Centre (Attacking Area)
Weighted Pass
7%
3*
U-24
Long-pass (Build Up)
Weighted Pass
7%
3*
AMF
Centre (Attacking Area)
Creative Playmaker
7%
5*
Dutch League
Strength On the Ball
Frontline Pressure (Defensive Styles)
7%
4*
Dutch League
Strength On the Ball
Frontline Pressure (Defensive Styles)
7%
3*
Dutch League
Strength On the Ball
Frontline Pressure (Defensive Styles)
7%
3*
U-24
Centre (Attacking Area)
Creative Playmaker
7%
3*
AMF
U-24
Weighted Pass
7%
3*
Dutch League
AMF
Dribbling
7%
3*
Dutch League
AMF
Left foot
7%
5*
Ball Control
Maintain Formation (Positioning)
Rabona
7%
5*
AMF
Wide (Containment Area)
Flip Flap
7%
5*
U-24
Centre (Attacking Area)
Marseille Turn
7%
4*
AMF
Frontline Pressure (Defensive Styles)
Flip Flap
7%
5*
Europe
AMF
Scissors Feint
7%
5*
AMF
U-24
Long Range Drive
7%
4*
AMF
U-24
Long Range Drive
7%
5*
U-24
Ball Control
Pinpoint Crossing
7%
4*
U-24
Ball Control
Pinpoint Crossing
7%
4*
Europe
Centre (Attacking Area)
Sombrero
7%
5*
Strength On the Ball
Sombrero
-
7%
5*
Utility Players
Strength On the Ball
Sombrero
7%
5*
Strength On the Ball
Centre (Attacking Area)
Flip Flap
7%
5*
U-24
Left foot
Flip Flap
7%
4*
U-24
Left foot
Flip Flap
7%
5*
Strength On the Ball
Frontline Pressure (Defensive Styles)
Flip Flap
7%
4*
Ball Control
Wide (Containment Area)
Rabona
7%
5*
Left foot
Wide (Containment Area)
Rabona
7%
5*
AMF
Ball Control
Rabona
7%
4*
AMF
Ball Control
Rabona
7%
5*
AMF
Frontline Pressure (Defensive Styles)
Rabona
7%
4*
AMF
Frontline Pressure (Defensive Styles)
Rabona
7%
4*
Ball Control
Centre (Attacking Area)
Sombrero
7%
4*
Dribbling
Centre (Attacking Area)
Sombrero
7%
4*
Europe
Counter Attack (Attacking Styles)
Sombrero
7%
4*
Europe
Frontline Pressure (Defensive Styles)
Sombrero
7%
4*
AMF
Ball Control
Flip Flap
7%
5*
AMF
U-24
Scissors Feint
7%
4*
AMF
U-24
Scissors Feint
7%
3*
AMF
U-24
Scissors Feint
7%
4*
Strength On the Ball
Counter Attack (Attacking Styles)
Scissors Feint
7%
3*
AMF
Dribbling
Long Range Drive
7%
5*
U-24
Strength On the Ball
Long Range Drive
7%
3*
AMF
Dribbling
Rabona
7%
3*
Ball Control
Frontline Pressure (Defensive Styles)
Rabona
7%
5*
Strength On the Ball
Maintain Formation (Positioning)
Pinpoint Crossing
7%
4*
Strength On the Ball
Maintain Formation (Positioning)
Pinpoint Crossing
7%
4*
AMF
Left foot
Pinpoint Crossing
7%
3*
Ball Control
Frontline Pressure (Defensive Styles)
Sombrero
7%
3*
Left foot
Aggressive (Pressuring)
Heel Trick
7%
4*
AMF
Frontline Pressure (Defensive Styles)
Heel Trick
7%
3*
AMF
Ball Control
Long Range Drive
7%
3*
U-24
Left foot
Long Range Drive
7%
3*
AMF
Aggressive (Pressuring)
Rabona
7%
3*
Utility Players
Counter Attack (Attacking Styles)
Rabona
7%
3*
AMF
Wide (Containment Area)
Pinpoint Crossing
7%
3*
Strength On the Ball
Wide (Containment Area)
Pinpoint Crossing
7%
3*
Strength On the Ball
Left foot
Pinpoint Crossing
7%
3*
Strength On the Ball
Frontline Pressure (Defensive Styles)
Pinpoint Crossing
7%
4*
Europe
Strength On the Ball
Pinpoint Crossing
7%
3*
Dribbling
Left foot
Weighted Pass
7%
5*
Strength On the Ball
Left foot
Weighted Pass
7%
3*
Europe
Aggressive (Pressuring)
Sombrero
7%
3*
AMF
Strength On the Ball
Marseille Turn
7%
3*
Utility Players
Strength On the Ball
Flip Flap
7%
4*
AMF
Wide (Containment Area)
Heel Trick
7%
3*
AMF
Ball Control
Heel Trick
7%
3*
Left foot
Frontline Pressure (Defensive Styles)
Heel Trick
7%
3*
Strength On the Ball
Left foot
Long Range Drive
7%
3*
U-24
Maintain Formation (Positioning)
Sombrero
7%
3*
Europe
Strength On the Ball
Marseille Turn
7%
3*
U-24
Strength On the Ball
Marseille Turn
7%
3*
Europe
Counter Attack (Attacking Styles)
Heel Trick
7%
4*
Strength On the Ball
Heel Trick
-
7%
3*
AMF
Long-pass (Build Up)
Incisive Run
7%
5*
Dutch League
Maintain Formation (Positioning)
Trickster
7%
4*
Dutch League
Maintain Formation (Positioning)
Trickster
7%
3*
Dutch League
Maintain Formation (Positioning)
Trickster
7%
3*
Left foot
Long-pass (Build Up)
Weighted Pass
7%
3*
Left foot
Long-pass (Build Up)
Marseille Turn
7%
4*
AMF
Strength On the Ball
Creative Playmaker
7%
5*
Dutch League
U-24
Trickster
7%
4*
Dutch League
U-24
Trickster
7%
3*
Dutch League
U-24
Trickster
7%
5*
NORWAY
U-24
Maintain Formation (Positioning)
7%
4*
NORWAY
U-24
Maintain Formation (Positioning)
7%
3*
NORWAY
U-24
Maintain Formation (Positioning)
7%
5*
Dutch League
Strength On the Ball
Left foot
7%
4*
Dutch League
Strength On the Ball
Left foot
7%
3*
Dutch League
Strength On the Ball
Left foot
7%
5*
Dutch League
AMF
Dribbling
7%
4*
Dutch League
AMF
Dribbling
7%
Compare
Search for similar players
Return to Home Page
We want to thank Last Resort Gaming for their help.